


I've implemented a fix in UMotion V1.20p01 that automatically switches Pro Builder to "Object Selection Mode" whenever a UMotion bone is selected. The update is currently under review by the Asset Store vetting team and should be available soon.
Best regards,
Peter

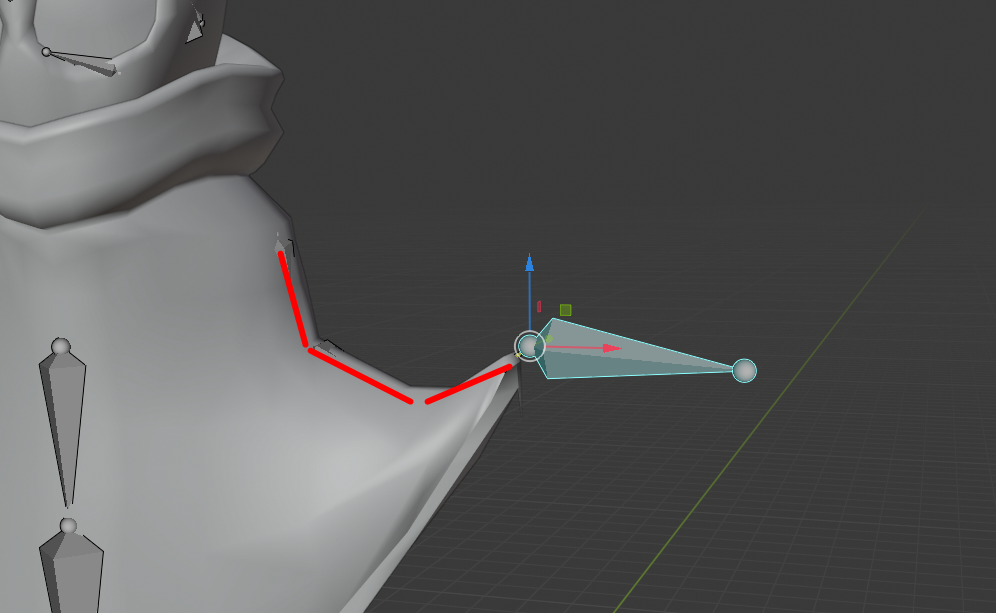
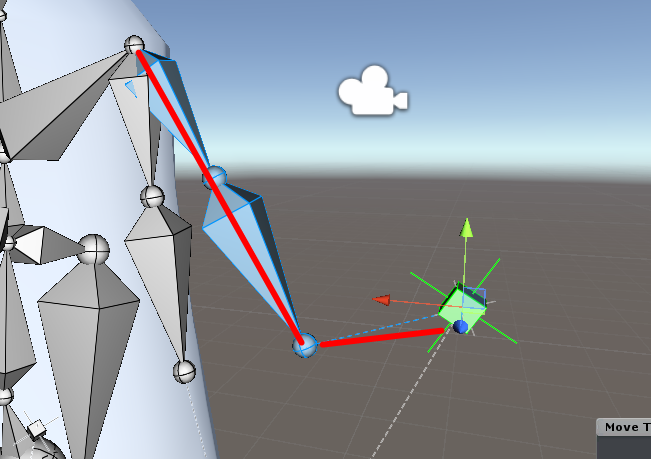
 wrong angle when bending IK
Hello, how i can fix it? In blender i have a smooth angles, but here I can’t get it
Hi,
thank you very much for your support request.
UMotion uses a CCD IK algorithm (when the IK chain consists of more than two bones). The result you get is a valid result for the CCD IK algorithm (as it reaches the target). Unfortunately there is no option to get a smoother/rounder result.
You can either use FK and pose the bones manually or you can use a custom IK implementation (either writing your own or use an existing solution from the asset store) that behaves like you need it. You can then let UMotion call your custom script so that you can use it inside UMotion. You can also decide if you want to bake the result into your animation (so that the script doesn't need to be executed during run-time to save some CPU performance). Click on the info button marked below to open the related manual page for further information:
Please let me know in case you have any follow-up questions.
Best regards,
Peter

(1) Our First Animation (FPS) - UMotion In Practice
As I begin this tutorial I find that once I have pt the FpsGunPrefab into the Pose editor I cannot select the
bones with the mouse. All of its subobjects are greyed out. I can select through the hierarchy.
But in your video all subobjects are blue and select-able with the mouse.
Please let me know what I am missing.
Thank you.
Hi JohnH,
thank you very much for your support request.
That's strange. Could you try to create an empty Unity project where you only import UMotion from the asset store and the gun model? Then try and see if it is working there (i.e. to rule out that any other asset is consuming all the scene view mouse events).
If this doesn't help, could you show me a screenshot or a video of your situation? Thanks.
Best regards,
Peter
Muting root motion keys to preview animation in-place
Hello,
I have a very basic walking animation with root motion applied. I put the root motion keys inside their own layer so I can mute them when needed while I work on the animation.
My problem is that the animation looks like this with root motion keys muted (or even deleted):
I don't have this problem when I delete the root motion keys in WalkRMAnimation.asset. The character stays in place and does the animation correctly, i.e.
Can you tell me what I am doing wrong?
Thanks
Hi,
thank you very much for your support request.
I tried to reproduce your situation:
I opened the "WalkRMAnimation.asset" and created an IK rig for it (using the IK Setup Wizard). I then converted the animation to IK and moved the root motion keys into an override layer. Muting the layer works perfectly fine (the feet walk in place).
Maybe the IK targets of your feet are pinned (i.e. they have "IK Pinned" enabled)? Pinning makes their position/rotation relative to the world space (and are thus moving forward even when the hips are muted).
Please let me know if that explains your situation.
Best regards,
Peter

ik pinning to an external object
Is it possible to pin a character's hands to an external object to create an animation of manipulating that object? For example to rotate the wheel with your character's hands?wheel.gif
Hi,
thank you very much for your support request.
An animation file (*.anim or *.fbx) can only reference bones/transforms that are within your character's hierarchy. Referencing external transforms (that are not a child in the character's transform hierarchy) is not possible. UMotion just creates regular animation files so this limitation also applies for UMotion created animations.
You would need to use a run-time script (a run-time IK solver) to pin the hands of your character to the wheel. You would also need a script to enable/disable the effect when your character grabs the wheel.
Please let me know in case you have any follow-up questions.
Best regards,
Peter

Custom Curves
Hi,
In Unity when you import an animation, normally you get an option to add custom "curves", name them, and add keyframes for them. Then, the curves can be tracked as properties in the animator.
When I create an animation with UMotion, I don't see this option on the clip anymore. How do I associate custom data (not events) with my animation using UMotion?
Here's an example of a regular import w/ custom curves:
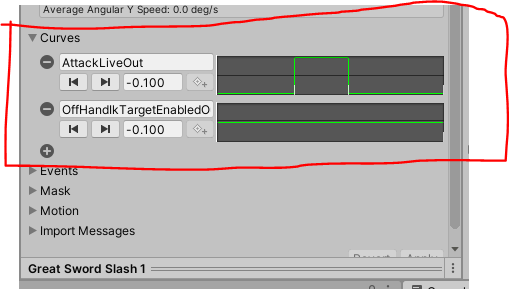
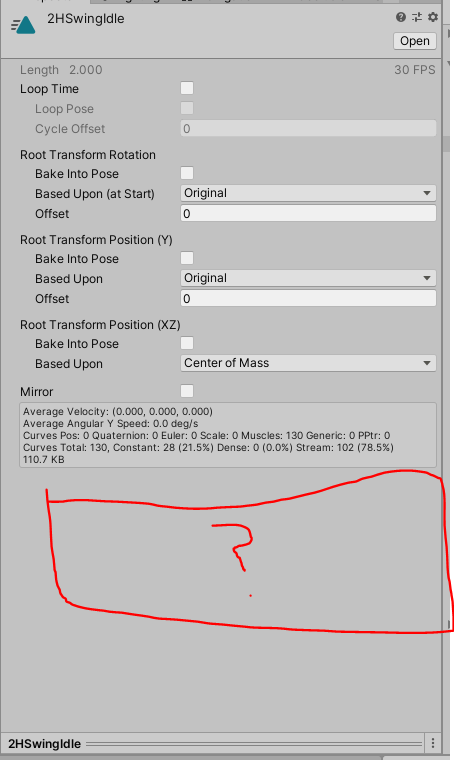
However, these options don't appear for the exported .anim files in UMotion:
Thanks!
Colton
Wait! Found the thing. It's under the constraint system / custom properties.
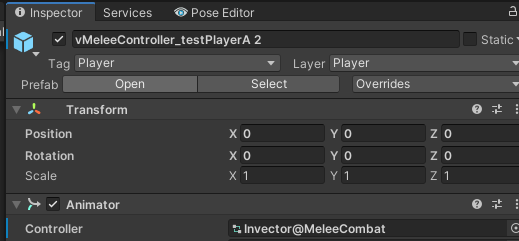
IK Pinned is set on feet, but the white bones move
I am trying to create an animation and keep the feet in place so they don't move. I did this by clicking on the foot bone, and then clicking "IK Pinned" and setting the FK/IK Blend slider to 1. When I move the character's hips, the blue bones move correctly - the blue feet stay in place, but the white bones are moving. The model moves the same way the blue bones do, but when I export the clip and play it, the feet are moving. In fact, it almost looks like the clip is inverted. The hips barely move and the feet move the most.
Note: The model is a humanoid and in the animation, I am just turning the character's hips slightly

Wrong root position
Hi, I have a problem when importing a clip, making some changes and exporting then. Even I didn't make any changes and export it ,the position of the character will change in the unity scene.
My character and animation are both humanoid, they work fine at first with each other.
Then I import the clip with no warnings and errors, and directly export it. But now when I use it on the character the position (root position?) changed.
Do you have any ideas on how to solve it? Thanks
I checked the previous posts and saw the Umotion's having the character animated in the zero position.
When I see the correct animation in Unity's animation editor, it has a different position than the zero position, but works fine in the game mode. Umotion seems to have every animation in the zero position, and when running it in game it falls below the ground.
"Root" not found in fbx
Hello,
When I export the animation as .ANIM, it works like a charm. When I try to export as .FBX I get an error saying "Root" not found in FBX. Am I doing something wrong?
Hi,
thank you very much for your support request.
For me it sounds like you are exporting your animation into an existing *.FBX file. UMotion then checks if all the bones you have in your UMotion project are present in the within your destination *.FBX file and the bone named "Root" can not be found because the character within the *.FBX file doesn't have that bone (or has it at a different position in the bone/transform hierarchy).
Please note that the character that you've assigned to your UMotion project must be an exact instance of the character that is within the export destination *.FBX file. If it's a different character then the export won't work. And if you've modified the hierarchy of your character (e.g. added another root transform on top of it or renamed some transforms) then the export will also fail.
Please let me know if that explains your situation.
Best regards,
Peter
vertex weights option not visible in Pro
I have just gotten Pro and am going through the tutorials.
It appears I do not have Vertex Weights available in the Pose Editor/Display tab.
Is there something I am missing???
Thank you.
Hi John,
thank you very much for your support request.
The vertex weight display option was removed in UMotion V1.15 due to incompatibility with newer Unity versions. It was only a visualization feature and did not allow to modify the actual vertex weights. Thus it wasn't really used that much anyway.
Where have you stumbled across this feature (I should note the deprecation there)?
Best regards,
Peter
Customer support service by UserEcho
