 Generic to Humanoid
I have an animation clip that is generic, but the rig that it contains is Humanoid. I want to convert that to Humanoid. The animation is not within an fbx it is just an animation clip. so there are no import settings to change. I tried the rig by it self as humanoid and it works.
So the Rig is FBX and i can change that. But the Animation is .Anim and I cannot do anything about that.

Hi,
thank you very much for your support request.
The following should work: Create a new UMotion Project of type humanoid and assign your humanoid character to the Pose Editor. Then import your generic *.anim file in that project. When you then export your animation it should be a humanoid *.anim.
Important: This only works if the generic *.anim file was created for that character. If this is not the case, you need to do the same as above but with the character the *.anim file was created for.
For further information regarding conversion between humanoid/generic, please refer to the "Import / Export" chapter in the UMotion manual.
Please let me know if you have any follow-up questions.
Best regards,
Peter

Root motion isn't working when I export as fbx only .anim
I'm not having any luck getting the root motion to come across when I export as FBX. The animation is just happening in place not moving the character around.
It works fine as .anim but I need FBXs.
please help :)
Hi Caitlin,
thank you very much for your support request.
Do you want to use your *.FBX animation as "generic" or as "humanoid"?
You need to tell Unity via the *.FBX import settings (shown in the Inspector when you have the *.FBX selected) how it should extract and generate root motion.
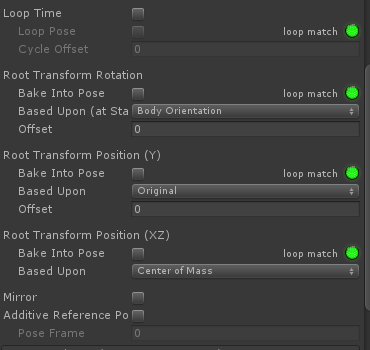
For generic, it's important that you define the "Root node" in the "Rig" tab and in the "Animation" tab under "Motion". For humanoid and generic, there are also the following settings shown under the "Animation" tab where it's important that "Bake Into Pose" is NOT ticked.
Also make sure that your character's Animator component has "Apply Root Motion" ticked.
Best regards,
Peter
 Animating Material Properties
Hi I have been trying to figure out how to change a materials properties while using U-Motion so that they can sync up with my animations, I thought I figured it out but it doesn't seem to be working.
In order to test this out first I made an incredibly simple material shader in amplify shader editor, just a float property in the albedo that changes it from black to white with a min and max slider.
It can be adjusted in the inspector tab with the material and I've also tested it with the regular animation window and it seems to work fine there.
So with U-Motion after a bit of sleuthing I realized I can add custom constraints that adjust component properties in the same way u-motion affects its blend shapes. So I added a custom constraint changed it to component properties, selected the mesh, used the ... to select skinnedmeshrenderer, material, property. Checked preview added constrain input so it can be a slider.
Went to pose mode and it doesn't seem to work.
Unlike blend shapes moving the slider doesn't appear to do anything to the material property. I tested in the unity animation window and it works there. It was also listed with the mesh in a category under skinnedmeshrenderer along with the blend
shapes.
I tried key framing the different value points in u-motion but it doesn't seem to change anything either. Again I did the same test in the regular animation window and it worked fine there.
I will admit I am still super new to Unity, U-Motion and shaders so I could have missed something obvious but I have spent too much time today trying to figure this out.
My ultimate goal with the shader was to use a 2d Texture to animate the mouth and possibly some other special effects through properties during animation so not being able to preview them while animating the body will be rather annoying too say the least.
I can take and post some example photos later if it might help, but its late and I am tired.
Thank you in advance for your help
-Z
This issue is fixed in UMotion V1.20p04 (pending Asset Store review at the time of writing).
Thanks for reporting.
Best regads,
Peter

How to sync positions in Maya and uMotion?
Im making some animations in Maya and then I do some tweaks in uMotion, but when I export from Maya to Unity the positions are different and Im wondering is there a way to keep the position/rotation that Ive set in maya when I import them to umotion?
Hi,
thank you very much for your support request.
This is probably a general "export from maya to Unity" issue, not related to UMotion (because UMotion just uses the animation as Unity imported it). Unfortunately I don't have enough experience with Maya's export pipeline to answer this question. I recommend that you ask this question in a related Unity forum.
Best regards,
Peter
Exported animation looks weird
Hi, Just bought this awesome asset, but I'm having an issue, with the exported animation, if I try to play it in the animation editor, it runs fine. But on gameplay runtime, the animation is weird, what could be causing this issue?
I've attached a screen shot showing the issue. Thanks

Hi, I've managed to fix this issue by following the thread here:
https://support.soxware.com/communities/1/topics/139-unnecessary-rootmotion-is-added
Basically I've ticked the Generate root motion curves, and all the child options available with it, this solved the weird animation issues.
Thanks for this wonderful asset and cheers!

Sharing asset
im making a game with my friend, ¿Can he share the UMotion Pro assets we me? As we work together in the same project or we would be violating any condition from the license?
Hi Andersson,
thank you very much for your support request.
From a legal perspective, all assets available on the Asset Store that are "Editor Extensions" are per seat licenses. You can see this on the asset store product page:

So yes, while there is no copy protection or the like it would still be nice if you would purchase a second license for your friend. That would also support my future work on this asset.
Thank you very much. Please let me know in case you have any follow-up questions.
Best regards,
Peter

legs bend after imported into UMotion
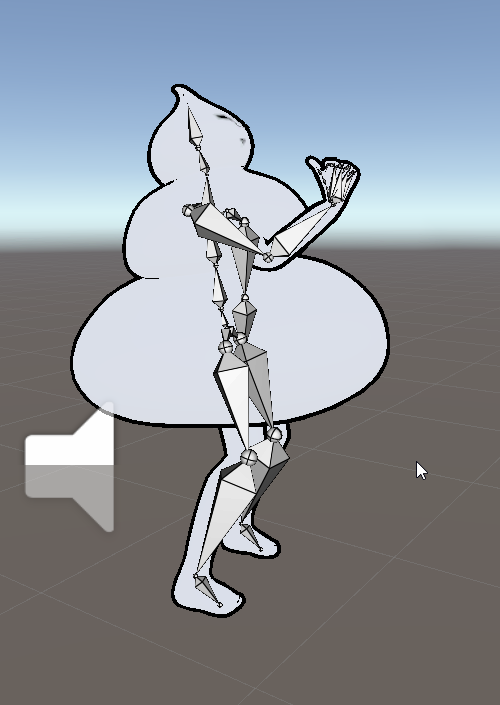
Hi, Peter, I have an animation which seems normal in the preview window
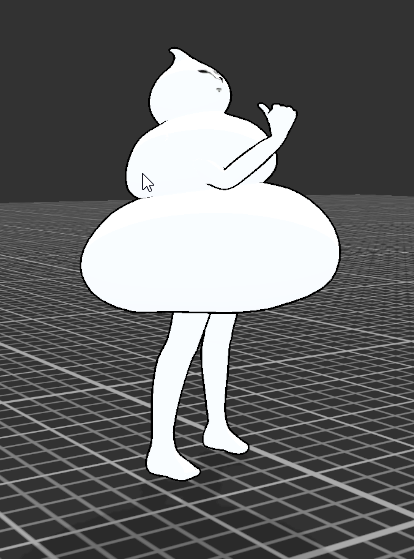
But after I import it into UMotion, the legs are bending. Other joints seem OK.
I wish you can shed some light about the reason of this, Thank you.
Hi,
thank you very much for your support request.
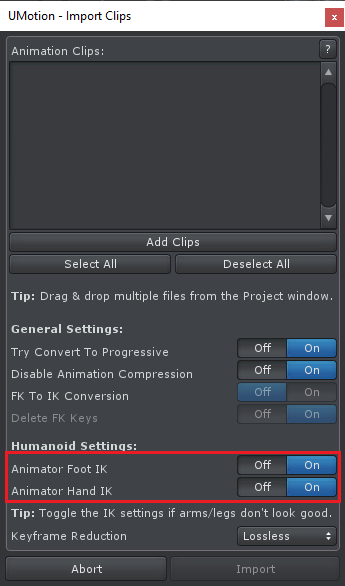
UMotion by default uses Mecanim "Foot IK" for the imported animation. This is the same as enabling the "IK" switch in Unity's Preview window. You can disable the "Foot IK" in the UMotion Import settings:
The humanoid Foot/Hand IK is used to improve re-targeting quality (and bring the feet/hands back to the same position as in the original animation). For further information I highly recommend reading Unity's blog post about Mecanim humanoid. It also goes in depth with the reason Foot/Hand IK exists: https://blogs.unity3d.com/2014/05/26/mecanim-humanoids/
Please let me know if you have any follow-up questions.
Best regards,
Peter

 Driven and Limit Constraints
Two constraints that I think would greatly benefit UMotion are a Driven constraint (very similar to Custom) and a Limit constraint.
Driven - The same as Custom but you can link the value to a value of the Driver. For example, link localPosition.x (with an offset so the 0 value can be set) of the Driver to localRotation.x of a bone. This would allow for building complex rigs with simple to use controls the same way Animators do in Maya/Blender. For example, this could be set up on each hand with one Driver per finger (and thumb). Moving it closer/farther from the hand opens/closes each finger using multiple Driven Constraints each with their own scaling/offset values. Another example is for wrist twist bones, the localRotation.X of the hand could be linked to the localRotation.x of the twist bone, when scaled to 50% the twist bone will automatically rotate with the hand at a reduced amount to give a good wrist rotation. This could be chained together for more complex setups with multiple twist bones.
Limit - A limit constraint would limit the position, rotation, or scale of a Transform to be within a certain range. For example, bones could be limited on a character to prevent unrealistic joint rotations without needing to manually fix them. Used with a Driven constraint, the Driver could be limited to only move on 1 axis within a certain range so it doesn't cause issues with the Driven.
Hi NickFlowers,
thank you very much for sharing your ideas. I really appreciate that.
I have put your ideas on my internal "ideas for the future" list. Before every new update I walk through this list and use it to prioritize new features.
Best regards,
Peter

Unwanted bones rotation
Hi,
I have problem with bones rotation. I've set up fingers in clip editing mode just like I wanted. However after exporting to animation clip, adding it to animator and playing animation it looks different. Fingers have wrong rotation. I wolud like to know if this is problem with UMotion or setting in Unity I don't know about.
Thanks in advance,
Maciej
Hi Maciej,
thank you very much for your support request.
When the fingers are correct inside UMotion but look different when playing the humanoid *.anim file it's a problem introduced by the animation re-targeting of Unity's humanoid system. This typically happens when the fingers don't have the correct pose in the humanoid avatar configuration of your character.
Open the avatar editor of your character (in the "Rig" tab in the Inspector of your character, click on "Configure...") and make sure that your character is in a perfect T-Pose with the fingers straight.
This might shed some light into what humanoid is and why it can introduce some imperfections: https://blogs.unity3d.com/2014/05/26/mecanim-humanoids/
Please take special notice at the headline "T-Stance" to learn more about how the fingers are expected to be in the T-Stance.
If you want a 100% perfect animation (that has no quality loss due to re-targeting), always choose generic instead of humanoid. Generic plays the animation directly as it is (involving no re-targeting). This also improves performance a bit (runtime re-targeting costs CPU performance).
Please let me know if you have any follow-up questions.
Best regards,
Peter

Mirrored rotation curves after FBX Export
Hello,
Once again - it's a great tool :). But I think, I've found a bug. A lot of times when I have an animation with full 360 rotation on a given axis - say a pirouette, when I export the animation to FBX (update an existing FBX file), the quaternion curves of the rotation are flipped - returning to the same position at the end. Visually everything works fine until you want to edit the curves (smooth them for instance). Please inspect the attached images. The first one shows the Y rotation curve in the editor (this is OK). The second image shows the curve in the FBX file (flipped). It is possible to fix those curves in Blender for instance (you have to select all Quaternion rotation curves one by one, flip them in the Y-axis and move them to match the keys). But it is really time-consuming.
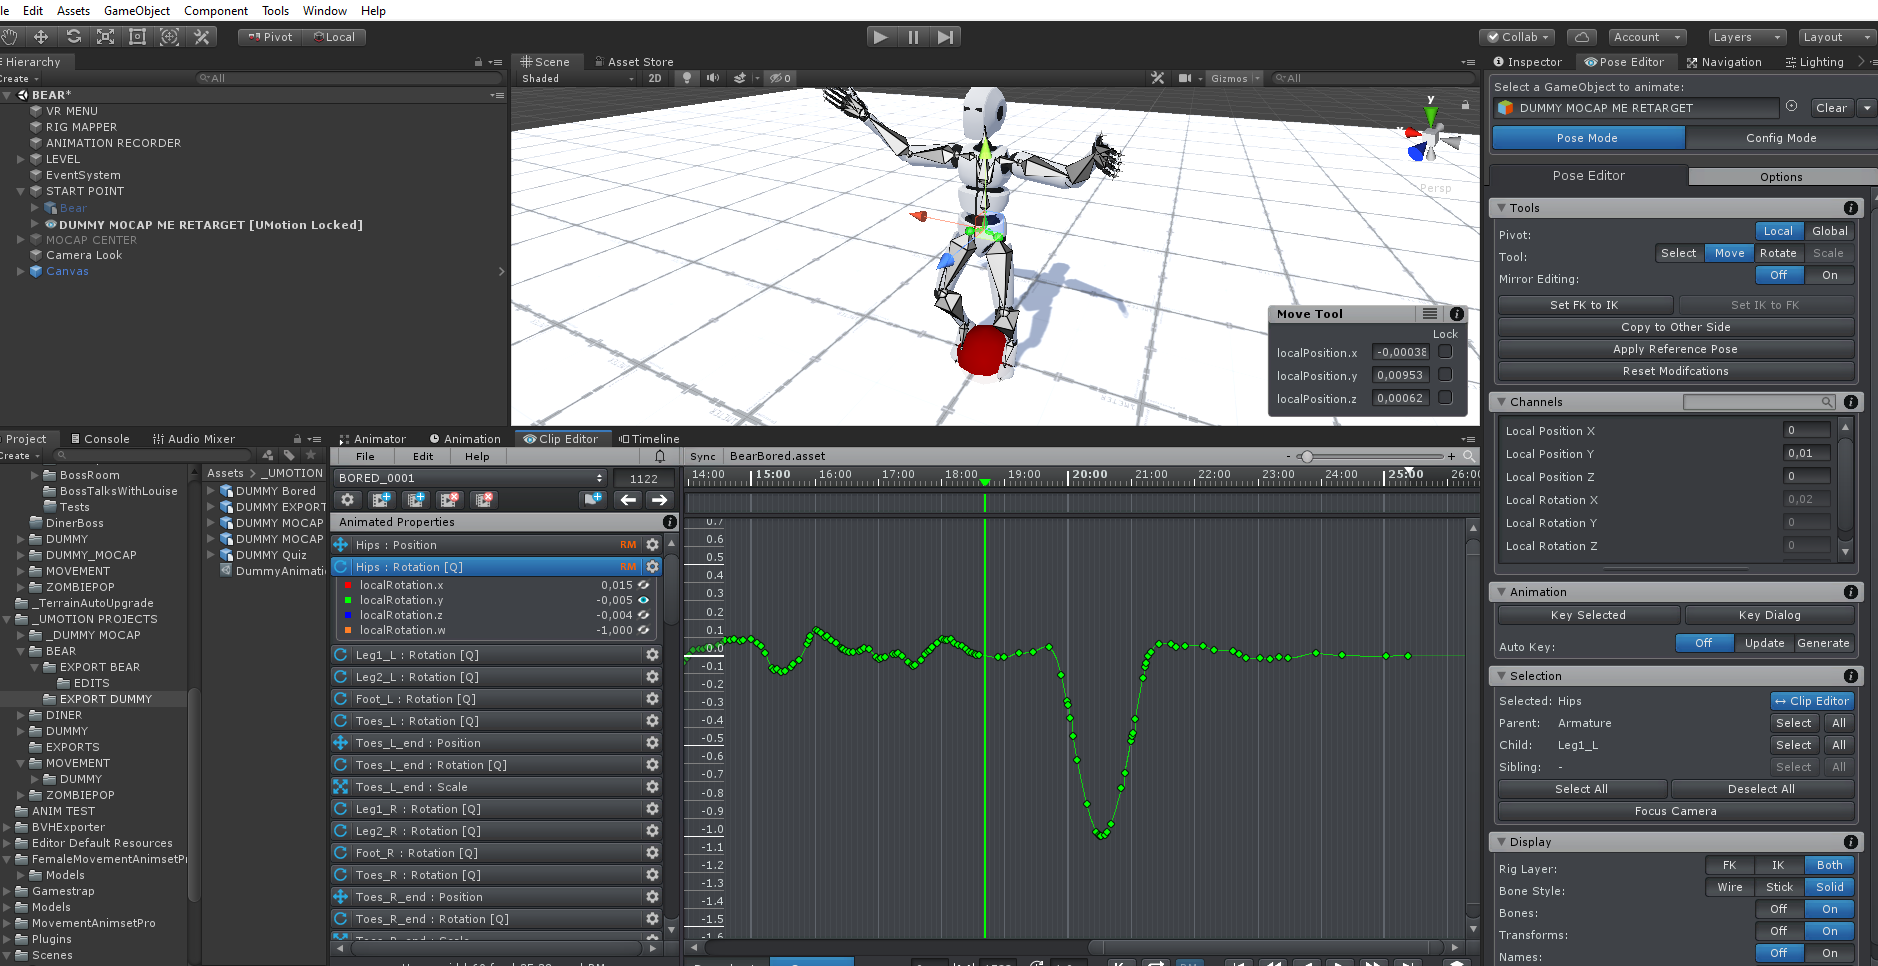
Rotation in UMotion editor
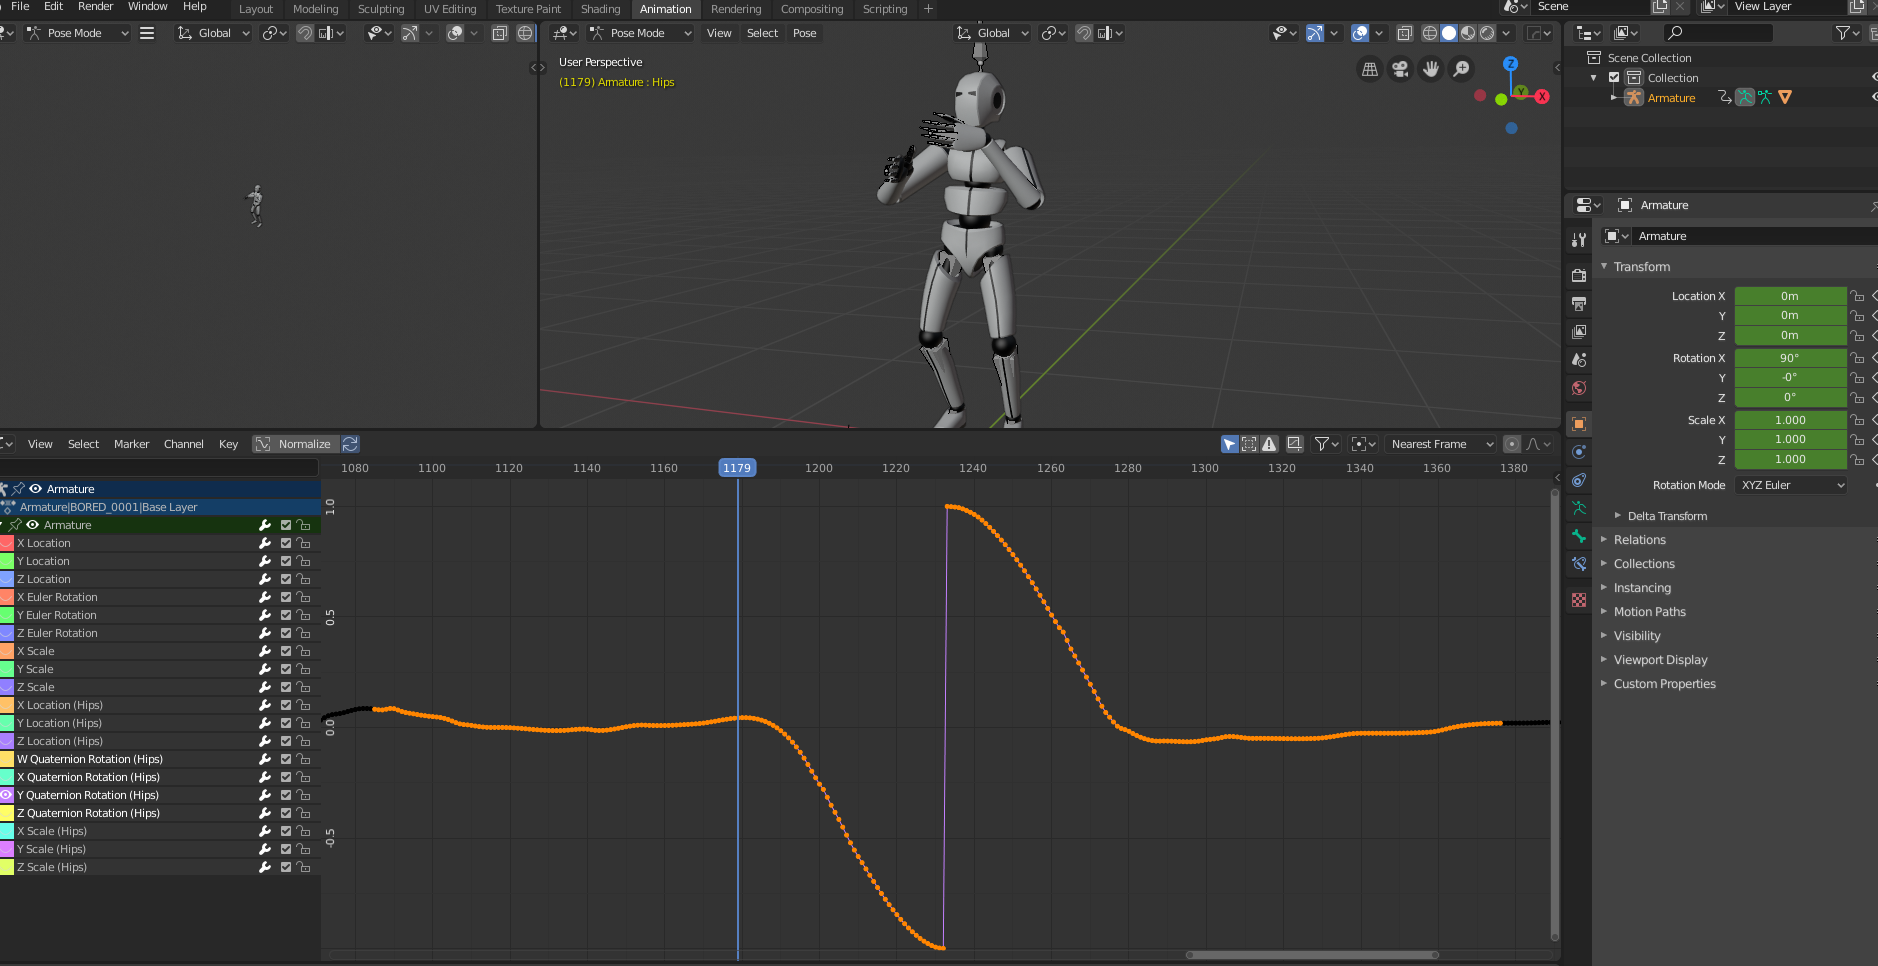
The same curve in the FBX file (imported to Blender).
(if you select the second "half" of it, flip it along the Y-axis and match the ends - it works perfectly fine - of course, you have to do it for every quaternion element).
Hi,
I just finished my investigations.
Please note that the *.FBX file format does not support quaternion rotation curves. It can only contain euler curves by definition. So when UMotion is generating the *.FBX file it stores euler curves in it. To check if UMotion is exporting the curves correctly, I exported your animation to *.FBX and then disabled "Resample Animation" in Unity's import settings. This ensures that the original animation curves from inside the *.FBX are used. Then I opened the animimation of the *.FBX file using Unity's native Animation Window and checked the hips curve:

As you can see, the animation curves look fine (and they also play correctly).
One thing I immediately noticed when looking at the blender file, is that the animation curve is a quaternion curve. That means that Blender must have converted the original euler curve to quaternion. Chances are that this conversion process introduces the wrong curve (i.e. it doesn't "ensure quaternion continuity"). So you need to tell Blender somehow to import the original euler curves (probably by importing the model first, then switch all transforms to euler and then import the animations in a second step).
Please let me know in case you have any follow-up questions.
Best regards,
Peter
Customer support service by UserEcho
