
 Increaseing chain length
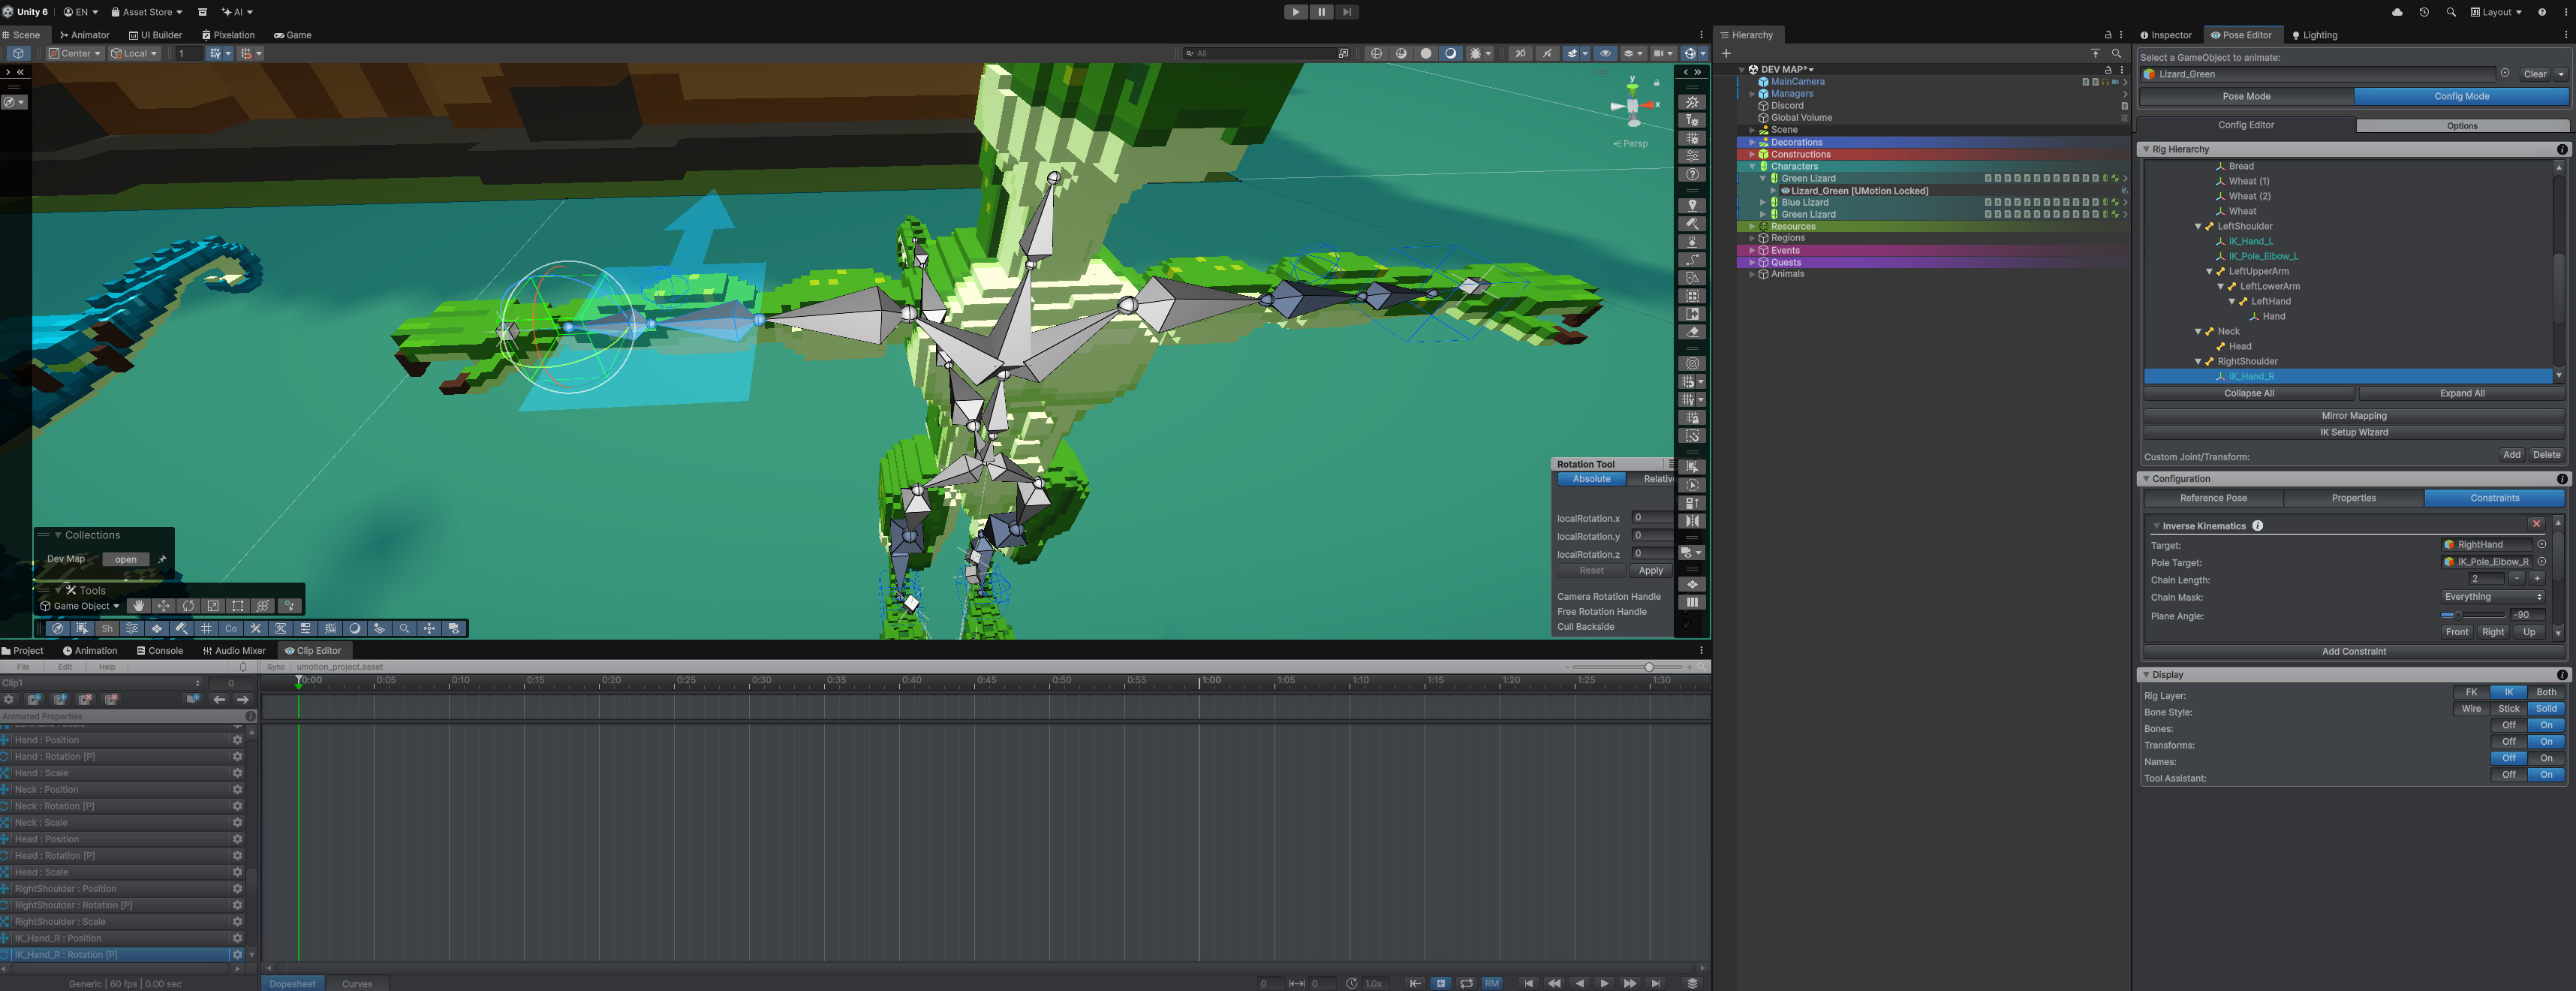
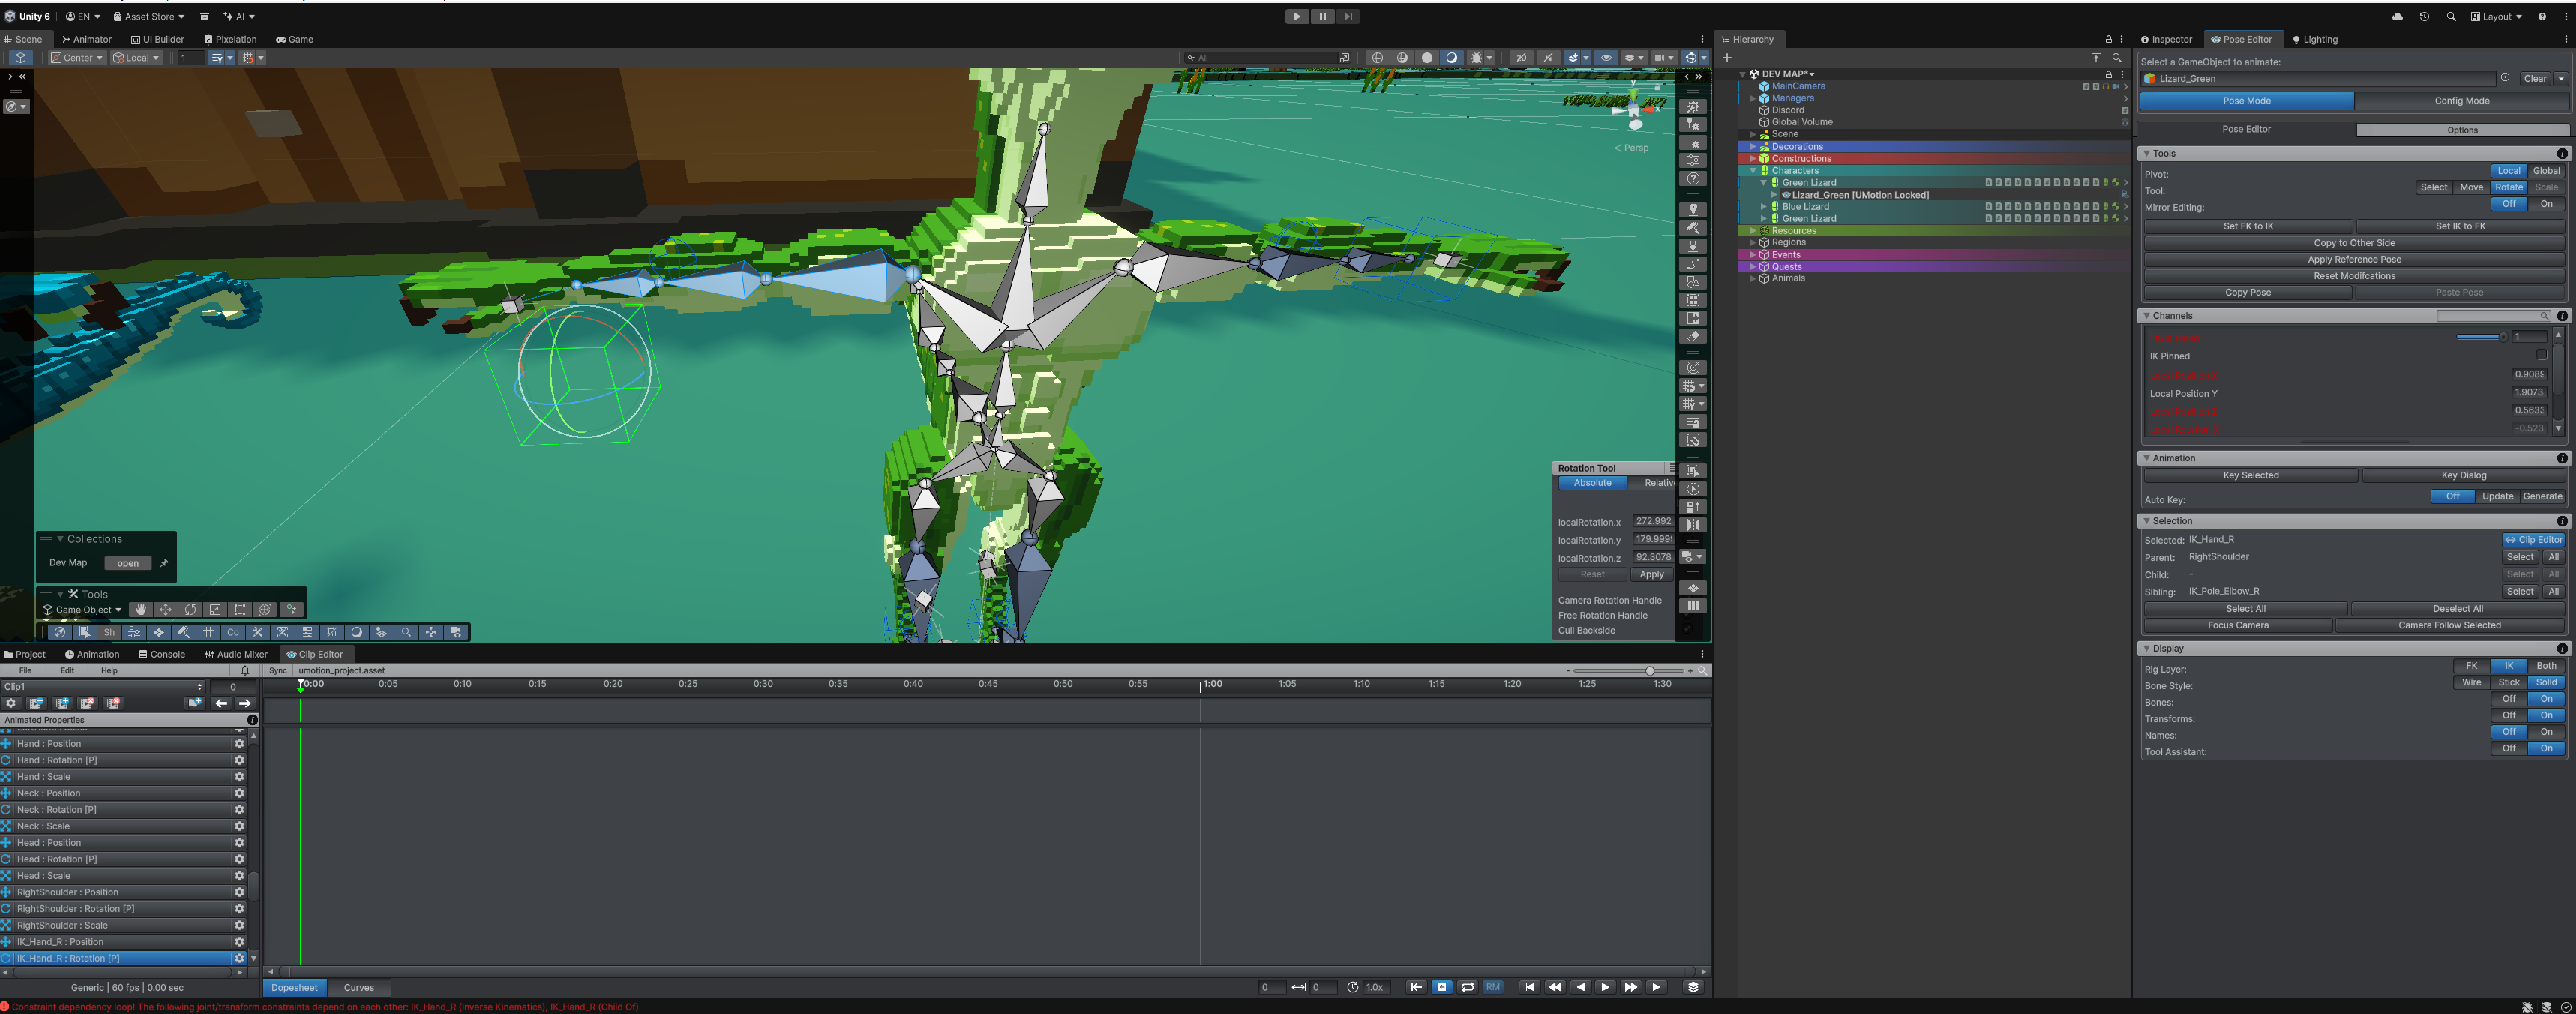
So when i just increase the chain length by one the IK does not seem to work but when it's two it's fine.
Since my arms and legs are with 3 bones each. Increasing the length for some reason makes the bones not follow the IK thingy. But lowering it works again not sure how to make 3 bones actually work. I looked in a bunch of places but could not seem to find anything about my problem.
Here is some pictures to see what i'm talking about.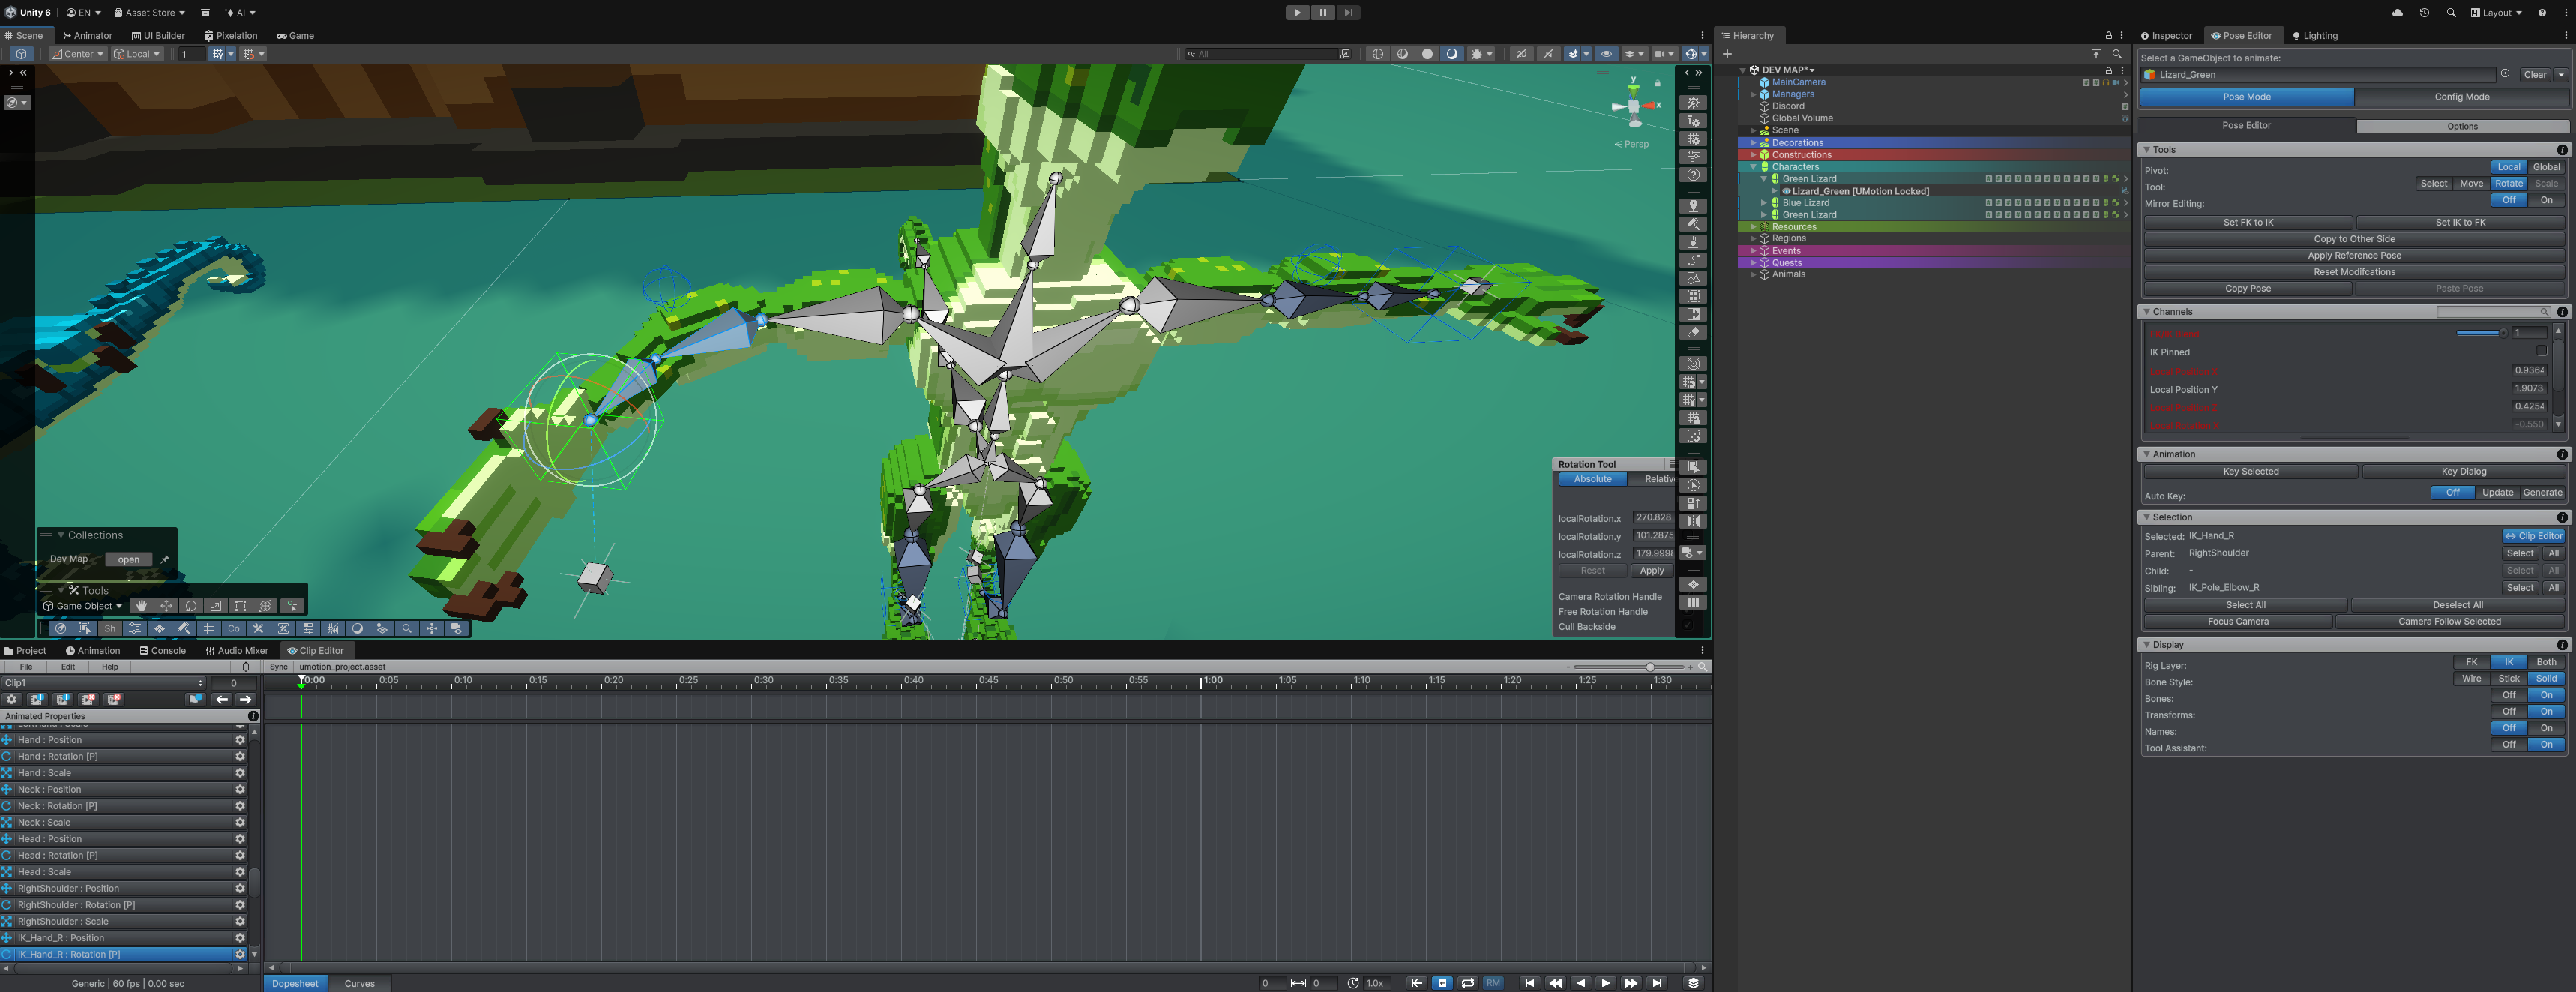

How to use FK and IK at the same time
I don't understand the reasoning behind having two separate rigs. If I set FK/IK blend to 0, I can only manipulate the model using FK handles. If I set it to 1, I can only manipulate it using IK handles. If I set it to anything in between I get this weird interpolated behavior where the mesh doesn't line up with either rig.
I want to be able to make adjustments using both IK and FK. How can I accomplish this? The only way I see currently is to use Set FK to IK or vice versa to sync up the rigs, then switch the blend between 1 and 0 - and this has to be done every single time I make any change.
IK handles don't work
I'm following the IK tutorial and used the setup wizard to create handles, but when I move them, the handles just move on their own and no bones move with them. Here's what the wizard created:
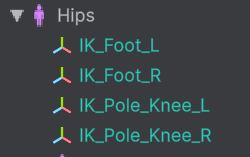
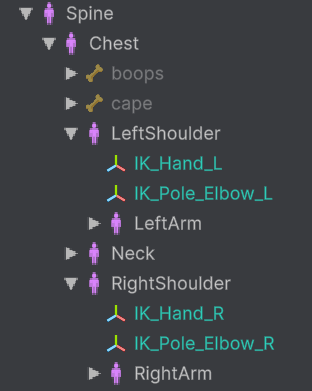
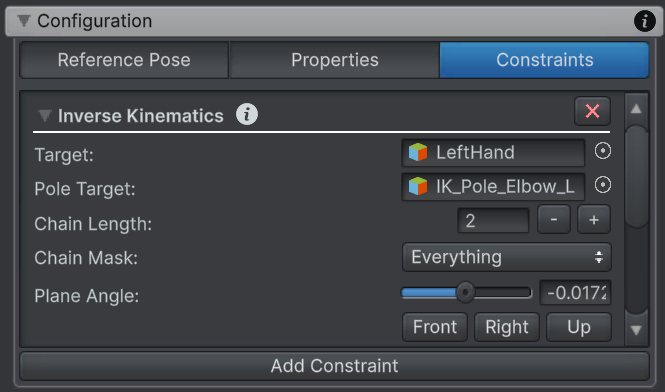
IK_Hand_L constraints:
EDIT: Just noticed an error in the console: "Constraint dependency loop! The following joint/transform constraints depend on each other: IK_Foot_L (Inverse Kinematics), IK_Foot_L (Child Of), IK_Foot_R (Inverse Kinematics), IK_Foot_R (Child Of), IK_Hand_L (Inverse Kinematics), IK_Hand_L (Child Of), IK_Hand_R (Inverse Kinematics), IK_Hand_R (Child Of)"

Hi Neon,
thanks for your support request.
, but when I move them, the handles just move on their own and no bones move with them
UMotion uses an FK / IK Blend rig. Your probably have set the blend property to 0 (FK). Please re-watch the IK video tutorial, it's mentioned there.
Constraint dependency loop! The following joint/transform constraints depend on each other: IK_Foot_L (Inverse Kinematics), IK_Foot_L (Child Of), IK_Foot_R (Inverse Kinematics), IK_Foot_R (Child Of), IK_Hand_L (Inverse Kinematics), IK_Hand_L (Child Of), IK_Hand_R (Inverse Kinematics), IK_Hand_R (Child Of)
A constraint dependency loop means your hierarchy is not setup correctly or the IK constraints are not added to the correct transforms in the hierarchy. In other words the result of one constraint depends on the result of another constraint which again depends on the result of the first constraint. This is not a UMotion bug, just a warning that something is not correctly setup in your model.
The IK Setup wizard does some automatic detection and guessing work to determine which transforms to assign the IK constraint to. It is not always guaranteed to be correct. You might need to manually adjust the pre-selections. You can also setup the entire IK manually (without the setup wizard).
Best regards,
Peter
 "Feature not available"
I have UMotion Pro, yet when I click IK Setup Wizard I get the message, "This feature is exclusive for UMotion Professional users.
Please visit the Unity Asset Store to learn more about UMotion Professional."
When I visit the asset store, it shows that I own the asset. When I click Open In Unity, it shows it as already imported. I've already done a clean reinstall of UMotion, but this issue persists. I don't see anywhere to activate a license or anything like that.
Hi Neon Specter,
thank you very much for your support request. This message means that you have UMotion Community opened which does not support IK. Make sure that you have only UMotion Pro installed in your Unity project.
Please do the following:
1) Delete all UMotion related folders of any installations
2) Verify, that the UMotion menu items under "Window" in Unitys menu bar are gone:
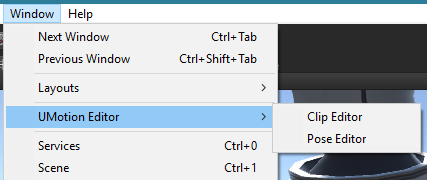
If the menu items are still visible, then there might be a second UMotion installation floating around in your project. You need to delete it as well.
3) After everything is correctly deleted, install UMotion Pro via Unity's package manager again.
Please let me know in case you need any further assistance.
Best regards,
Peter
Pose editor changes not being saved
Every time I try to switch to config mode in the pose editor, I get the warning: "The current pose has modifications that have not been applied. If you continue the modifications will be discarded.
Do you really want to continue?"
This is despite having saved ALL keys via the key dialog. If I open up the key dialog, nothing is red (which I believe indicates unsaved changes).
Upon exiting the pose editor via the clear button, my model snaps back to its previous position before any changes were made to the pose. How do you actually apply the pose to the model in the scene?
Also, my changes to the pose do not survive a Unity restart... Here's what I'm doing:
- Create UMotion project.
- Create clip.
- Load model into pose editor
- Make adjustments using pose editor
- Key dialog --> Select all --> Add Keys (all filters are blue)
- File --> Save Project
- Restart Unity, load project in clip editor --> all changes lost (same when loading model into pose editor)
When you press on "clear" --> "keep scene pose" only the modifications done on the bones and transforms are applied to the scene instance of your character. This feature is intended for creating static poses for characters without having to export and assign single frame animations.
Blend shape changes are not applied by this feature, that's normal. I'm actually not sure if Unity by itself is even capable of a static preview of blend shapes (at edit time).
From the video it looks like the key frames are stored in your UMotion project's animation clip correctly. So when you export your animation, all your modifications are in there.
Best regards,
Peter
How to prevent object from snapping back after transform
I have a character model with a weapon. The weapon is parented to the character's right hand so that it moves with the hand.
When I position the weapon in the hand in scene view, then open the model in the pose editor, the weapon snaps back to its previous position. Since UMotion locks the model, I can't manually reposition it and then save the project.
Is there any way to prevent this from happening? Or do I have to position the weapon first and then make a whole new project (which would also necessitate creating a new project every time I want to adjust the weapon's position)?
Hi,
thank you very much for your support request. UMotion stores the pose your character had when it was first assigned to the UMotion Pose Editor as "Reference Pose". So if you change something outside of UMotion and you want your reference pose to be updated accordingly, do the following:
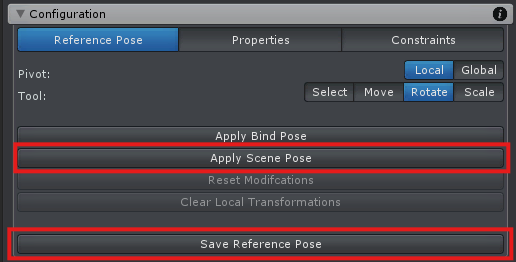
- Open "Config Mode" in the pose editor
- Under "Configuration / Reference Pose" click on "Apply Scene Pose".
- If you are happy with the modifications, click on "Save Reference Pose". You can now go back to the "Pose Mode".
Please let me know in case you have any follow-up questions.
Best regards,
Peter
Console Noise
I'm getting a lot of exceptions in the console from UMotion. They're mostly NullReferenceExceptions, with some others like:
"Assertion failed on expression: '!(o->TestHideFlag(Object::kDontSaveInEditor) && (options & kAllowDontSaveObjectsToBePersistent) == 0)'"
The stack traces are garbage ("ΊΊΉΉΊΊΉΊ"), so I have no idea what the cause would be.
Assigning wrong characters to UMotion projects in combination with trying to undo the resulting modifications is an example where a project can get messed up quite quickly. Another example is making huge hierarchical changes to the character in Unity's scene view, then reapplying the modified character to the UMotion project (and again mess with undoing those changes etc). So please be careful with these situations.
Make sure to use one UMotion project for each of your characters. Also make sure to use GIT and/or the auto backup feature so you can always roll back in case something bad happens.
In case you have a reproducible problem, please feel free to open another bug report.
Best regards,
Peter

Can't select bone or handle in Scene View [Unity 6.5]
When I set it to target a Game Object, I run into an issue where certain Bones or Handles cannot be selected in the Scene View.
One unusual detail is that, when a Game Object was set, I remember that the corresponding Game Object in the Hierarchy would change to the UMotion icon and be converted to [UMotion Locked]. However, in Unity 6.5, it was simply being deactivated instead.
I suspect this behavior might be related to the fact that I cannot select the Bone or Handle.
Crashes when using UMotion with VFX Graph assets
Hi there,
I encountered multiple crashes while working with UMotion and I suspect it might be related to how it interacts with VFX Graph assets.
I’m using this package for a sword effect
https://assetstore.unity.com/packages/vfx/particles/vfx-graph-weapon-effects-vol-1-206237
The sword GameObject (which contains a VFX Graph) is initially disabled in the hierarchy.
The crashes seem to occur more frequently when both the Pose Editor and the Clip Editor windows are open in UMotion. I noticed that once I removed the VFX asset from the hierarchy, the crashes stopped occurring.
This makes me think there may be some kind of conflict between UMotion’s editor updates and Unity’s VFX system.
Here is one of the stack traces from a crash:
========== OUTPUTTING STACK TRACE ==================
0x00007FFE31E215BC (Unity) MemoryProfilerStats::UnregisterObject
0x00007FFE31E21886 (Unity) profiler_unregister_object
0x00007FFE31A0C5F8 (Unity) delete_object_internal_step1
0x00007FFE31A08EF9 (Unity) DestroySingleObject
0x00007FFE32BBA4E0 (Unity) VFXParticleSystemBatchData::~VFXParticleSystemBatchData
0x00007FFE32BBAD74 (Unity) VFXParticleSystemBatchData::`vector deleting destructor'
0x00007FFE32BD2A42 (Unity) VFXBatch::~VFXBatch
0x00007FFE32BD4818 (Unity) VFXBatchPool::Destruct
0x00007FFE32BCC84A (Unity) VFXBatchedEffect::CleanupEmptyBatches
0x00007FFE32BF02CB (Unity) VFXManager::Update
0x00007FFE32BE6A31 (Unity) `VFXManager::InitializeClass'::`2'::PostLateUpdateVFXUpdateRegistrator::Forward
0x00007FFE31DBBB37 (Unity) ExecutePlayerLoop
0x00007FFE31DBBCA7 (Unity) ExecutePlayerLoop
0x00007FFE31DC0D9F (Unity) PlayerLoop
0x00007FFE32EBBB1A (Unity) EditorPlayerLoop::Execute
0x00007FFE32ED29BA (Unity) PlayerLoopController::InternalUpdateScene
0x00007FFE32ED479D (Unity) PlayerLoopController::UpdateSceneIfNeededFromMainLoop
0x00007FFE32ECE45C (Unity) Application::TickTimer
0x00007FFE334C6A26 (Unity) WindowsDropTargetImpl::DragUpdated
0x00007FFE334B6E80 (Unity) CDropTarget::DragOver
0x00007FFEECBAC006 (ole32) RevokeActiveObjectExt
0x00007FFEECBABE6C (ole32) RevokeActiveObjectExt
0x00007FFEECB6A01A (ole32) OleGetPackageClipboardOwner
0x00007FFEECB69F51 (ole32) OleGetPackageClipboardOwner
0x00007FFEECB6DAA0 (ole32) DoDragDrop
0x00007FFE334CAE27 (Unity) DragAndDrop::StartDelayedDrag
0x00007FFE334C6F4A (Unity) DragAndDrop::ApplyQueuedStartDrag
0x00007FFE334E63F1 (Unity) GUIView::OnInputEvent
0x00007FFE3345A18D (Unity) GUIView::ProcessInputEvent
0x00007FFE334E6E71 (Unity) GUIViewPlatform::ProcessEventMessages
0x00007FFE334E33CF (Unity) GUIViewPlatform::GUIViewWndProc
0x00007FFEED83EF5C (USER32) CallWindowProcW
0x00007FFEED83E684 (USER32) DispatchMessageW
0x00007FFE334A98C3 (Unity) MainMessageLoop
0x00007FFE334AF59C (Unity) UnityMain
0x00007FF701E92FBA (Unity) __scrt_common_main_seh
0x00007FFEED407374 (KERNEL32) BaseThreadInitThunk
0x00007FFEEE0BCC91 (ntdll) RtlUserThreadStart

Can we make FPS animations if I rig in blender?
Can I make full FPS Animations if I rig my arms in Unity? I just wanna make simple-ish animations but need IK from Umotion pro because blender feels so complicated.
Customer support service by UserEcho
