
 Manipulating external objects
Hi I am wondering how to go about manipulating external objects from my character. Lets say I have a rigged character and I want him to grab and take an orange and then throw it towards something else. What will be the best way to do that ? For the moment I have been using sort of a cheat, by integrating the objects as part of the character model, though I cant use that for every random object in the future.

Hi,
thank you very much for your support request.
So first of all, in Unity animation files can only address objects that are a child of the Animation/Animator component. In other words, you can't access objects that are lying around in your scene directly from within your character's animation.
So in every case, this involves scripting and can't be done purely with pre-made animations. There are simple ways and more complex ways to implement a pick-up system depending on what level of quality you want to achieve. An easy way would be to create a pick-up animation that is rather generic in which the character just picks into the air. Using animation events you can trigger a "pick-up" script in the right moment . This script then checks if there is an object that is "pick-up able" nearby and if so parents it to the players hand.
More sophisticated approaches would use runtime-IK to adjust the pre-made animation to always reach exactly to the object no-matter the current player offset. You could also add different grab-poses per object... As you can see, this can get rather complicated very quickly.
Please let me know in case you have any follow-up questions.
Best regards,
Peter

 Tool Assistant not visible (Unity 2021.2)
I've installed UMotion into a new, relatively clean project in Unity 2021.2.0b8. Everything is working great, with the exception of the Tool Assisnt not being visible in the scene view. Toggling it on and off via the display settings group does nothing. There are no errors or warnings. It is just not visible - I suspect it is possibly being drawn off-screen? Is there a way to manually modify its position in a settings file or asset?

Leaning While Running and Climbing
Hello! I finally have some time between my programming jobs to work again with UMotion Pro and wondered:
1) Do you have (or know of) any tutorials showing how to lean characters when running or climbing? I want to blend a lean and have the lean based on speed and the sharpness of the turn. Also, for walking up/down stairs want to lean toward the slope somewhat.
2) If not, do you have any suggestions to an approach?
Thank you for a great tool, too!
Dear Michael,
thank you very much for your support request.
As the amount of the leaning is dependent on the current runtime situation, you can't do this in a static animation file (otherwise the leaning amount would always be the same). Thus using UMotion Pro for this won't work. I haven't done something like this myself yet, but I think your best bet is to do this via code in your character controller.
A quick search gave me this video tutorial which might be helpful:
Please let me know in case you have any follow-up questions.
Best regards,
Peter
Removing duplicate keys
Is there a way I can have UMotion remove duplicate/redundant keys within a clip?
Hi,
thank you very much for your support request.
Unfortunately there is currently no way to automatically remove duplicate/redundant keys.
Please let me know in case you have any follow-up questions.
Best regards,
Peter

Child-of looks perfect in Umotion but looks differently in Unity Timeline
Hi guys. So I'm creating an animation of a character holding a gun. It looks perfect in Clip Editor but when I exported to Anim file and ran it on Unity Timeline, it looked like the second pic. The gun was off position and I don't know why.
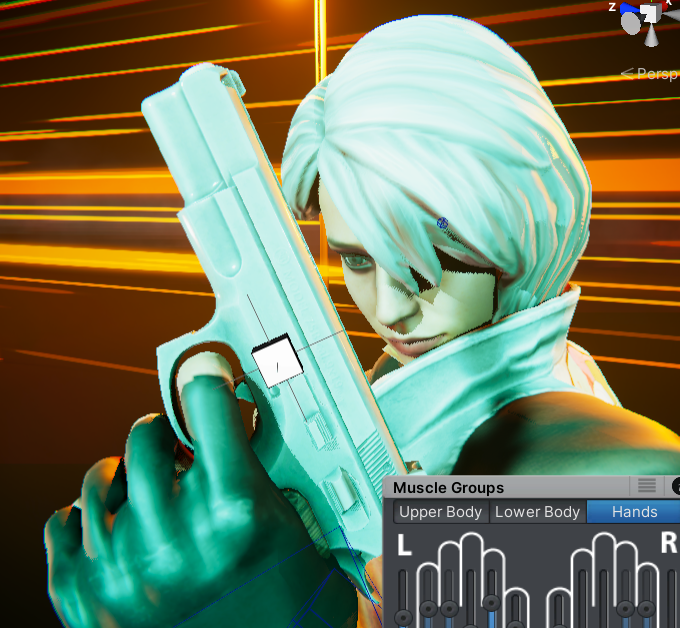
Clip Editor
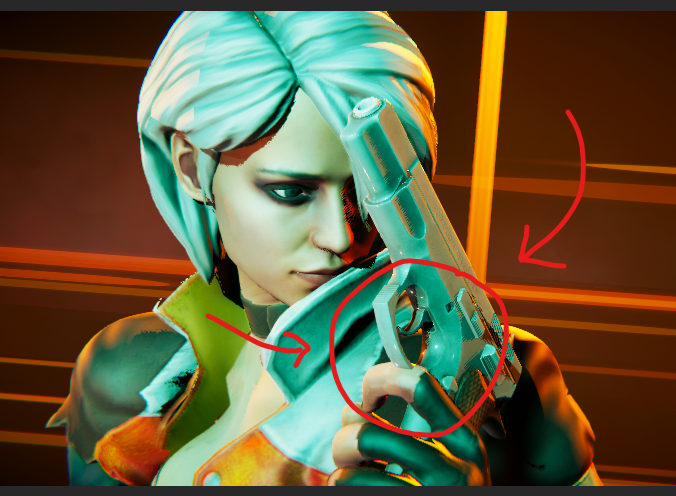
Unity Timeline
Hi Sang,
thank you very much for your support request.
The child-of constraint only "fakes" changing the parent by generating key frames that make the pistol act as if it's a child of a different parent. (This is needed because it's technically not possible to alter the parent/child relationship from within an animation.) This "fake" works as long as the real parent isn't moved to a different spot than it was while exporting the animation. It's also necessary that your hand is in the same spot again in the exported animation. If your character uses the humanoid animation system, it is not guaranteed that your hands end up in the same spot (due to the re-targeting algorithm of humanoid).
Maybe you are using an override layer in your timeline that alters some of the pre-baked positions? When you play the exported animation directly on your character (not using Unity Timeline, does it work then)?
My recommendations:
If you're using humanoid, I recommend using "generic" instead. Generic is playing an animation 1:1 as you've authored it while humanoid uses animation re-targeting which only "approximates" your authored animation (here's a good explanation how humanoid works: https://blog.unity.com/technology/mecanim-humanoids).
Using humanoid will give you lots of headache if your trying to do precise hand interactions that are close to the camera (thus very visible to the viewer) because humanoid's "lossy" nature (due to the re-targeting) introduces lots of small position errors.
To switch to generic, simply duplicate your source character. Configure it as generic. Create a new UMotion project of type generic for your generic character. Import the old humanoid UMotion project file (the *.asset file, not the exported animations!). This results in a new project of type generic with all your previously created animation. Export the animations and use them on your generic character.
Let me know in case you need any further help.
Best regards,
Peter
IK Pinning on elbows or knees
Hi,
Is there any way to pin the elbow or knee instead of the and or foot?
Regards,
Scott Hong
Hi Scott,
thank you very much for your support request.
Yes, you would need to setup an IK chain that only includes the upper arm/leg. The IK handle would then define the elbow/knee position (instead of the wrist/ankle position). As the IK setup is UMotion project wide, I recommend that you do this in a separate UMotion project (in order to not destroy the regular IK setup probably used by other animations in your UMotion project).
For more information on how to setup IK chains manually, please follow the second part of the IK video tutotrial:
Here's how to setup IK pinning:
Please let me know in case you have any follow-up questions.
Best regards,
Peter
IK Pinned
Hi,
I'm trying to modify a crawling animation.
In certain frame area, the hand must remain stationary, with no change in position and rotation.
I think it can be done using IK Pinned option.
It works, however the position and rotation of the hand are fixed only when all the backend keys are removed.
For the next animation, IK Pinned option must be released again after some frame area.
Isn't it possible only work in a specific frame section?
Regards,
Scott Hong
This problem is resolved. I replied it before, but it was not saved.

 Hide blendshapes in clip editor?
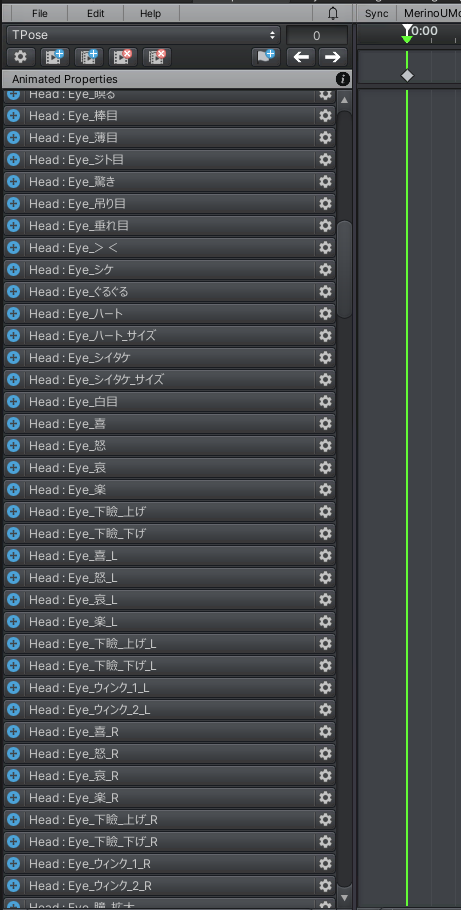
My models has always a lot of blendshapes (sometimes > 100), which are all bound on the head and are used in my animations. But when you are focused on the skeleton, this blendshapes forces you to scroll up and down all the time. Is there a way, to hide them temporary? If not, maybe an additional filter option would be nice for this 4 types (IK, position, rotation, "plus")?
Hi Esska,
thank you very much for your support request.
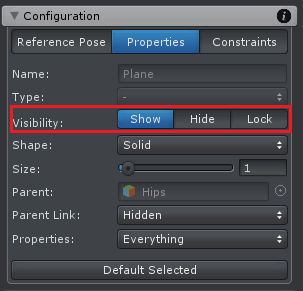
If you want to hide the blend shapes, go to config mode and select the bone that contains the blend shapes (the head bone in your case). Then under "Properties" set "Visibility" to "Lock". Don't forget to unlock the bone once you're done.
But when you are focused on the skeleton, this blendshapes forces you to scroll up and down all the time.
The intended workflow when working with UMotion is to do your selection work in the scene view. As soon as a bone/transform is selected in the scene view, the according animated property is automatically highlighted in the clip editor. This is usually much faster than doing it the other way around (selecting properties in the clip editor).
Please let me know in case you have any follow-up questions.
Best regards,
Peter

adding objects to rig after configuring the rig
Hello,
I have a rig I have already configured, and I now want to attach an object to the hand of my rig and use it as a constraint. However I am unable to add it, or am I missing something? I have tried to set it as a child (not possible), tried adding a constraint and attaching it to it but no luck there as well. Any ideas are welcome, I hope my question is clear :)
Hi,
thank you very much for your support request.
While a character is assigned to the pose editor, it is locked by UMotion for any external (i.e. outside of UMotion) changes. So in order to add an additional child object to your character, you first need to un-assign the character from the pose editor by clicking the "clear" button:
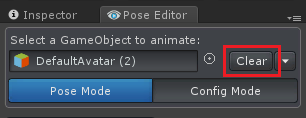
You can then add the object as a child to your character. Then assign the character to the UMotion pose editor again. The child object is then automatically added to your UMotion project configuration.
Please note that if your character is of type humanoid, none-humanoid bones/tranforms need to be manually released for animating. You can do this by going into config mode, select the transform from the rig hierarchy list. Then under properties, set visibility to "Show".
Please let me know in case you have any follow-up questions.
Best regards,
Peter

Is it possible to add child of constraint to IK handles?
Hi Shayan,
thank you very much for your support request.
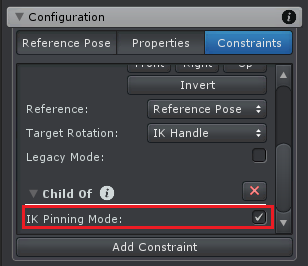
Yes this is possible. If you have setup your IK chains with the IK setup wizard, a child-of constraint was automatically added to each IK handle but it's in IK pinning mode. Disable the IK pinning mode in the child-of constraint setup (in config mode). This replaces the IK pinning toggle button with the regular "parent" field that allows you to select any arbitrary parent.
If you've setup your IK chains manually, you can just add a child-of constraint to your IK handles manually (in config mode).
More information about the child-of constraint and IK pinning can be found in the following two video tutorials:
Please let me know in case you have any follow-up questions.
Best regards,
Peter
Customer support service by UserEcho
