 Export only humanoid bones
Hello I bought Your system :)
Its really cool, but I have 2 questions:
1. How to export only humanoid bones when exporting animation to fbx. I want to export only what is necessary for animation, no additional empty game objects of my object. I know System is basing on what is in Character that I edit. But basically, if that is humanoid It And I have dozens of animations (mainly we use only skeleton if fbx with animation ) I dont like the thing that system dont have option like: "Export Only motion for humanoid" or something like that.
2.How to get rid of the need of renaming all objects if they are called the same? Cant it be done automatic way on export like changing it to some 1,2,3 etc if there is problem with fbx
3.I exported my animation to actual fbx, but it seems like it is connected to old one animation in the same fbx, when I choose that animation both animation are chosen at once, some problem with meta files or something? Overall my workflow is to keep in the same fbx animation of old anim (I rename it to OLD or something like that) and new animation, everything would be good if not the thing I described that when selecting one anim unity select both of them so replacing it is impossible.

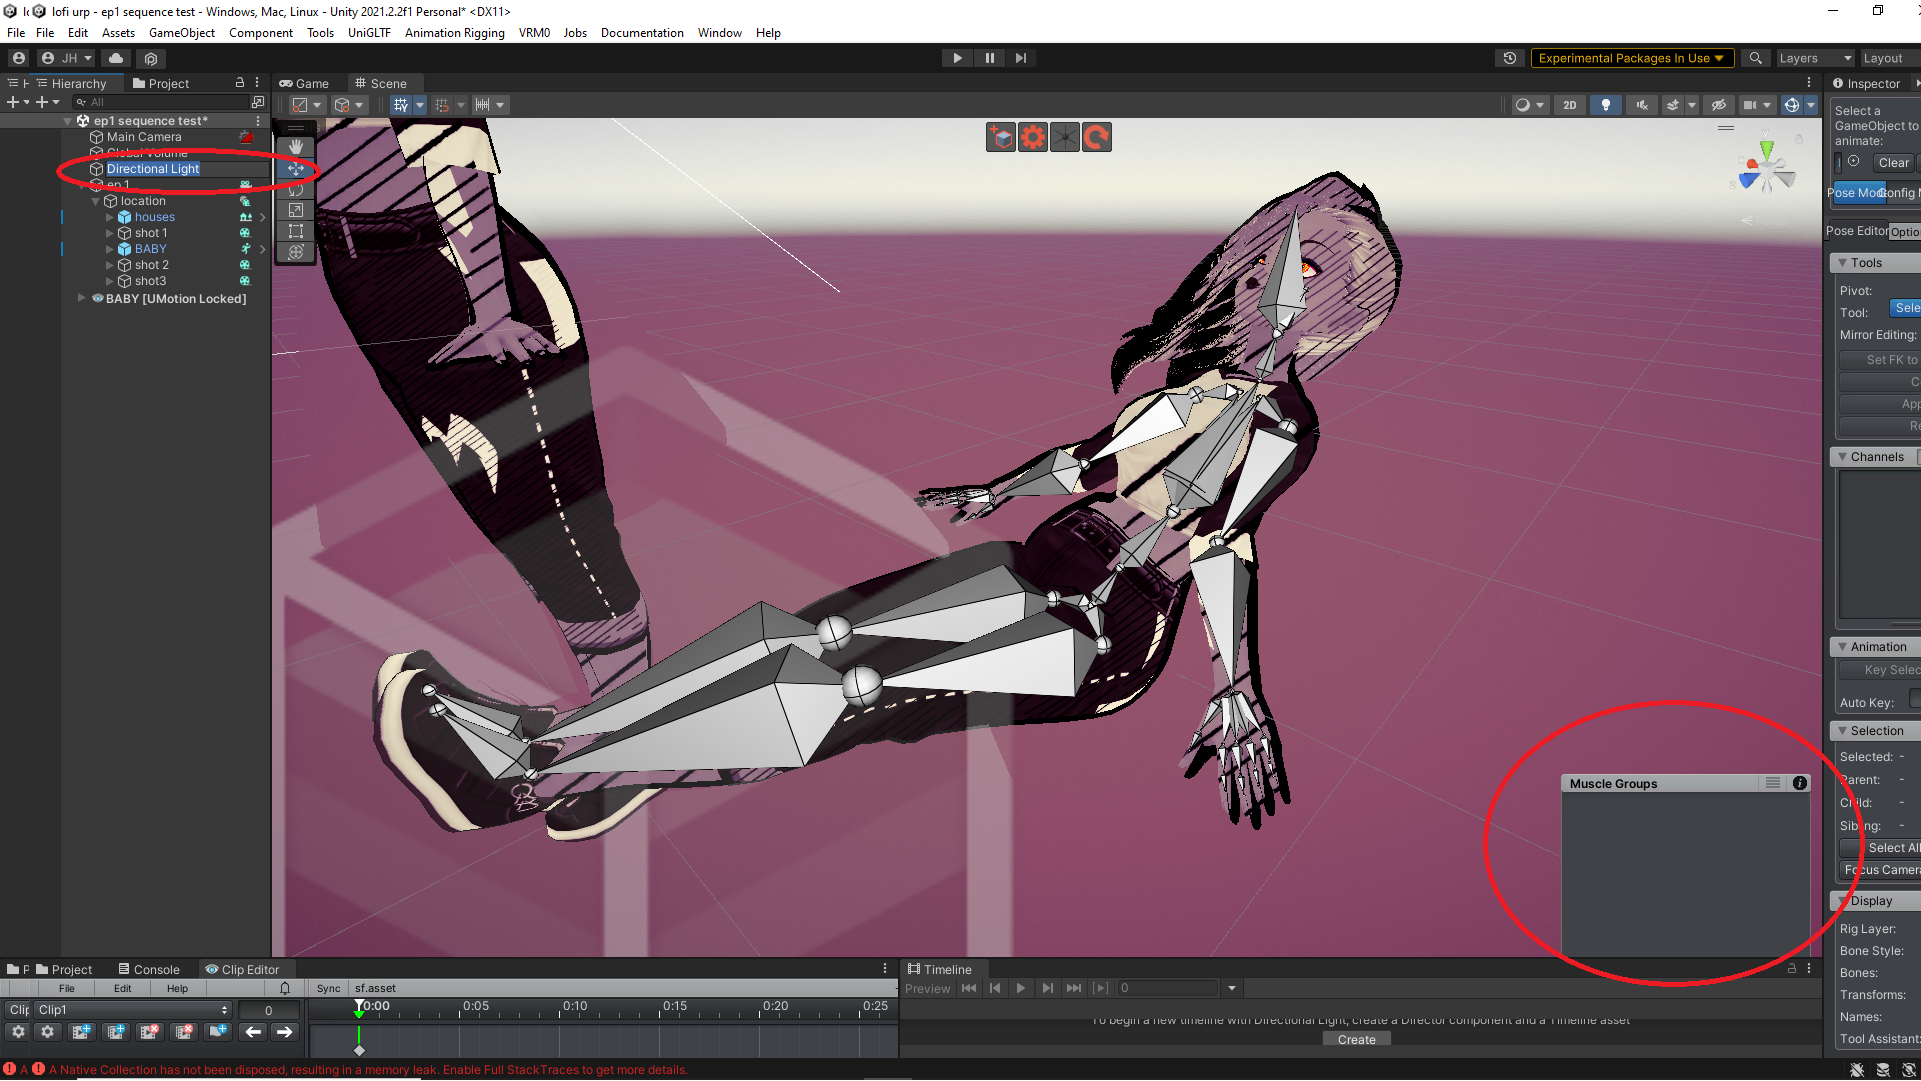
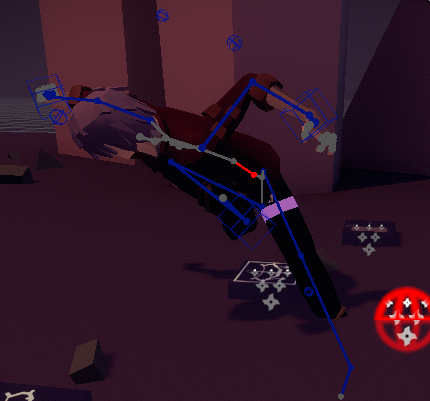
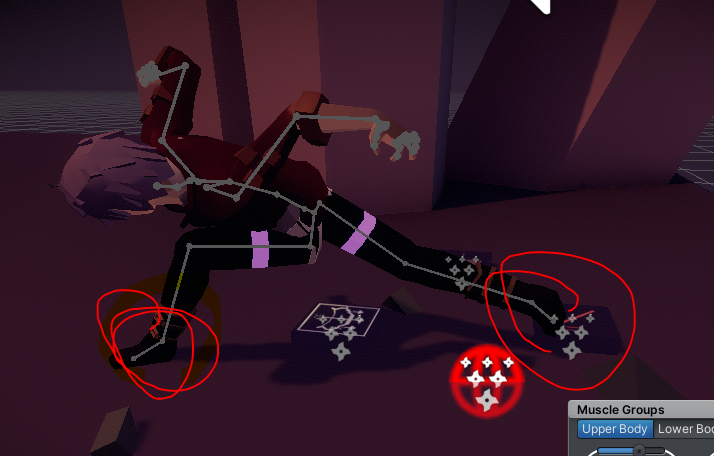
 Muscle groups tool crashing umotion when selected
The muscle groups tool set does not appear when working with a character but appears on the directional light source. when interacting with the tool it crashes umotion forcing a this only happens on the new version of unity 2021.2.2f1.
Update the sliders work but cannot be seen.

Hi,
thank you very much for your bug report. I really appreciate your time.
Unfortunately this is a Unity bug that was already reported during the 2021.2 beta but wasn't fixed yet. Please disable the tool assistant for now or downgrade to Unity 2021.1. I'm sorry.
Best regards,
Peter

Error on Export
Hi,
I am trying to create an animation using only "constant" interpolation between keys, however when I export the animation it doesn't stay constant in the resulting animation clip, and I am getting two errors in the console on export:
QuaternionToEuler: Input quaternion was not normalized
UnityEditor.AnimationUtility:SetEditorCurve (UnityEngine.AnimationClip,UnityEditor.EditorCurveBinding,UnityEngine.AnimationCurve)
Assertion failed on expression: 'IsFinite(rot)'
UnityEditor.AnimationUtility:SetEditorCurve (UnityEngine.AnimationClip,UnityEditor.EditorCurveBinding,UnityEngine.AnimationCurve)
The rig and umotion project are "generic".
Any help with this? I tried deleting+updating umotion already. And I am confused, since I have never run into this issue when exporting previously - I don't know that I have changed nothing with the .fbx, and the version of unity is the same as before...
I am using Unity version 2020.21f1, Umotion version 1.26p05.
Best regards,
Felix Wahlström
Editing Clothing Bones During Humanoid Animation
Hello,
I recently began working with Umotion pro and have a question about something I'm trying to accomplish. I have a humanoid character with armor that also has its own bones that can be moved and manipulated. I imported a humanoid animation clip and I am able to edit the humanoid bones of the character, but not the armor bones. I noticed that it doesn't seem to be possible to edit generic bones in a humanoid project and vice versa. Is there a work around or something I am missing?
Hi,
thank you very much for your support request.
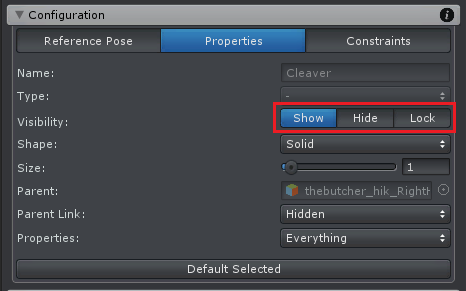
You can edit generic bones in a humanoid project, it's just not enabled by default.
To enable editing of a generic bone in a humanoid project, switch into config mode. Select the generic bone you want to enable from the rig hierarchy. Under the properties tab, set "Visibility" to "Show".
The reason for it not being enabled by default is because when you use humanoid, you usually use it because you want to use animation re-targeting (i.e. use the same animation on multiple different characters). Because that's the only real benefit you get from using humanoid. When combining a humanoid animation with animated generic bones, these generic bones would not be re-targeted (as they are, generic and not humanoid) thus loosing the only real benefit of humanoid.
Pro-tip:
So in your case, it would most probably make more sense to entirely switch to generic (as you seem not to use animation re-targeting). Humanoid comes with quality trade-offs (and some small performance penalties) that you can get rid of by using generic instead. On the plus side, humanoid has the muscle tool assistant in umotion that allows you to animate e.g. fingers by using simple sliders. To use the best of both worlds, you could also continue using your humanoid UMotion project for animating, but then export your animation to FBX which you then configure as generic.
Of course if you do not have any quality issues with humanoid, feel free to continue using it.
Please let me know in case you have any follow-up questions.
Best regards,
Peter

 Pro Lite
I absolutely love the community edition, but I do find the inability to import clips, export FBX and do IK frustrating. I fully understand why those are in the Pro version, which is why I am not asking for them in the Community version. However, the Pro version is just too expensive for my budget.
I am suggesting a Pro-Lite version with import clips, export FBX and IK at a reduced price, say $20. This would bring it in the price range of hobbyists like me who do not need all the advanced features but still allow us to contribute to the development of a superb asset.
Hi Adrian,
thank you very much for reaching out and for your interest in UMotion.
Unfortunately there are currently no plans to create a lite version of UMotion. Please note that the asset store is often holding sales where you can grab UMotion at 50% off (or even less). So keep an eye on the asset store page if you want to grab UMotion at a reduced price.
Please let me know in case you have any follow-up questions.
Best regards,
Peter

When are we finally going to be able to copy poses?
It's a painstaking experience to select all the bones, then carefully selecting the keyframes which are linked to the bones, so we lose the whole bone selection. So I actually write down the bones I need so I don't lose track which is ridiculous... I then scroll through the HUGE list of keys and all of the bone names... And select bones through selecting keys... And then after all that, i carefully right-click and copy the keys hoping I dont mess up... And head over to another clip and arduously select the same bones all over again... and then when I hit ctrl+v, nothing happens, the keys get added but the pose does not change...
Please help
Hey,
thank you very much for your support request.
This is how I usually copy a pose:
- Click on the master key of the frame you want to copy the pose (this is the key at the very top). This selects all keys at this frame. It also selects all the bones that relate to those keys.
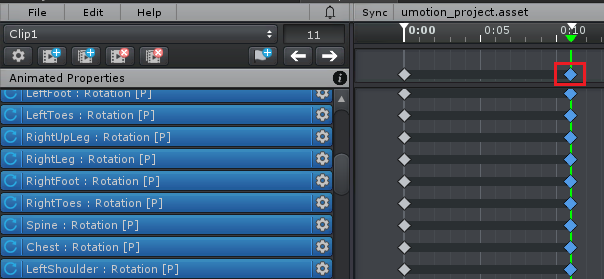
Special case: If you are missing some keys on this specific frame, you would immediately see this by some bones not being selected. You would need to create keys for those bones, otherwise those bones pose will be ignored in the copy process. If you don't want to add keys to an existing animation, you could create a duplicated version of that clip just for the purpose of grabbing animation poses from it:
- [Optionally] Deselect bones you don't want to copy (if you e.g. only want to copy an upper body pose, deselect all the leg bones). You can do this by holding [STRG] and clicking on a selected bone in the scene view OR by holding [STRG] and clicking on a selected animated property in the animated properties list.
- Once you have your selection, press CTR+C to copy the keys.
- Switch to your target animation.
- Move the frame cursor at the desired position.
- Press CTRL + V to past the keys.
This method requires that you selection synchronization enabled (which it is by default):
Pro Tip: If you re-use a lot of poses, create a "pose libary". An animation clip in your project that contains all the poses one after the other. Make sure that each pose is well-defined (i.e. it contains keys for every bone).
Please let me know in case you have any follow-up questions.
Best regards,
Peter
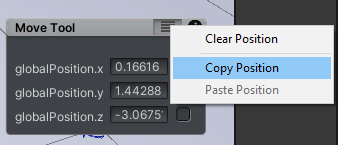
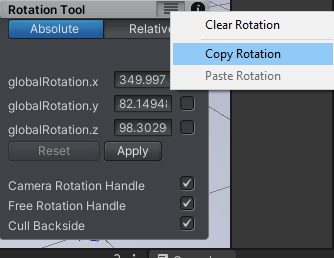
How do we copy both the world position and rotation of an IK handle?
It's possible to do one, but how do you do both?
Hey,
thank you very much for reaching out.
Unfortunately there is currently no way to copy/paste the position and rotation at the same time. I've added this to my to-do list.
Please let me know in case you have any follow-up questions.
Best regards,
Peter

Pass animation end point (center of mass) to other animation
Hello, I have two animations, "Idle" and "Get out of bed"
First animation "Idle"
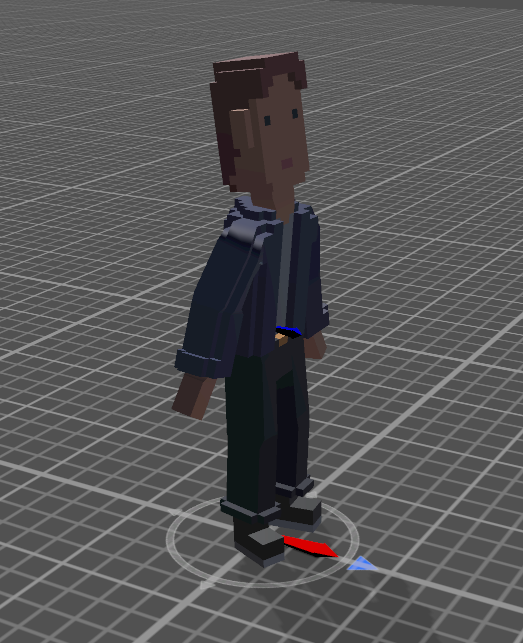
Second animation "Get out of bed"

As you see the red center point on second animation is far from the character's feet and after I change second animation to first "Idle", character will return to red point center of first animation, how I can pass to "Idle" animation position of characters feet from "Get out of bed"?
Hi,
thank you very much for your support request.
Your animation is an "In-Place" animation. Meaning that when it moves, it does not move the red center point with it. In your case what you would like to use instead is a so called "Root-Motion" animation. That type of animation does move the center point.
Is your character of type "humanoid"? In that case, select the *.anim file and make sure that the "Bake Into Pose" setting of the "Root Transform Position (XZ)" is disabled. That should make the center move with the character.
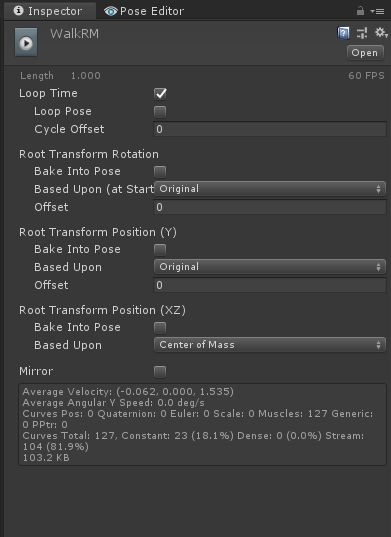
Also make sure to have "Root Motion" enabled in the Animator Component of your character in-game (in your actual scene) for this to work.
Here is Unity's documentation of the root motion settings: https://docs.unity3d.com/Manual/class-AnimationClip.html#ClipProperties
Please let me know in case you have any follow-up questions.
Best regards,
Peter

Motion changes after edit ik
I put FK to IK conversion an it works well. but after i change some motion with IK, some next motion or past motion changes weird automatically. it drives me crazy everytime :(
I changed this motion with IK. i fixed my legs and moved body up.
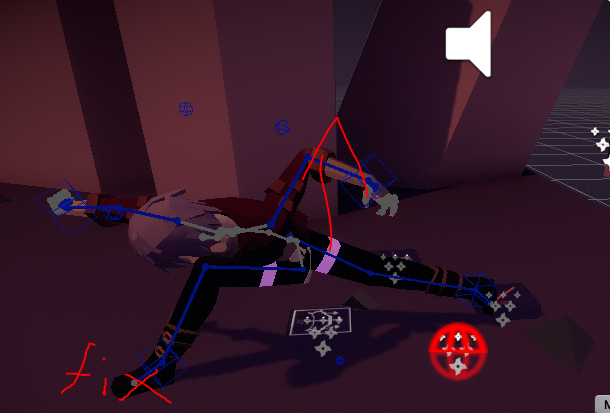
like this. and after modify...........
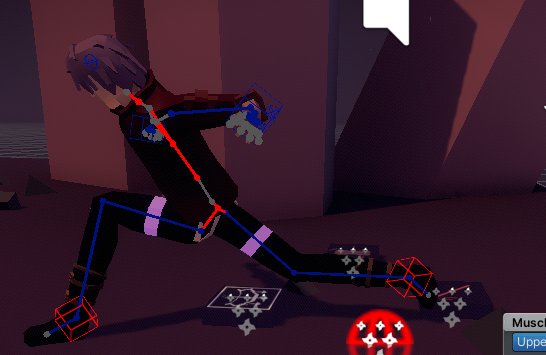
Next animation is changed suddenly like this. it happens always when i edit motion..
So i just want to edit motion without ik.
i want to pin these foots and move body up. is there way to only move body? because all bones follow body when i move hip(spine).
Hi,
thank you very much for your support request.
So i just want to edit motion without ik.
i want to pin these foots and move body up. is there way to only move body? because all bones follow body when i move hip(spine).
What you described is exactly the purpose of IK :-) You need IK in order to do that.
Next animation is changed suddenly like this
Just for clarification, with "next animation" you mean one of the following frames/poses within the same animation clip, right?
From the screenshots, I can only make some guesses:
You need to be careful when changing the IK pinning state during the animation. This can affect the following (already existing) keys of your IK target. When IK pinning is enabled, all following position/rotation keys of your IK handle are treated as "world space". While when IK pinning is disabled, the following position/rotation keys of your IK handle are treated as "local space". When you change the pinning state, UMotion automatically asks you (with a dialog) if it should convert the following keys.
When you don't correctly update your keys position/rotation values to match the IK pinning state (e.g. pinning is on but keys are in local space) you get wrong poses.
This is also explained in the child-of video tutorial (IK pinning is just a special mode of the child-of constraint):
Here is also the IK pinning video tutorial for completeness:
It's a bit hard for me to tell you exactly what happens just from static screenshots. If you need any further help, please record a video that first shows the complete working animation, then edit one frame/pose and then show me how that affected the pose on other frames. Then I can tell you exactly why this and that happened :-)
Best regards,
Peter
Customer support service by UserEcho
