Extra bones appearing
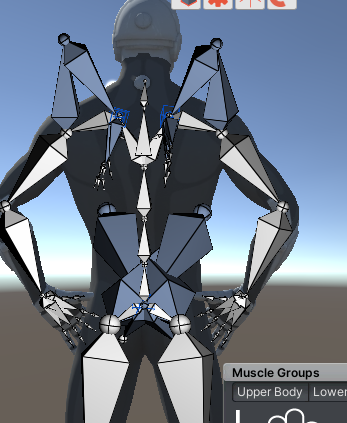
I was messing around with the set default pose, scene pose, reference pose and got extra bones.

This is the pose tab. The config tab show correct bone orientation. How can I reset this. I dont want to keep pressing switches indiscriminately at this point.
Then I ended up with a clip with no keys. All was lost.
Answer

Hi,
thank you very much for your support request.
The blue bones are the "IK" bones and the "Grey" bones are the regular "FK" bones. As you have IK setup for your arms and legs, you have the regular "FK" bones for your arms and legs and the "IK" bones for your arms and legs. With the "FK/IK Blend" value (shown in the "channels" view when having the IK handle i.e. the wired cube selected) you can make the mesh follow either the FK bones or the IK bones.
Under the "Display" section of the pose editor, you can show hide the FK/IK bones.
The getting started video tutorial briefly covers this:
And the inverse kinematics video tutorial goes even more in-depth on this topic:
Please let me know in case you have any follow-up questions.
Best regards,
Peter
Customer support service by UserEcho


Hi,
thank you very much for your support request.
The blue bones are the "IK" bones and the "Grey" bones are the regular "FK" bones. As you have IK setup for your arms and legs, you have the regular "FK" bones for your arms and legs and the "IK" bones for your arms and legs. With the "FK/IK Blend" value (shown in the "channels" view when having the IK handle i.e. the wired cube selected) you can make the mesh follow either the FK bones or the IK bones.
Under the "Display" section of the pose editor, you can show hide the FK/IK bones.
The getting started video tutorial briefly covers this:
And the inverse kinematics video tutorial goes even more in-depth on this topic:
Please let me know in case you have any follow-up questions.
Best regards,
Peter