
 Animating multiple objects - workflow for weapon reload or animations, on FPS Arms
Hey all,
I am thinking about animating multiple objects, specifically the issue I am trying to tackle is doing weapon reload animations. I’ve realized that what UMotion animates needs to be on the GameObject select in the pose editor, and whatever is animated must be in that hierarchy. The object in question is my FPS Arms model, and guns are usually attached to it (ie. hand, or holder object). So I am left with a 3-4 options I believe, for workflow:
1. Keep all the guns on on the one object, like a big model game object. That way I can enable and disable what weapon is active and the animations will be easy because it’s all within the hierarchy of one GameObject.
2. Make separate copies of the FPS Arms, and permanently tie a specific weapon to that set of arms. This would be much less modular, and it would mean maintaining a separate set of arms in my project. That could cause complications in the future.
3. I suppose instead of having individual FPS Arms models, I could have distinct prefabs, each with the same FPS Arms models, and each with their respective weapon.
4. And finally, perhaps I can take advantage of this Sync feature I keep hearing about. This would mean having a separate animator and clips for the guns, and syncing them on the Unity timeline while using Umotion editor.
***. So far what I am doing is having FPS Arms rig/prefab, and attaching the guns when appropriate. This allows me to animate the gun as a child of FPS Arms and automatically in response to the location and rotation of the arm or holder. This is OK except for the fact that I have an issue with gun specific animations as mentioned above.
Also, one of my concerns is having to make a rig for each set of arms. It is time consuming to set up the IK and child-of constraints and such. *** So far, it has been easy. I simply duplicate the UMotion project, and use each for a different weapon animation set. I duplicated the original pistol Umotion project, then just deleted the clips and set it up easily for my Rifle animation set. All the constraints were re-usable. I’m concerned about that being an issue if I were to change my workflow.
I feel like these are important considerations and I wanted to ask for advice and how others have handled such issues. I’d like to consider my options and decide on which workflow “path” to take as it will be difficult to change once I am in one specific workflow. I may need to do all the animations and rig setup over again, for each weapon or animation set. Also I think it may be a good way for me to learn about the Sync feature which in general would be important for my continued use of this software and Unity’s animation features.
Thank you in advance.

I do still want the issue of having to set up the rig and constraints again. If i were to have separate models for each weapon, that would mean having to re-do the whole rig again, and that is what i am concerned about.
You mean the rig/constraint setup in UMotion? If the arms are exactly the same and only the gun is different, you won't have to re-do it again. Simply duplicate your existing UMotion Project, drag & drop the new prefab instance into the pose editor and then go into config mode and click on "cleanup" to remove any references to the old gun.
Would using the Sync feature make the animations harder to do? I mean, back and forth between the Umotion editor and the Unity clip editor, to sync the reload animations?
Yes it would be much harder. Also makes it very easy to mess things up (if for example you accidentally shift the arms and the gun relative to each other).
Best regards,
Peter
 Weapon Reload animations with First Person model
Hello all,
My project consists of using an FPS model (arms) and appropriate UMotion project/rigs.
I came across the problem of animating the gun as well. It seems that to animate the gun, with UMotion, along with the FPS model, it needs to be part of the hierarchy, and this leads to issue with design, as not all weapons are attached to the FPS model (hierarchy) at a time. Here are my considerations so far:
1. I suppose I could make it all one big model, and just enable the active weapon and disable all non-active weapons. That way the weapons would always be children in the hierarchy and could be simultaneously animated in Umotion.
2. I could also make a seperate FPS arm model with its own weapon, and that way I could animate it as one object, but again this would require multiple arm models, and isn't exactly modular in the way i'd like.
3. And the other way would be to sync the FPS arm animations with the gun animations. It would be more modular, but add complexity, as I would need a separate animator and clips, one for the arms, and one each for each weapon. I believe the Sync feature would allow me to do this? For instance, if i was creating a weapon reload animation, then i could move the arms down, then go to Unity animation editor and then move the gun clip, and such and such?
Could anyone that has experience with this issue give me a sense of how they did it, or support, could you shed light on which would be more ideal? I still have yet to explore the Sync feature, but that may be the way to go if i indeed want to sync one object's animations with the other.
I think I would like #3, because it is a bit more modular, and i'm thinking for the long run.
Either way this is something i need to figure out soon soon because i'd have to change everything if i change this system of how the arms and guns are put together.

Hi,
thank you very much for your support request.
I think traditionally an animation would animate both, the gun and the arms. Splitting the animations adds a whole lot of complexity as you now have to sync the animations at runtime. It also makes the authoring process way more complicated and error prone.
So I would either go with 1 or 2. Which one you choose is probably up to personal preferences.
Please let me know in case you have any follow-up questions.
Best regards,
Peter

 How to edit object ?
Hi.
I have a project where i have imported a humonoid rig. In that rig parented to the hand is an object.
I cant seem to work how to edit the object. Everything else comes through fine and i can animate but not the object.
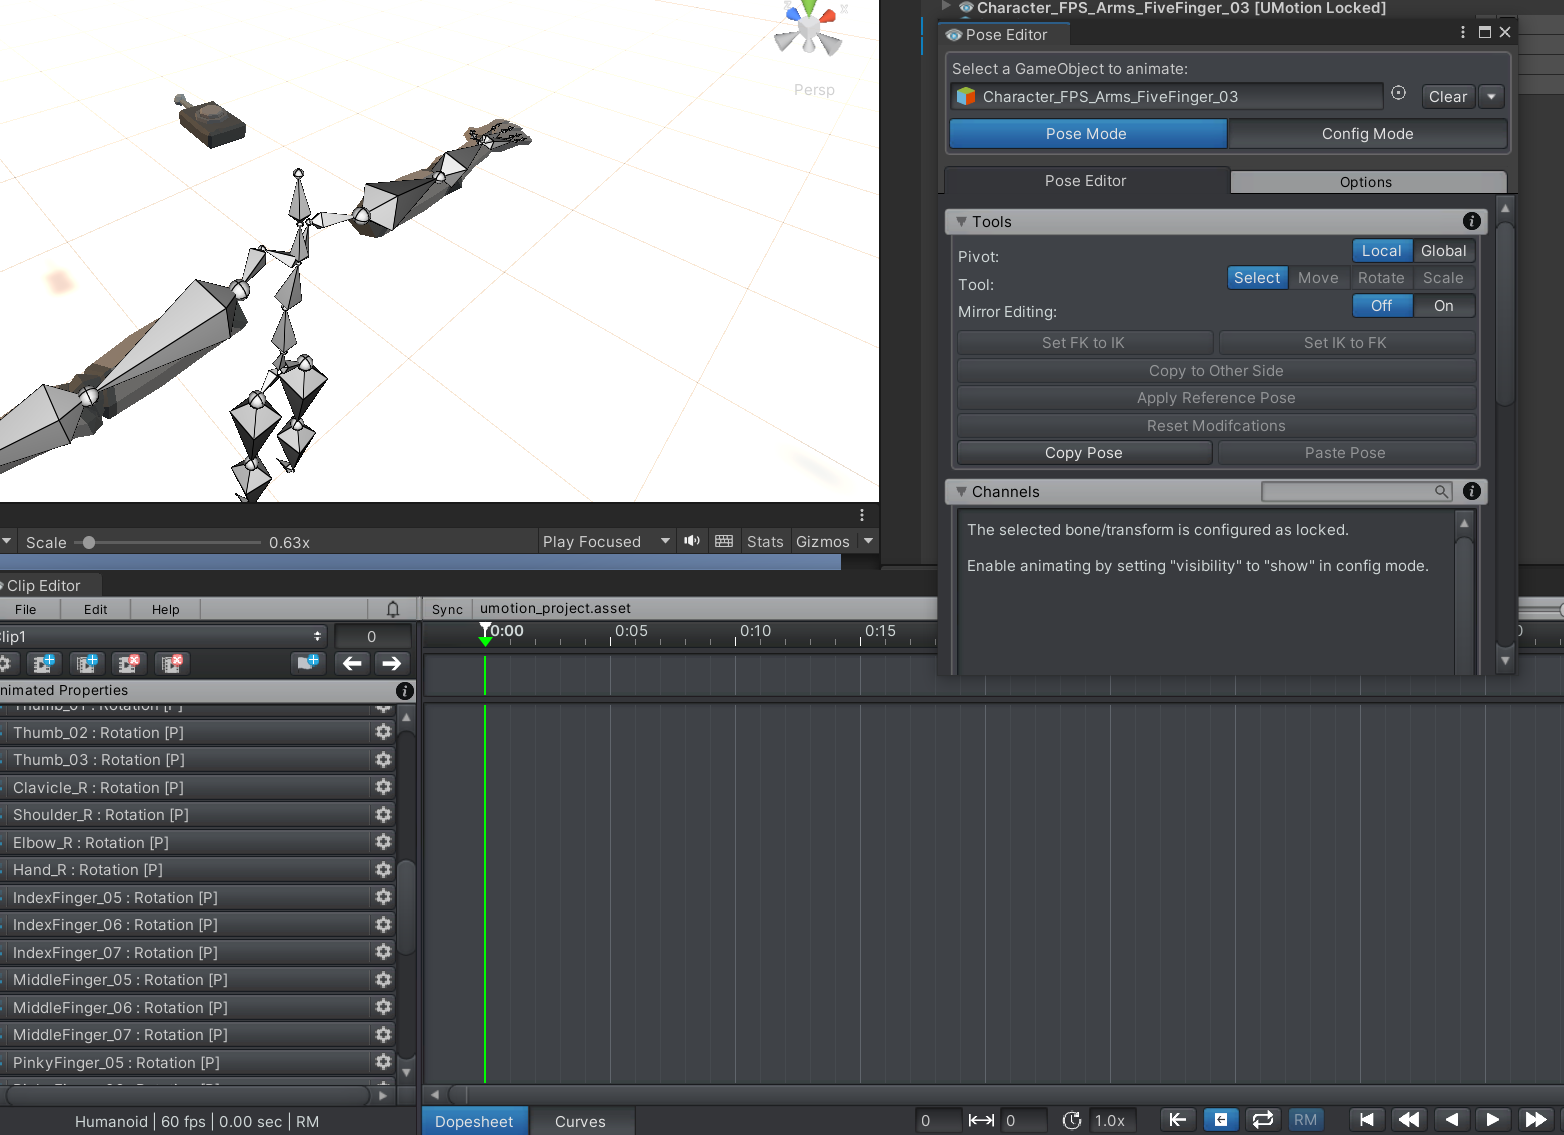

Hi,
thank you very much for your support request.
In humanoid UMotion project's, all non-humanoid bones/transforms are hidden by default. To make them visible/editable, go into config mode, select the bone/transform in the "rig hierarchy" and under "properties" set "visbility" to "show".
More information:
Please let me know in case you have any follow-up questions.
Best regards,
Peter

 UMotion makes a humanoid skeleton appear from nothing
When I drag my model into the UMotion pose editor, it first shows a warning that "Not all bones are available in the prefab", then proceeds to not only show all the bones I have in the prefab, but also make a humanoid righ appear on top from nowhere. It's not on the model, it's not in the prefab, it exists only if I pose in UMotion. The fact that they are phantom bones is supported by nothing happening to the model if I move or rotate them. Also UMotion make my model tiny and rotated?
For reference:
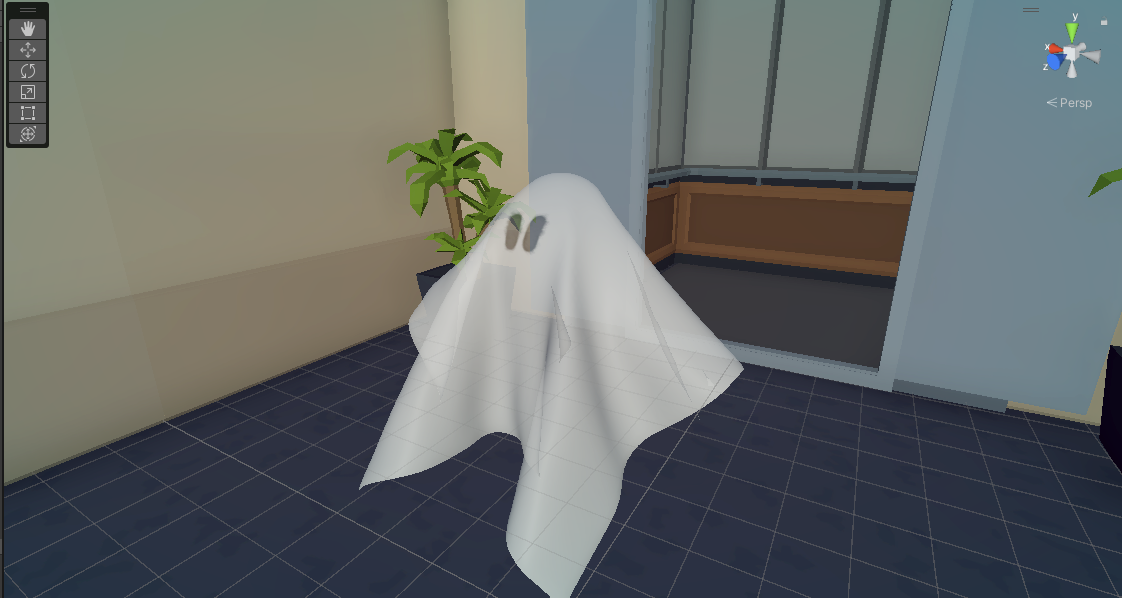
gets turned into
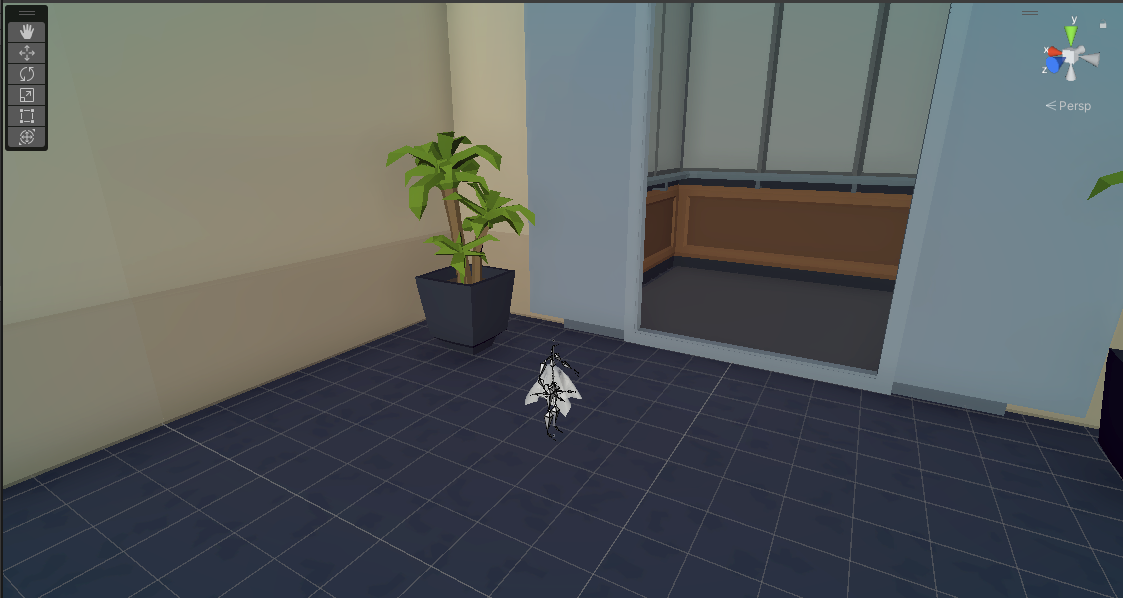
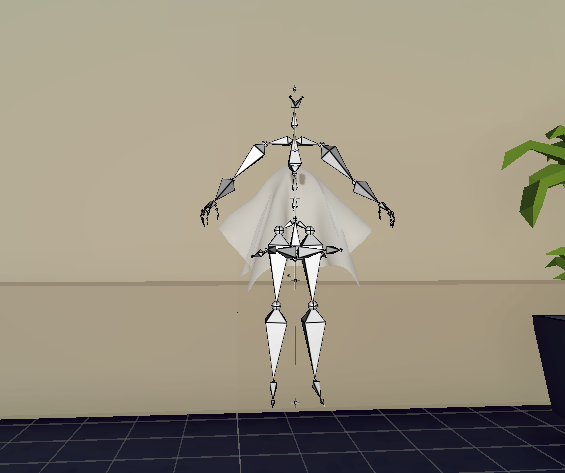
The rig looks like this in Blender:
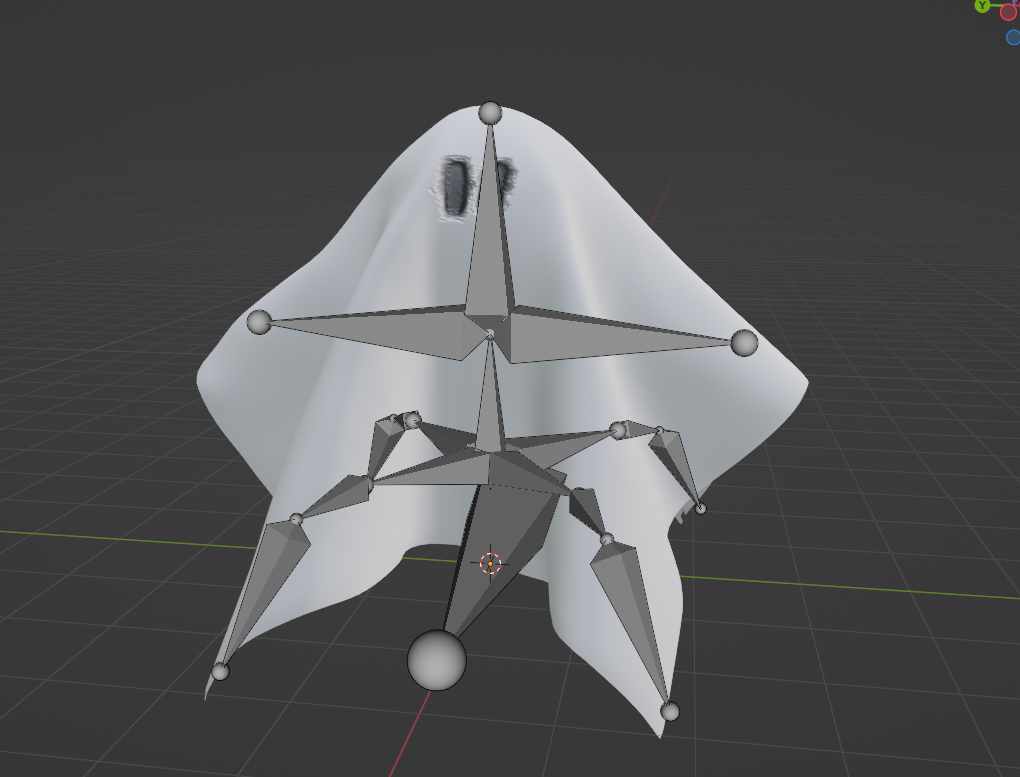
I assume the making the model small is some Unity thing with the base model, I'm used to that, but a phantom skeleton appearing randomly that does literally nothing but obstruct my vision? That's new.

Hi,
thank you very much for your suppor request.
I guess that you've created your UMotion project for a human like model and then assigned your ghost model to the same UMotion project file. Now you have bones from the original human like model and those of the ghost stored in the same UMotion project. Please remember that UMotion project files are "one project file per character".
Please let me know in case this does not explain your situation. I would be happy to assist you further.
Best regards,
Peter

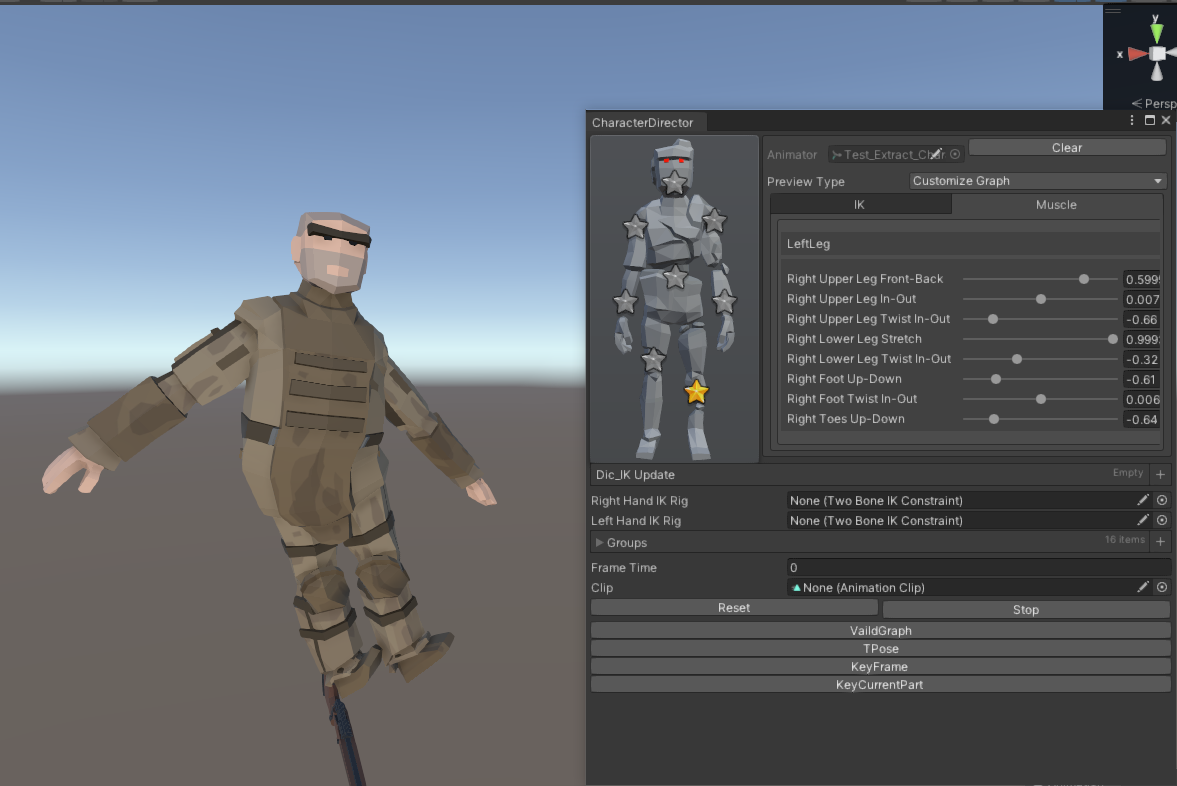
 Feature Request : Custom Animation Stream Input Port
I have my own animation editor works with animation stream which control muscle wrapping and IK motoin,
but it's really a hard work to develop a new animation recorder with editor GUI.
Could we have a socket to make UMotion editor reading custom animation data from target skeleton but do not lock it down.

Hi,
thank you very much for your support request.
Humanoid data can't be fed directly into UMotion, but regular rotation and position data for bones/transforms can:
https://www.soxware.com/umotion-manual/UMotionAPI.html
You would need to grab the actual rotation/position data of bones/transforms of your animated model and then you can use PoseEditor.TrySetFkLocalRotation().
Hope this helps.
Best regards,
Peter

 Workflow for FPS Arms with different weapons / modes
I wanted to ask about best practices and workflow for working with a set of FPS arms.
I want to do different animation sets for say, a gun, a melee, and just empty hands for magic.
The gun and melee animation workflow so far depend on IK handles and another object called a "holder". The holder stores the gun, and the IK handle follows the holder (Child Of).
I'm wondering now, if i complete a few animations for my gun, and then want to make some for my melee, what the best approach would be. It seems that perhaps a new separate project would be in order? That way I could customize the rig different for the melee and the empty hands.
I just want to be able to go back into seamlessly making my gun animations, then working on my melee, and move back and forth between them without having to completely redo my rigs and such in config mode.
Can anyone including the develops offer some guidance about proper workflow, saving rigs and working with projects so that i can handle this growing complexity in my animations.

Hi,
thank you very much for your support request.
If your rig setups are different, using different UMotion Project files is mandatory. So yes, create one UMotion project per "rig version". If you want, you can also create a new Unity scene solely for animating your different fps configurations. Instantiate all the different FPS arm configurations right next to each other so that you can quickly change from one to another.
Please let me know in case you have any follow-up questions.
Best regards,
Peter
 Animating generic humanoid bones
The selected bone/transform is configured as locked. enable animating by setting visibility to show in config mode.
Animating generic bones that have a humanoid child game object is not allowed in unity.
Does Umotion only do genertic?

Hi,
thank you very much for your support request.
When the character you are animating is configured as "humanoid", then all non-humanoid bones are locked/invisible by default. You can unlock them by going into config mode and setting "visibility to show".
Animating generic bones that have a humanoid child game object is not allowed in unity.
When you get this message, you are having a humanoid character in your UMotion project but instead of animating the humanoid bones, you are trying to animate some generic bones/transforms that are parents of a humanoid bone which is something that is not supported by Unity.
Does Umotion only do genertic?
UMotion supports all animation types: humanoid, generic and legacy
Please let me know in case you have any follow-up questions.
Best regards,
Peter

 FPS Arms requirement
Hi
I am wondering if u motion pro would be suitable to do the following.
1. import an existing fps arms rig. (its just the arms)
2. remove any object\gun from the existing animation may contained.
3.replace with another object
4.edit animation to something else.
5. expert for use in the same animator and\or new animator.

Hi,
thank you very much for your support request.
Yes this doable with UMotion:
- Drag and drop your FPS Arms into a Unity scene, delete the old objects/guns and replace them with new ones.
- Create a new Unity project of type "generic" and drag and drop your FPS arms from the Unity scene into the pose editor.
- Import the existing animation. UMotion won't import the parts of the animation that belong to the old objects/guns.
- Edit the animation to fit your needs.
- Export the animation, create a new animator controller for your new FPS arms and assign the new animation to it.
In case you have any questions/problems in this workflow, feel free to ask.
Best regards,
Peter

 Question of Framerate
Hi, Peter.
First, I am using Umotion very well. Thank you.
I didn't speak English so I used a translator. I hope you understand.
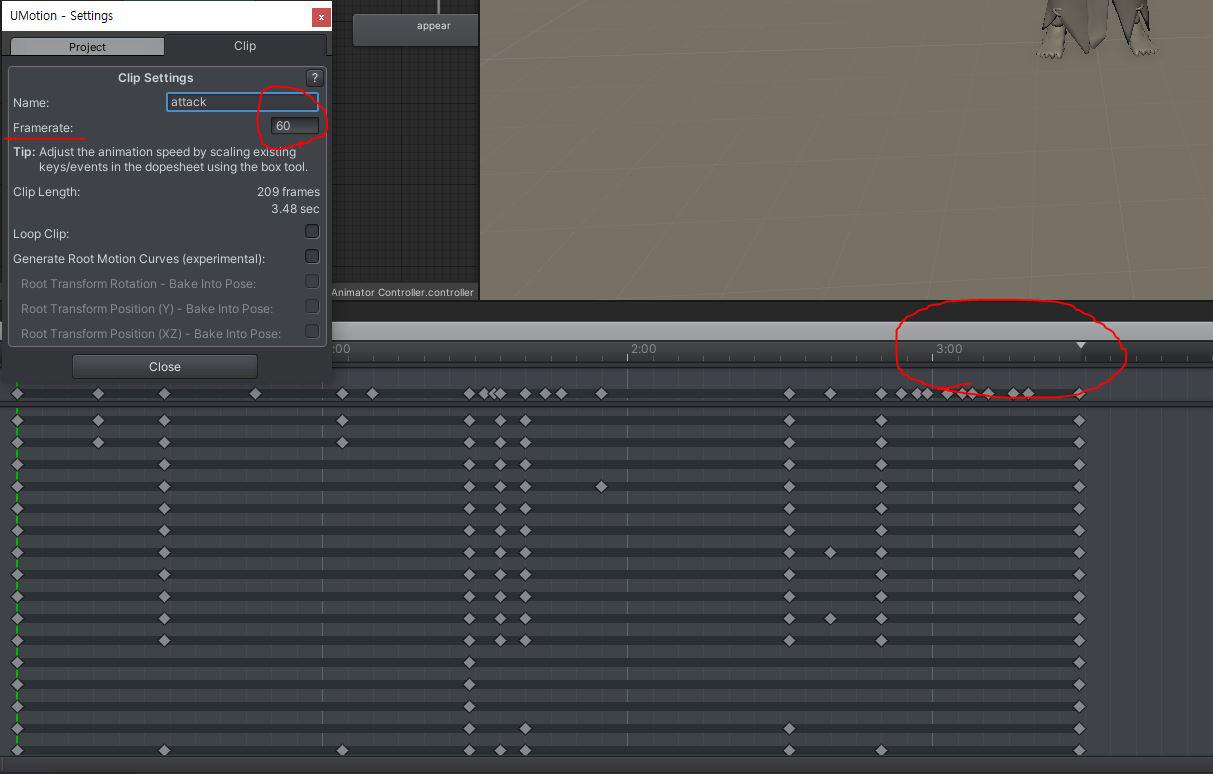
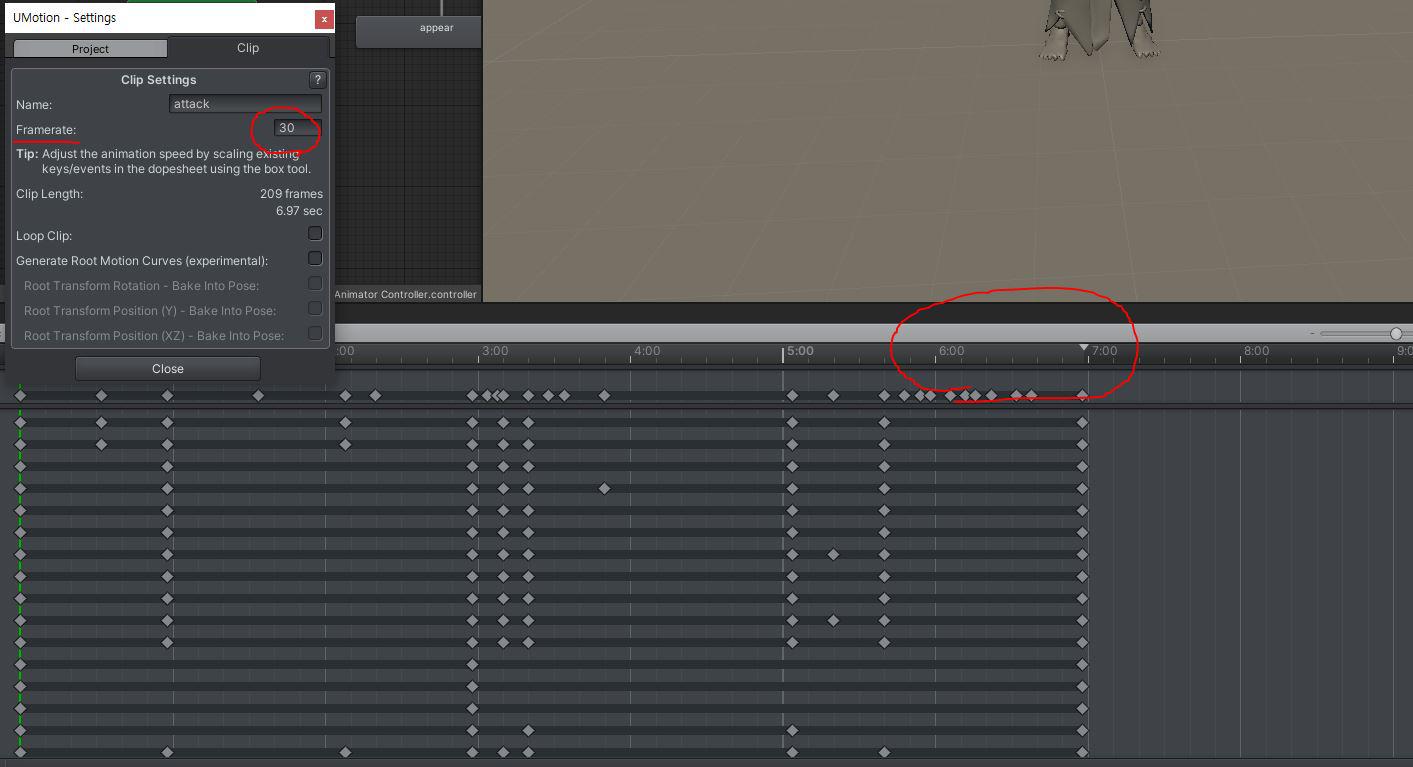
After working with 60 frames, I thought I should reduce the capacity,
so I changed the animation file I worked on to 30 frames.
Obviously, the clip length doubled and the animation time doubled too.

(reference_3D Max)
To save time when editing key frames, I ask you a question.
Is there a way to select all keyframes and then collapse/shorten them like in Max or Maya?
It's okay to not be perfect. I'm looking for a way to reduce the spacing between keyframes globally.
I searched for an answer in Umotion support, but I couldn't find the answer I was looking for, so I am writing to you.
Let me know if there are any options I don't know about!
i will wait for your help.
thank you.

Hi,
thank you very much for your support request.
Is there a way to select all keyframes and then collapse/shorten them like in Max or Maya?
Yes this is possible:
- Select all key frames (press CTRL + A in the clip editor).
- Then use the blue bar at the very right to scale the animation:

Please let me know in case you have any follow-up questions.
Best regards,
Peter
 Copy Animations from a Generic to Humanoid Rig (Tail)
Hello,
I was wondering if UMotion would allow for something like a part of an animation from a generic rig, to that of a humanoid rig but with extra bones.
For context, I am making a custom race of Fox people using Synty's Dog and Prototype pack. I have cut off the tail mesh, and separated the tail bones from the Fox and added them to my humanoid rig, with the tail being parented under the Hips.
Since this is a humanoid rig, the heirarchy is now Root -> Hips -> Tail, whereas the dog's was root -> hip -> spine -> tail, so I unfortunately can't just levarge mecanim retargeting with an avatar mask.
However, I'd still like to take the tail animation from that existing generic animation if possible, and create a new animation that is able to work with my new humanoid that has tail bones. Is that something I can do with this tool? I am trying to avoid just re-animating from scratch, so if UMotion let's me copy or some way of copying the bones starting with the Tail bone and copying it over or exporting it to match the new rig in some form, that would be perfect.
I would like to do something similar with the ears as well if also possible, and that would be in a similar scenario.
Hopefully that makes sense, thanks!

Hi,
thank you very much for your support request.
Yes this should be possible (as long as the tail bones really are a 1:1 copy just at a different location in the hierarchy) but it involves manipulating Unity's *.anim files directly with a text editor:
- Create a *.anim file containing just the source animation for the tail. Remove any other bones/keyframes from it. You can either do this in UMotion or in Unity's Animation Window. If you use the animation window, make sure to click on "File-->Save Project" in Unity so that all your changes are written to disk.
- Now open the *.anim file in a text editor. You need to change all "transform paths" so that they now point at the correct location in the new rig hierarchy.
A transform path is used by animation curves to reference the actual bones they belong to. This would be a transform path addressing a bone named "spine" that is a child of a bone named "hips" and a bone named "root": "root/hips/spine"
I don't know the exact location of the transform paths out of my head, but just try searching the file (CTRL + F) for things like "path" or bone names of your existing rig.
After you've finished editing the file, save it and return to Unity. - If you edited all transform paths correctly, the resulting *.anim clip should be usable with your new character (if you assign it to the character, it should play the tail animation correctly).
Please let me know in case you have any follow-up questions.
Best regards,
Peter
Customer support service by UserEcho
