
 Position item not saved
Hi
(Translated using google translate)I have a problem with changing the position of an added item to my hand. How to add an item to the hand bone (Generic) so that its position can be changed in Umotion and this position will be saved.
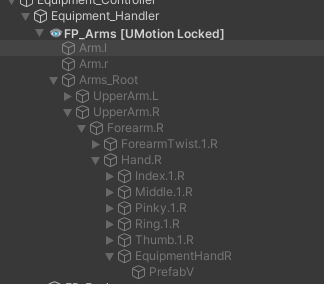
In the hand bone I created an empty object (EquipmentHandR) in which the script spawns an item (PrefabV). When creating animations, everything is fine. I set the position of the item and create animations. When running an animation in runtime mode the position/rotation of the item is default without any changes made when creating the animation.
In the timeline (Clip editor) the position/rotation of the item (PrefabV) is saved.
What am I doing wrong?

Hi,
thank you very much for your support request.
If it previews correctly in UMotion the way you described it, this should indeed just work.
- Maybe a script is overwriting the position of the item?
- Are you sure you aren't playing an old/outdated version of the animation?
- Are you adding/removing said item at runtime? It might be necessary to update the internal transform cache of the animator component in this case (I think simply toggling the animator.enable) might be sufficient.
- Does the exported *.anim preview correctly when viewed using Unity's Animation window?
Please let me know in case you have any follow-up questions.
Best regards,
Peter

pose library use
I have created a list of poses that I want to use as a pose library. When I import a clip, How do I use these poses in a humanoid animation?
Hi,
thank you very much for your support request.
After importing your poses via the animation clip import, you can simply copy and paste a pose by copy and pasting all key frames at that position (you might need to ensure that there are keys for all bones at that frame because during import, UMotion removes any redundant keys).
Please let me know in case you have any follow-up questions.
Best regards,
Peter

Umotion Animation and Timeline Animation Shift
Hello there,
I started using umotion and it is a good asset. However I have trouble using this asset in my timeline. In timeline I have 2 humanoid characters and their animations are recorded by motion capture system.
I have imported and created the project for both animations and generate it in the timeline. However when I edit the motion in umotion and export the animation there will be a shift in the position of the characters.
I tryone of the characters arm to hold and follow the other character's arms.
I managed to sync with timeline and edit the humanoid in umotion animation. While the project is open everything is perfect when I export to timeline the animation shifts on the sideways.
I nearly tried every option inside the editor however I do not manage to overcome this position shift. Do you have any idea?
Hi Mümin,
thank you very much for your support request.
Here is a list of settings that influence the position offset in Unity Timeline:
- Root motion settings that are shown in the inspector when you have the *.anim file selected. Using "Bake Into Pose" might help.
- There is a "Track Offset" property for each animation track in Unity Timeline
- There is a "Clip Offset" property for each animation clip in Unity Timeline
Having scaling applied on some of the child-transforms of your character can also cause some weird positional offsets. Make sure to only scale the root of the character.
Please let me know in case you need any further help.
Best regards,
Peter

jump and rotate 45 in the air
I completed the tutorial where you fix the jump animation.
I removed the forward motion from the animation so the character jumps straight up and down.
All I want to do is rotate the character 45 degrees while in the air around the Y-axis.
While that sounds easy, I've spent all day trying to get it right and I can't no matter what combination I try.
The rotation influences the Z and X axis as well (not in the inspector though it works as expected rotating on global y). I can be in Euler rotation, quaternion progressive, local, global, absolute, or relative, it doesn't matter the output is always the same, the character rocks back and forth on both the x and z axis after it lands until it settles back down into the same pose as the first frame.
I have no idea what is going on.
Please help.
Hi kloogens,
thank you very much for your support request.
In order to rotate a character around the y axis make sure that your "Pivot Mode" in the Pose Editor is set to "Global". Then select the hips bone and rotate it using the green circle of the rotation gizmo. If you want your character to turn from e.g. frame 5 to frame 10 make sure that you have a key with the initial rotation at frame 5 and a key with the final 45° rotation at frame 10. Remove any rotation keys of the hips bone that are in between.
Please let me know in case you have any follow-up questions.
Best regards,
Peter
 Not able to select all hand bones with Shift when in IK mode.
I found a reference in the forums to use Shift + selecting the wrist bone to select all fingers. It wasn't working for me and then I discovered that it only appears to work in FK. I'm able to switch from IK to FK, select all the bones, and then go back into IK to copy them over to the other side.
Hi,
thank you very much for your support request.
Shift + Select selects all children of the clicked bone in the hierarchy. The finger bones are not children of the IK target (you can see this in the rig hierarchy view in config mode).
Best regards,
Peter

Anyway through UMotion to convert a Humanoid animation to a Generic?
I have several Humanoid animations, but I only need to turn 1 of them into a Generic animation. This is for the Among Us Follower.
Is this possible to do through UMotion? Or do I have to purchase the $25 Animation Converter thingy (just to convert one single animation and likely never use it again, which IMO would make the cost pointless)?
Hi BenieTheDragon,
thank you very much for your support request.
Yes you can do it with UMotion Pro as well. Here are the steps:
1) Duplicate the generic character which you want to animate with these animations.
2) Configure the duplicated generic character as humanoid. Make sure that everything is setup correctly (all bones are shown in green in the humanoid avatar config and that the character is in a T-Stance). More info: https://www.youtube.com/watch?v=pbaOGZzth6g
3) Create a new humanoid UMotion project, assign the humanoid version of your character to the pose editor and import the humanoid animations you want to turn into generic. Validate that the animations play correctly.
4) Go to the settings (gear icon in clip editor) and change export type to FBX. Select your character's FBX file (of the generic one) as destination file.
5) Export the animations.
The animations are now within the FBX file of your generic character.
Please let me know in case you have any follow-up questions.
Best regards,
Peter
Can't figure out how to apply/save ik animation keys
Watched the tutorials. No animating experience.
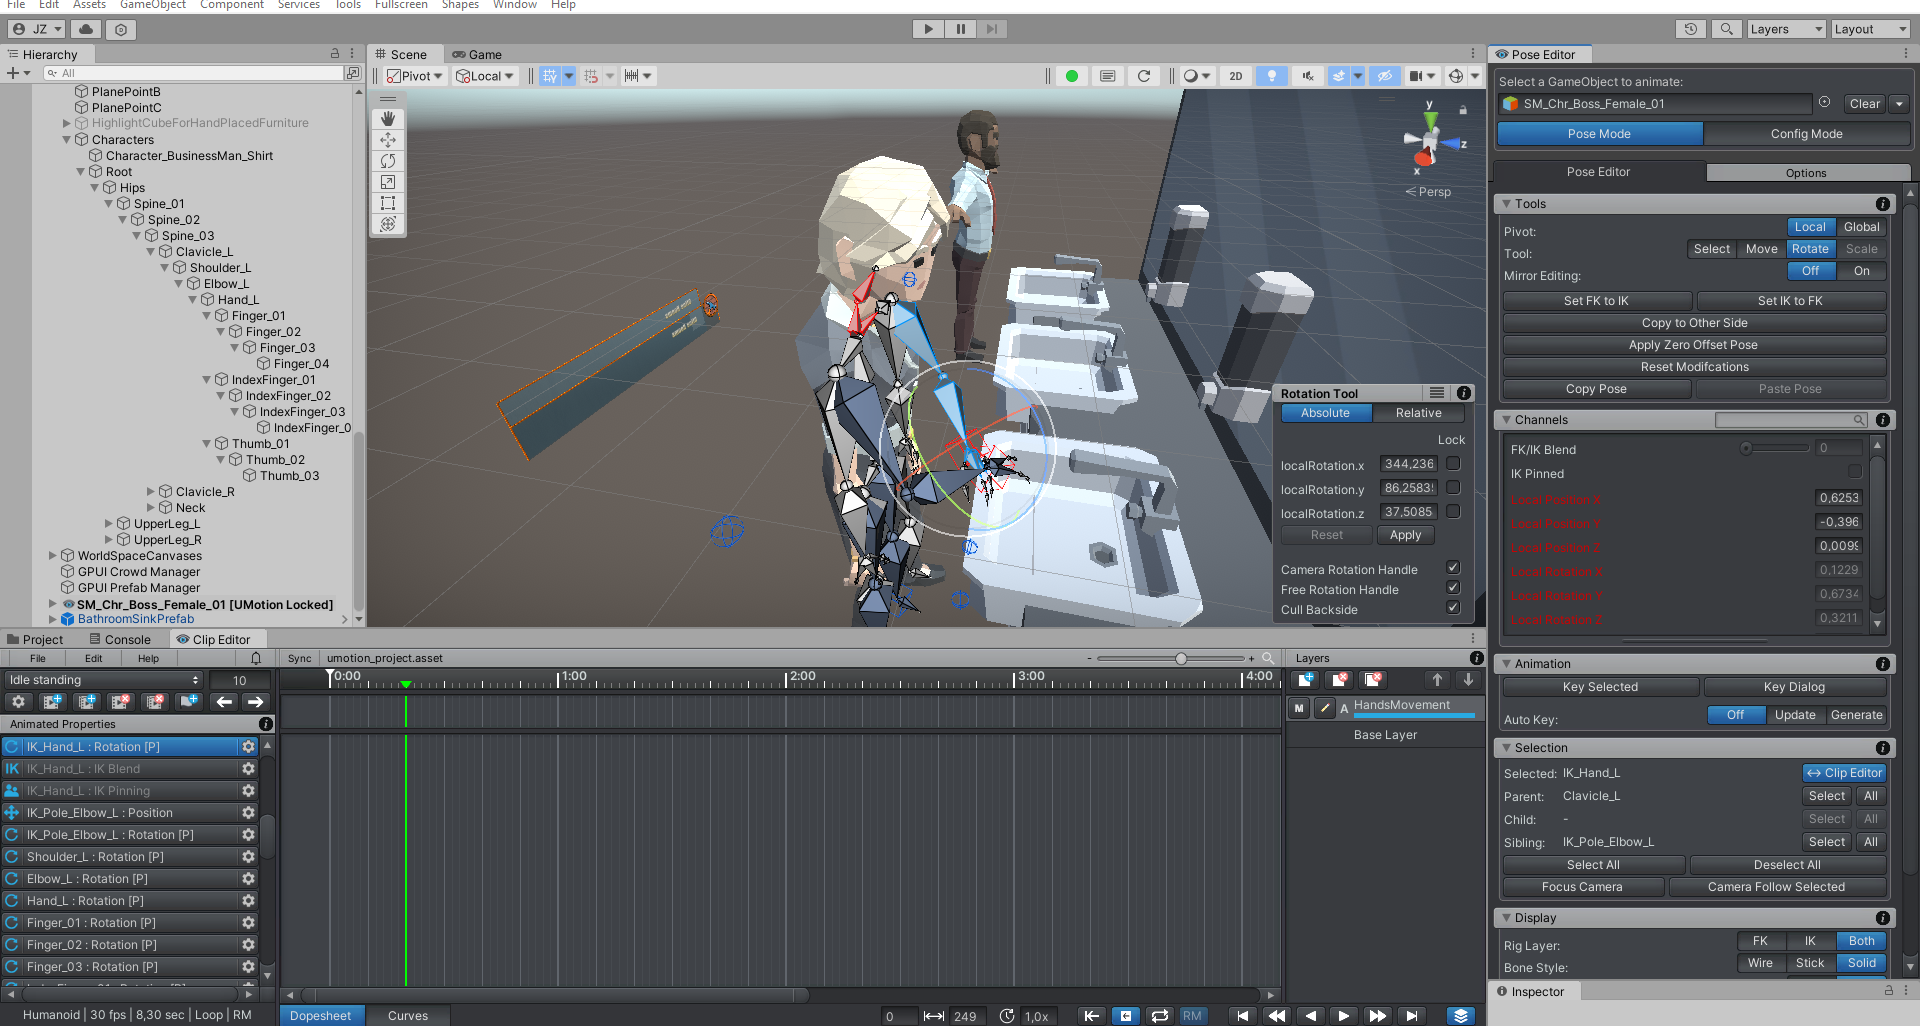
I have mixamo standing idle animation. Want to add to it so that char pretends to wash hands at sink. Repositioned hands with ik. Well i guess i need to create additive layer like tutorial told me. Ofc it deleted the progress as it promised :). Made changes again. But i'm not sure how to properly apply/save the changes to additive layer at specified time.
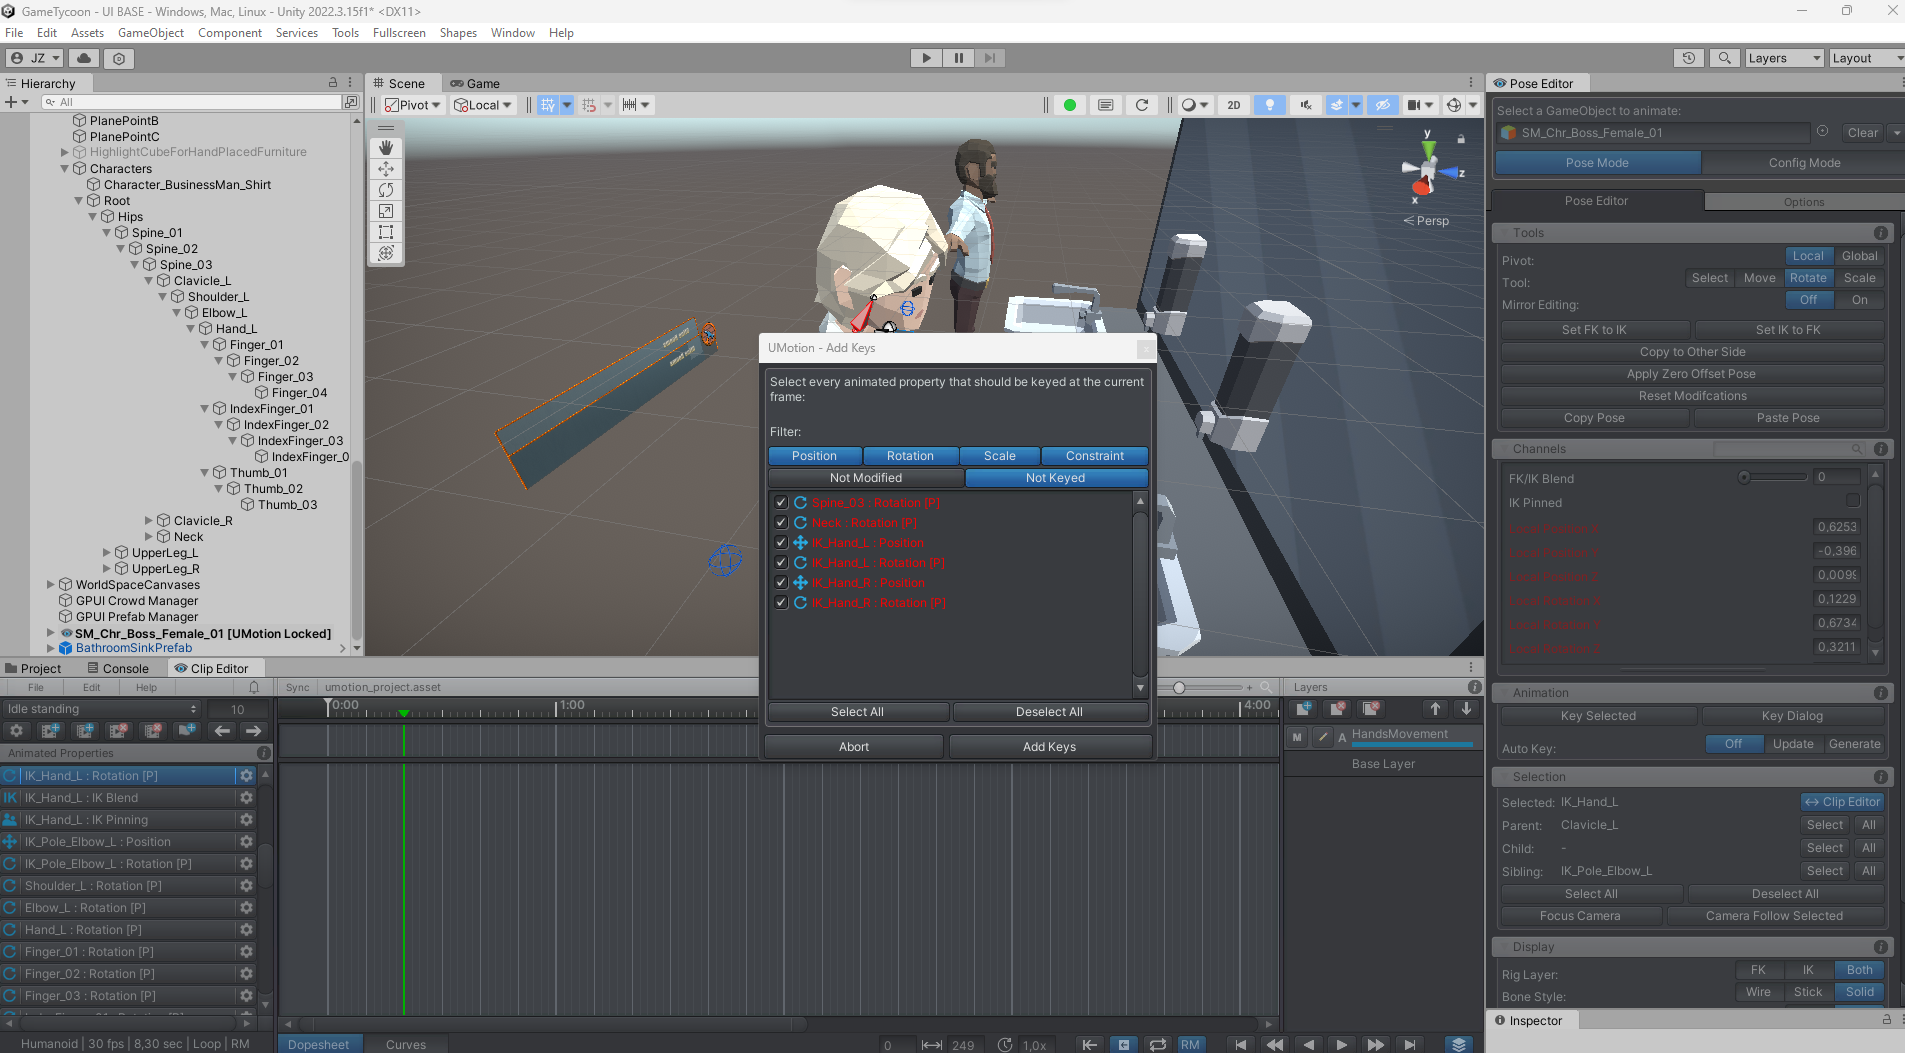
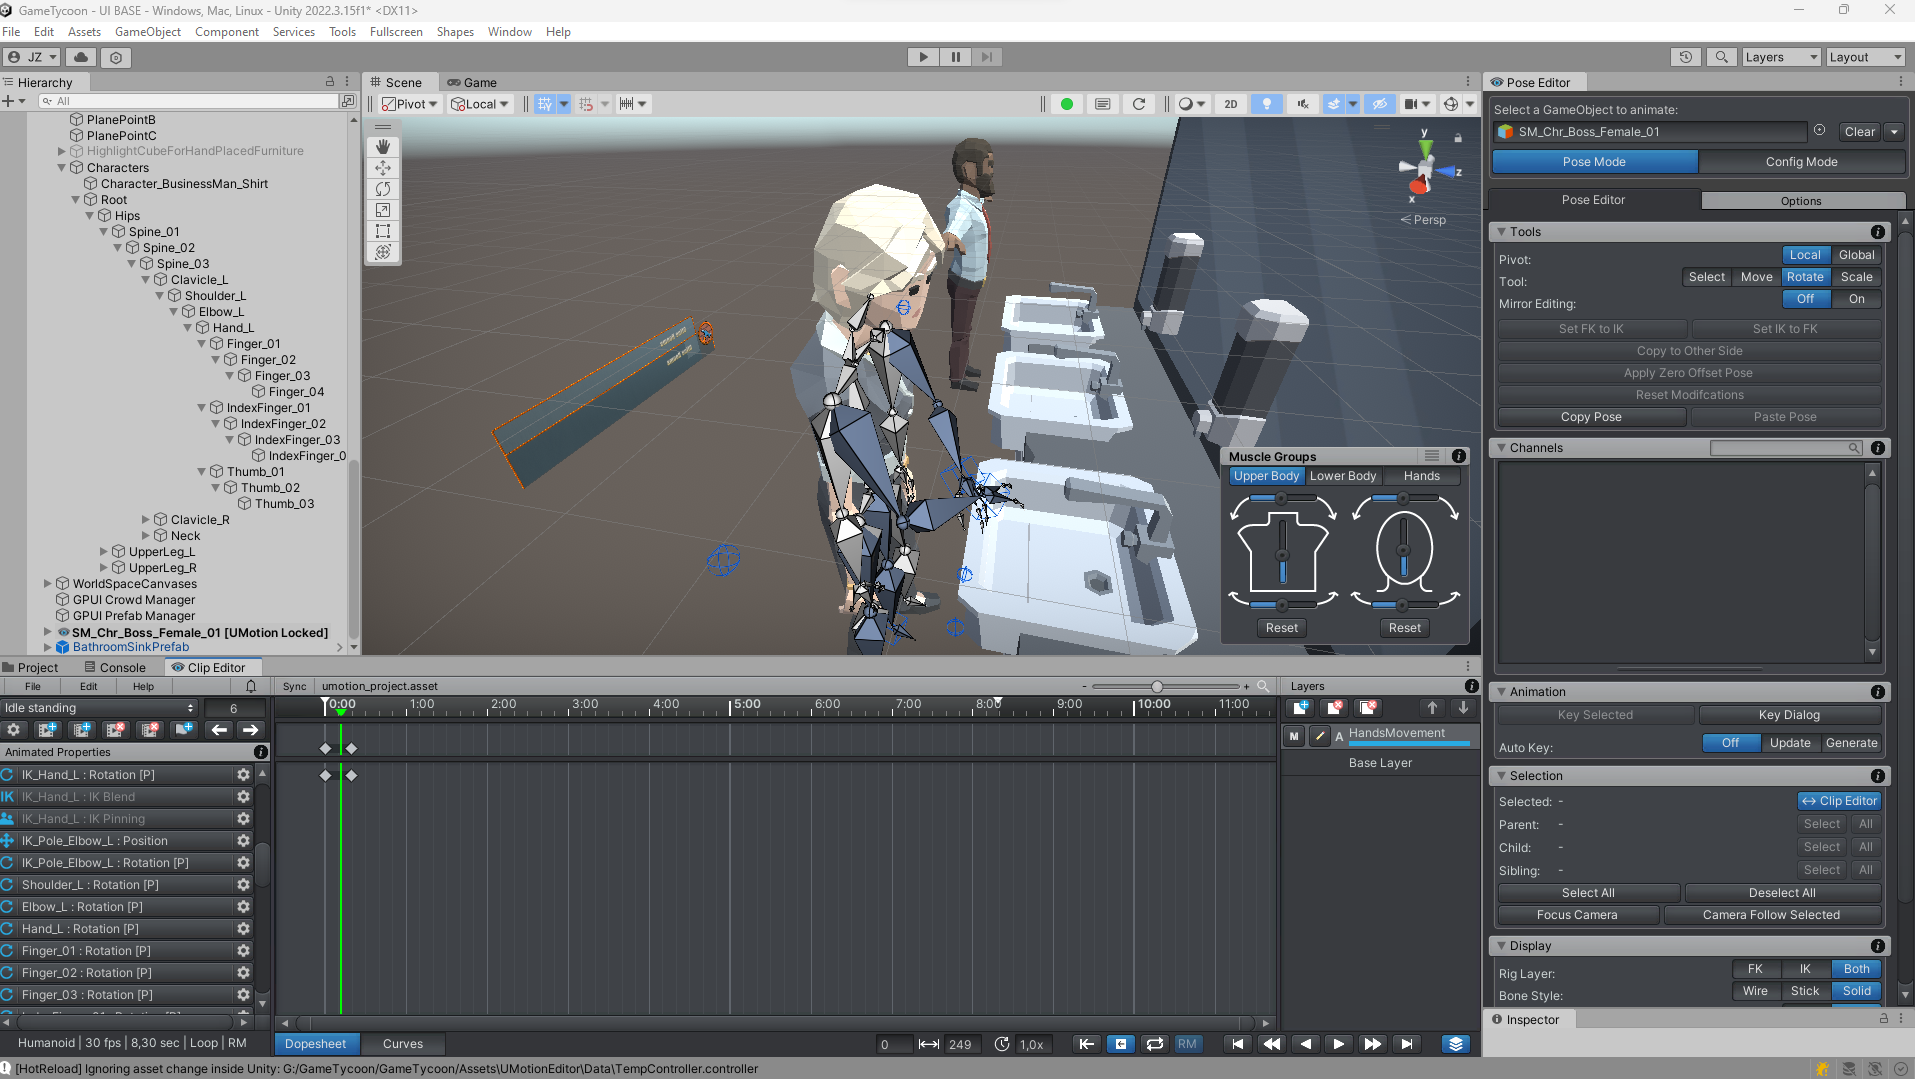
The FK/IK Blend is greyed out and can't be modified. Key dialogue seems to detect the changes to hands and neck. So i select all and add. But when i play animation from the beginning absolutely nothing is applied. I'm missing something very obvious. Went ctr+z couple of times, but no matter what i do, i see some new keys created, both at the beginning of the animation on my new layer and in specified time, but when playing it, nothing moves, just basic idle animation is playing.
Cheers.
Hi,
thank you very much for your support request.
IK is supported on layers, but it's not supported to key the "FK/IK Blend" property in an additive layer. An additive layer is adding an offset to the underlaying animation (mathematically it performs an add operation: "FK/IK Blend (base layer)" + "FK/IK Blend (layer1)"). For "FK/IK Blend" this doesn't really make sense as it could yield to values that are out of range 1+1 = 2 which is not a valid value for FK/IK Blend.
So key the FK/IK Blend value on the base layer. You can also modify the IK of the hands on the base layer as your base layer does not have any IK keys anyway as the imported animation was using FK.
Alternatively you could use an override animation layer for your arms as you want there motion to be completley overwritten anyways. In an override layer, it's also possible to change the "FK/IK Blend" property.
The additive layer would be useful for e.g. adding some rotational offset to the spine so that the character is leaning over the sink. This would still keep the base idle movement of the spine just offsets it by e.g 10° (i.e. base layer spine angle + 10° of the additive layer).
I hope this shed's some light into what an additive layer actually is.
Best regards,
Peter

Simple Modification of an existing animation
Hi sorry I have Umotion pro but I'm getting pretty frustrated with the getting started tutorials. I feel like my requirement is extremely basic - I have an existing animation sitting in my project folder on a bird and for certain keyframes I just want to stop the bird's feet from moving away from where they are on frame 4-5 for example. Also the getting started tutorial is like - "I recommend setting up IK". Well why? What's the consequence of doing it versus not? What do we do when mapping in IK isnt correctly assigned? Also I dont want to modify my existing characters in scene. For an animation beginner there's a lot of prior knowledge assumed.
Hi,
thank you very much for your support request.
I just want to stop the bird's feet from moving away from where they are on frame 4-5 for example.
You mean you want that the feet stay exactly at place? You need to pin the to the ground using IK.
Also the getting started tutorial is like - "I recommend setting up IK". Well why?
IK makes it easier for you to animate, as you can just drag the "end effector" (e.g. for the arms, you can just drag the hand to the spot you want them to be and the IK is calculating the required angles for the upper/lower arms automatically for you). When using FK instead, you would have to manually rotate the upper/lower arms until the hand is at the spot you want it to be.
Same goes for your bird's feet. If you want them to stay at the exact same spot, with FK you would have to manually adjust the rotation of the upper/lower leg bones for each frame so that the feet stay on spot. IK plus IK pinning would do that automatically for you.
What do we do when mapping in IK isnt correctly assigned?
Since your model is a generic model (and not a humanoid one), UMotion has no way to know that e.g. a leg bone is a leg as in a generic model it really could be anything. So you have to manually setup your IK chain. I recommend checking out the detailed IK video tutorial: https://www.soxware.com/umotion-manual/ProLesson2.html
Here is a video tutorial that explains what IK Pinning does and why you would use it for your feet: https://www.soxware.com/umotion-manual/ProLesson5.html
Basically IK Pinning locks the (in your case) feet at a certain world space position.
Please let me know in case you have any follow-up questions.
Best regards,
Peter

 Two Clips Editor & Pose Editor at the same time
Hi there, If it is possible to open Two Clips Editor & Pose Editor or more at the same time, It will be really awesome to make multiple character/object animation, that will be way much simple than sync will timeline/animation window, since for many time I have to close the project and re-open other character Umotion project to sync and adjust one simple animtion.
Hi Calvin,
thank you very much for sharing your idea.
I'm adding this idea to my collection of ideas that I'm looking through each time I'm starting with a new UMotion update in order to decide which features to ship next.
Best regards,
Peter
Grouping properties & Select keys on current frame with scene selection
Hi there, I have been using Umotion for two character animation for a while,
I want to know if it is any possible to grouping the animation properties and quick selection in Umotion?
for example, coding the custom menu?
also I found that I can't only make the scene selection to the current frame key,
only a button that can select all key with whole timeline.
did I missing something?
It this two problem can be solve, It will speed up the multiple character animation workflow very much,Thanks
Hi,
thank you very much for your support request.
Grouping animation properties in the clip editor is not possible. Instead I would recommend selecting the bone in the scene view which also automatically selects the animated property in the clip editor. This is the fastest way to select things.
To code a custom button for selecting something, please check out this: https://www.soxware.com/umotion-manual/UMotionAPI.html
The following methods might be especially useful for you:
static void PoseEditor.GetAllTransforms(List<Transform> transformsList)
static void PoseEditor.GetSelectedTransforms(List<Transform> transformsList)
static void PoseEditor.SetTransformIsSelected(Transform transform, bool selected)
Please let me know in case you have any follow-up questions.
Best regards,
Peter
Customer support service by UserEcho
