
 Recreate blendshape config
Hi, I have a model with 200+ BlendShapes and found the overall setup rather confusing and I think I lost some of my work. This is what i did:
- Created project and added model
- UMotion asked me what kind of blendshape setup I like, I chose "custom controller"
- Then I proceeded to animate my blendshapes happily
- However, when wanting to export the animation, a bunch of warnings surfaced, telling me that the blend shapes are not being setup correctly (not much details were given, just that).
- Then, playing around with the pose config, I accidentally deleted the custom controller that the config created upon project creation.
- After doing this, I figured that the issue could come from the constraints configuration, but now I've deleted them and I have no idea how to add them back. There's no option to do it.
- Now, i'm (1) unable to recreate the custom controller without losing work? (2) unable to fix the strange export issue.
Any ideas on (1) and (2)?
Thanks for the support.

Hi,
thank you very much for your support request.
Blend shapes are controlled via custom property constraints in "Component Property" mode: https://www.soxware.com/umotion-manual/CustomProperty.html#ComponentProperty
Automatically adding them unfortunately currently only works when creating the UMotion Project. There is currently no button to re-create them later.
If you accidentally removed the custom controller with the blend shapes assigned, you could try to restore some of the automatic back-ups UMotion created of your project file. Here is how the backup functionality works: https://www.soxware.com/umotion-manual/MenuBarFile.html (see "Restore From Backup").
Additionally I also highly recommend using a version control system (like GIT,...) to keep track of your changes and always have the possibility to roll-back in case something was accidentally messed up.
Regarding the warning you got during export, not sure exactly what this was. Please try to restore your project with the methods mentioned above and if you can reproduce the warning, please show me a screenshot so that I can further assist you.
Best regards,
Peter

 Scale curves
Hi,
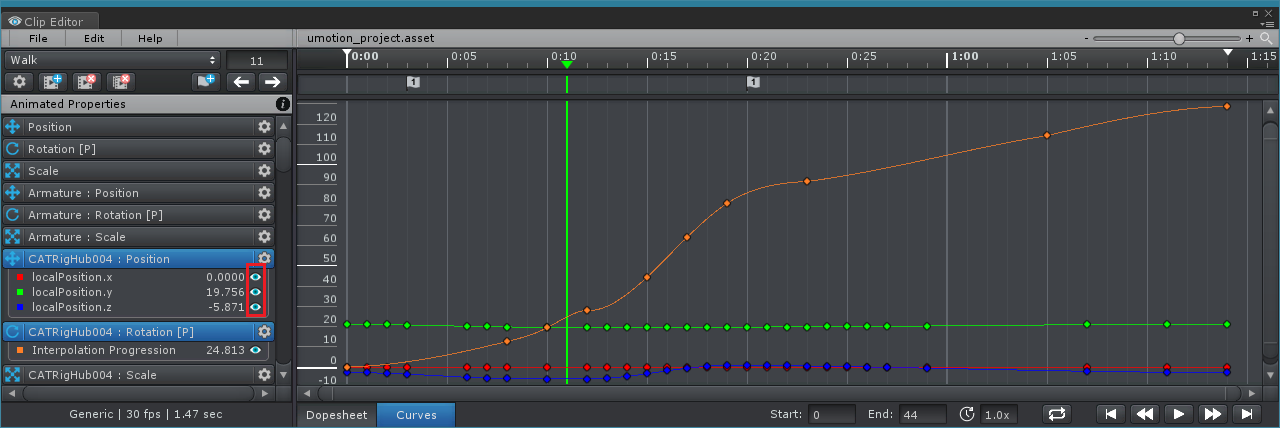
I think this is a bug. I can't seem to scale keyframes. Please see video: https://gyazo.com/3614ba87ea74ffef9ad499c90b1354d2
Thanks, Jake
Hi Jake,
thanks for your support request. To show/hide individual channels (X, Y, Z), you need to click on the eye icon. The eye icon isn't visible in your case because you need to scroll to the right (in the animated properties list).
Please let me know in case you have any follow-up questions.
Best regards,
Peter

Is there anyway to record movement from VR?
Basically I want to record VR arm movement and then fine tune it in UMotion Pro. Is there an easy way of doing this?
Hi madawe,
thank you very much for your support request. You could use this official package from Unity to record animations: https://unitytech.github.io/unity-recorder/manual/index.html This will create an *.anim file which you can then import and edit in UMotion Pro.
Please let me know in case you have any follow-up questions.
Best regards,
Peter

 Make notes or label keyframes
Hey, I think it would be a cool idea to be able to write a small note or label at the top of keyframe in the editor, that might show up in an area near the animation events. It would make it a lot easier to know which frame is which so you can copy or paste the right one without having to take the extra steps to scroll through and preview the animation first each time.
Thanks,
Leo

how to attach staff with two hands hold to an animation
I have an old man leaning to a staff with two hands. I have also an animation from Mixamo that would suite this purpose, but I need to set the staff somehow to the rig so that I could move it little bit independently, but the hands would follow. I just can't figure out how to set the the staff and hand rigs to it.
but what I actually want is that the point of the staff should stay in one place
Could you further elaborate what you mean by that?
If I try to set the staff to the root, I get a complaint that it doesn't have a bone...
For characters configured as humanoid, Unity requires that any animated object must be a child of a humanoid bone. So you would need to make your staff at least a child of the hips bone. You can then parent the two IK handles of the right and left hand to the staff so that both hands follow the staff as you move it. Please note that humanoid adds re-targeting errors to the mix, meaning that at runtime it can happen that their is a (usually small) positional offset between the hands and the staff. You do not have that issue when using generic.
Best regards,
Peter

Exported Generic Animation is incorrect
Hello - first of all, big fan of the software. Used it for a long time, still a big fan. Umotion Pro is amazing.
That said, with recent changes to Unity, I had to attempt the FBX export feature and it has errors...
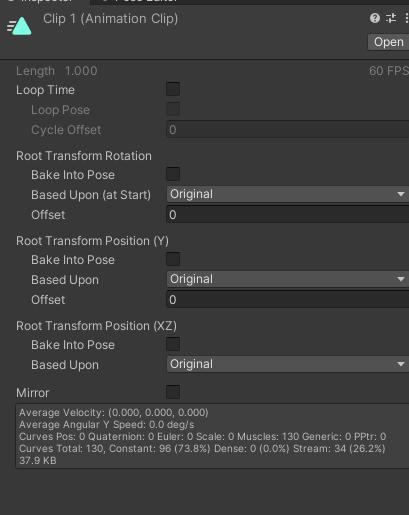
I have an issue exporting the created animation into a .FBX file though. For some reason it applies an odd off-set to the exported Generic Anim:
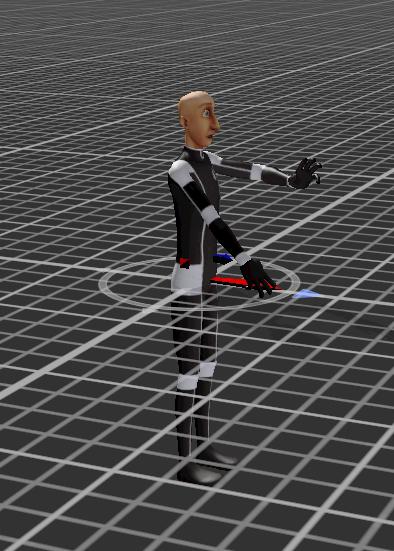
The animation as a Unity anim works correctly and plays correctly.
However when updating the .FBX file of the model, it introduces the following errors:
- the character is given a massive off-set from the ground
- the character clothes parts are moving away from the mesh.
- I am updating an existing FBX mesh file, a copy of the file originally imported and used for this animation.
The character was animated with an offset of 0.23 to left in the scene, but the Root doesn't seem to affect this behavior.
It uses a 2014 FBX binary format.
Any ideas why this is happening?
Thank you for your time.
Hi,
thank you very much for your support request.
You mentioned that you are exporting the animation into an existing FBX file. Maybe the character assigned to the UMotion Pose Editor is scaled differently than how it is scaled inside the FBX file? Because it looks like the positions of the cloth parts are off by a scaling factor.
- Have you tried to play the animation on the actual character (that is also assigned to UMotion) and see if that works
- Please also try the "Export As New File" mode?
Please let me know if that solves your issue or if you need any further assistance.
Best regards,
Peter
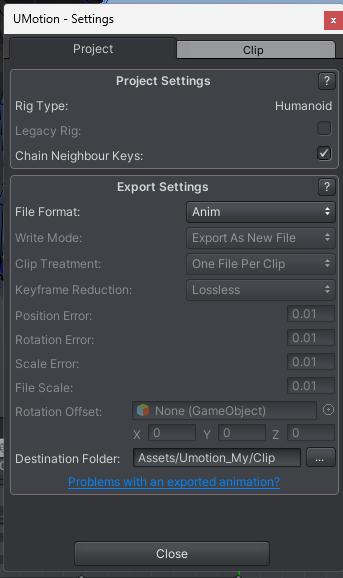
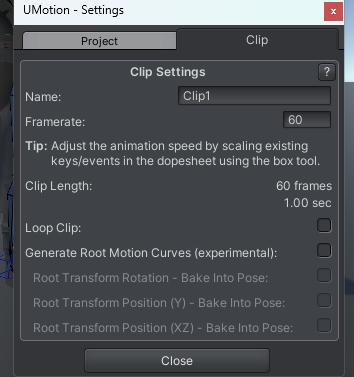
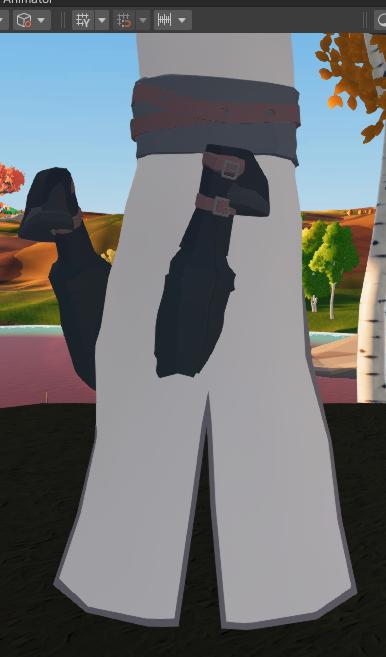
Export Anim model sink to the goround
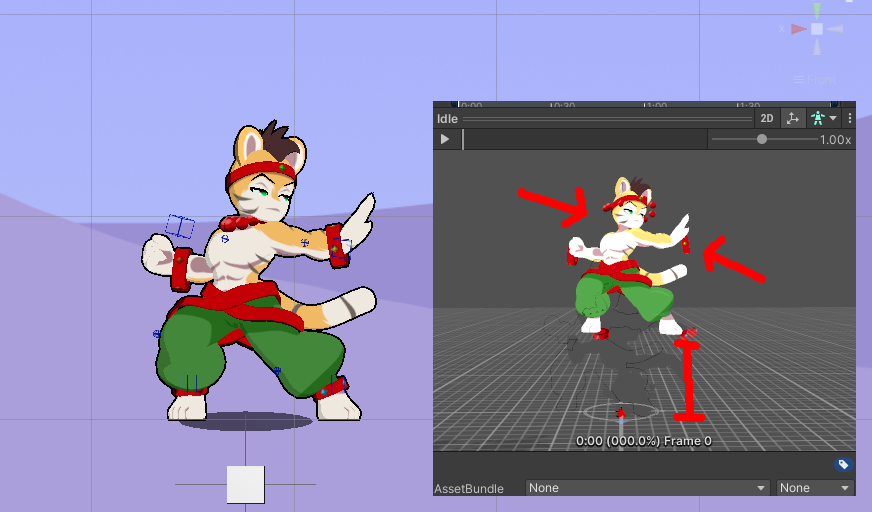
I studied the video to create a simple animation, but the model sinks into the ground in the exported animation. After importing it into my project, the character's feet move to the waist.
How can I fix this?
Hi THRoot99,
thank you very much for your support request.
Is it possible that any of the parent bones of the bone defined as "hip" in the humanoid avatar is scaled (i.e. scale.x/.y./.z != 1)? In some cases, Humanoid doesn't work well in this case. If you need to apply scaling, apply it on the root (top most) transform (i.e. the one where the Animator component is present).
Here are a few other things you could try:
- Enable the "Generate Root Motion Curves (experimental)" feature and re-export.
- Try the FBX export to see if it makes a difference. To export via FBX, you need to select your humanoid character (or a 1:1 duplication of it) as destination file. The exported animation is then inside the humanoid character's FBX file.
Please let me know if any of the above fixes your issue or if you need further assistance.
Best regards,
Peter

Importing IK Target Animations to Different Skeletons
I exported the animation of the humanoid skeleton and its subordinate IK targets. If I import it to the same skeleton, the IK target animation can be imported normally. But if I change to another skeleton, the IK target animation cannot be imported. Is there a way to solve this?
Hi Enkianssus,
thank you very much for your support request.
If your animation is of type humanoid, you can import it to any other humanoid skeleton. The UMotion IK targets you used while authoring the animation inside UMotion is not included in the exported *.anim file though. So you can not restore the UMotion IK targets on other skeletons.
Please let me know in case you have any follow-up questions.
Best regards,
Peter
Solutions for Applying Short Looping Animations to Long Clips in uMotion
Umotion doesn't seem to have the functionality to easily add a short, looping animation on top of a longer main animation clip. For example, if my main animation is a long sequence, and I want to overlay a shorter cyclic motion, I can add an addictive layer in umotion and insert my looping clip. But to make it fit the length of the main animation, I need to manually copy and paste it over and over. This makes it very tedious to modify the looping animation later on. Is there a better way to achieve this overlay of a short loop onto a long main clip in umotion?
Hi Enkianssus,
thanks for reaching out.
Unfortunately, such a feature is currently not implemented in UMotion. But I've took notes of your idea in order to consider it for future updates.
Best regards,
Peter
uMotion + Final IK: Animation Baking Only Works for IK Targets Under Skeleton
I'm using umotion and final IK together. I've noticed that if the IK target is a child object of the skeleton for the humanoid I'm currently editing, then the animation can bake properly. However, if the target is located under another object in the hierarchy, then it can't bake correctly. Is there any way to fix this?
Hi Enkianssus,
thank you very much for your support request.
This limitation is coming from Unity's Animator component. When the character is humanoid, additional generic (= non humanoid) bones can only be animated if they have a humanoid bone as parent somewhere in their hierarchy. So unfortunately there is no way to fix this, I'm sorry.
Please let me know in case you have any follow-up questions.
Best regards,
Peter
Customer support service by UserEcho
