
 just a few ideas after using umotion for awhile
hi
Peter
after using umotion for a few months now
i have a few ideas that might make your fantastic software even better
some are probably just the way i use it and dont make sense to others but i thought i would send you my thoughts
would it be possible to have a default save folder ( so if none set it would just save say in assets or assests/Umotion/Animations .etc.
making the export clip dialog box all one something like this
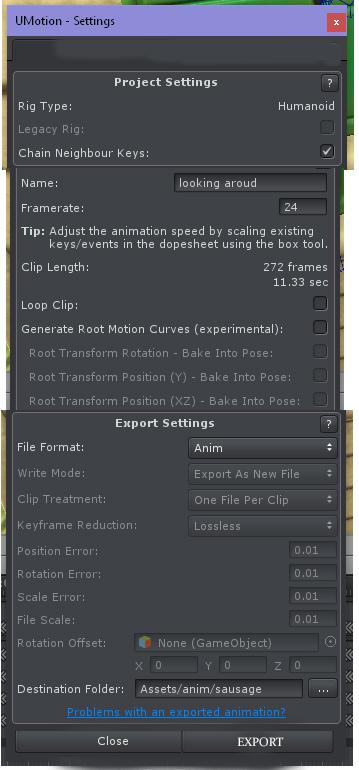
make exporting clips much easer
as i have to click the settings then close it then click export
then relise i didn't give the clip a name or set the frame rate as i wanted it?
make double click or say alt click on an item in the clip editor window highlight all frames of that parameter
like this
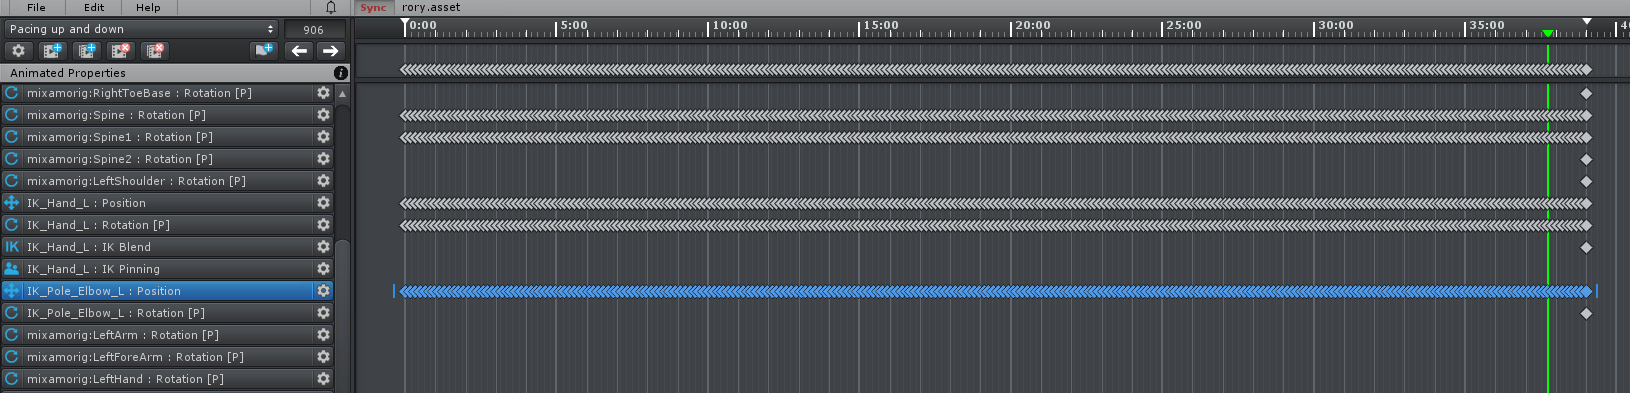
as i often want to remove all keys from something then just add some where i need them
when sycning clip in the timeline it imports the clip
but when exporting it dosn't remember where the clip was imported from
would it be possible to set that as export path
i imported a clip altered it exported it then couldn't work out why it hadnt changed then realised it had exported to a different folder than were it had imported from came from anim/walks exported to anims
( probably my fault having my clips in different folders ie anims/walks
anims/runs
anims
anims/pickups
anims/walks
etc)
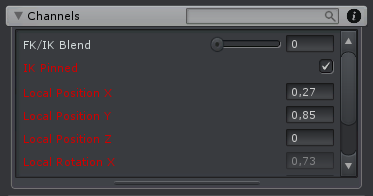
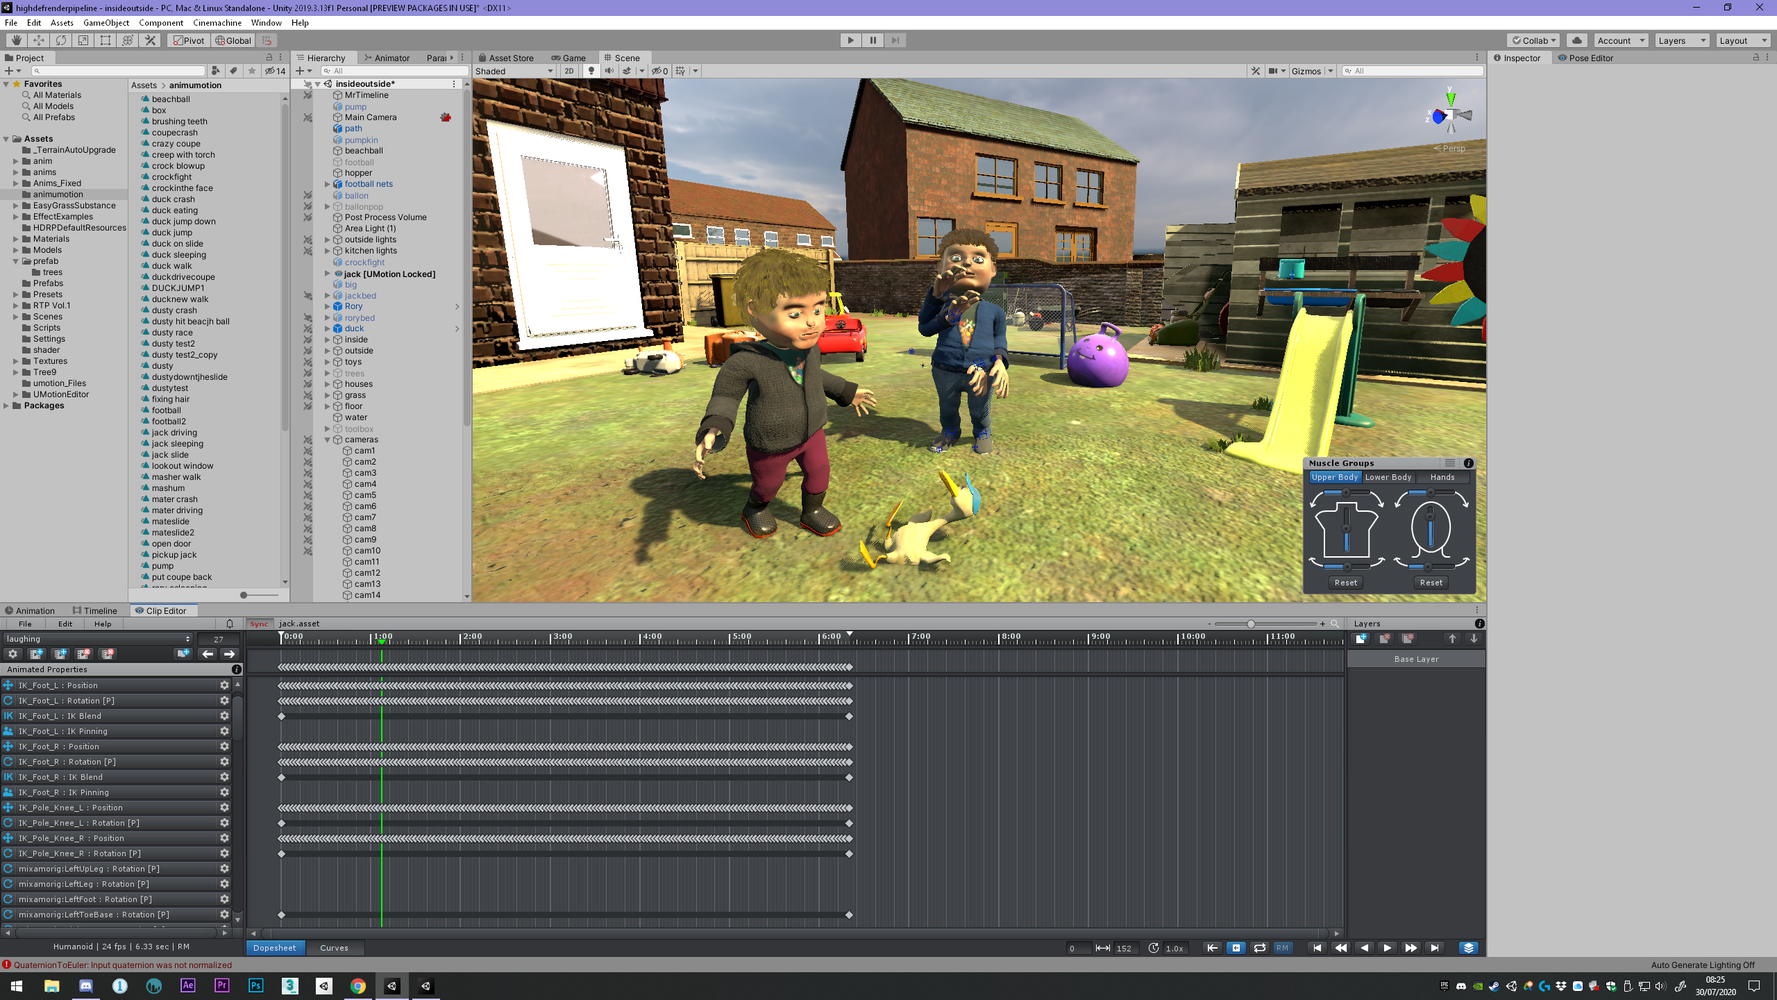
I love that you can click on muscle groups slider buttons to add a key( I love the muscle groups one of the best things about umotion)
would it be possible that when you click on the muscle group slider and or alter it. it highlighted it in the clip editor
(the same as it does if you select a bone or ik target)
as would help keep track of were your animating is going
thanks again peter for your time and great software

Hi Robin,
thank you very much for your ideas and suggestions. I really appreciate them.
- When setting the default export directory, you risk that you accidentally overwrite clips with the same name. Lets say you have two umotion project's and both have a clip named "walk" but are for two different characters. If you are not forced to set the export folder manually, it might be very easy to forget that there is already an existing clip in that folder with the same name. I could of course add a warning each time you overwrite an existing clip, but that warning might be very annoying in the default use-case (when you iterate on an animation and export it several times).
I think it's good practice to have one animation folder per character (and one UMotion project per character) so that would mean that you have to set a different export directory for each character anyway. - For selecting all keys of a property: Currently you can right-click on the property (or click the gear icon with the left mouse button) and click on "Select All". There is currently no way to assign a shortcut to this operation, I've took a note in my to-do list to either bind the double click to it (fixed) or allow to bind a custom shortcut to it.
- Yes setting the export directory to the directory of an imported clip could be useful in some situations (like when editing a timeline clip). I'll probably add a dialog during the "sync/edit clip" process that asks you if you want to do that.
- Regarding muscle groups: The selection is always synchronized between the scene view and the clip editor. So that would mean that your requested feature would also automatically select the bones in the scene view. I'm not sure if there aren't some cases in which this is not desired.
Best regards,
Peter

 Pin IK to World
I'd like to be able to pin the IK to the world so that when moving the root my IK stays in place. I would use this for a ladder climbing animation with root motion. Is this possible?
To be clear I am not asking for it to be pinned to an external object or pinned at runtime, I know this is not possible with UMotion. It should be baked down to exactly the positions it holds in the animation.
Hi Janooba,
thank you very much for your support request.
Yes this is possible. Just select the IK handle and make a check mark on the "IK Pinned" channel:
Before using the IK Pinning feature, please follow the following two video tutorials (there are some special cases you need to be aware of):
Please let me know in case you have any follow-up quetions.
Best regards,
Peter

 Preview window problem
Hi, I really like Umotion Pro. I am using Unity 2019.3.13f1. it seems like I can not preview animation in the preview window when a umotion project is loaded. The preview window works fine if I close Umotion pro but this mean I have to close Umotion Pro every time I want to preview animation in unity. I am cleaning a huge mocap library and It would be so much easier if you could still preview animation without closing the project in between each animation preview. Thanks for your help!
Hi,
thank you very much for sending me all the requested repo project and also the video.
The good news is (at least for me :-) ), this problem is independent of UMotion. The bad news is, it's a Unity bug:
The problem happens if you use the animation preview window as a separate floating window and have the Inspector window in the background. When you then select an animation clip, it will only play the number of frames the previous selected animation clip had (where the inspector window has still been visible). If you then bring the inspector window to the front again the animation clip plays in full length. That's why you thought it's UMotion's fault as the Pose Editor window was the window that was hiding the Inspector in your case.
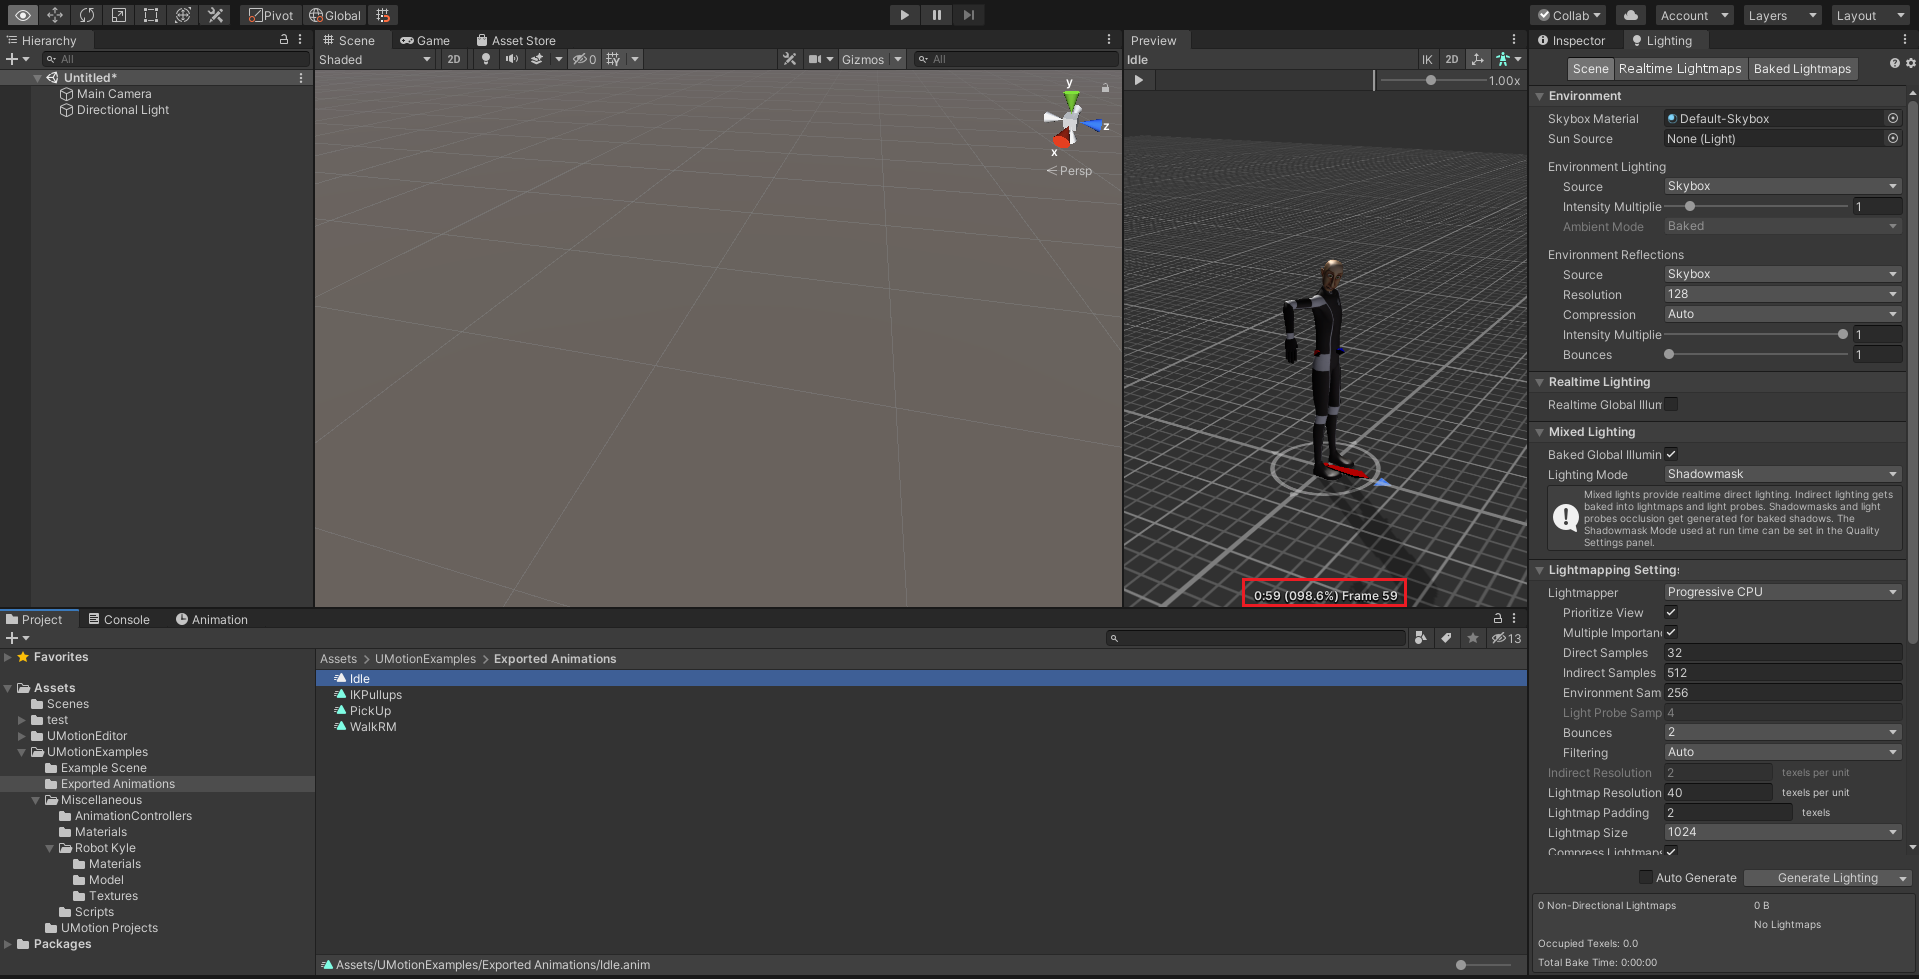
You may want to report this as a bug to Unity (maybe there is already a fix in newer versions of Unity). As a workaround you just ensure that the Inspector stays open (or open it whenever you change the previewed animation).
Please let me know in case you have any follow-up questions.
Best regards,
Peter
sync timeline edit selected clip
hi peter
i have just recently found the excellent sync timeline feature this is just what i needed
i'm having a problem probably something i'm doing wrong
i load a umoution file in the clip editor
i then select the timeline highlight the clip i want to edit
then in umotion click sync edit selected clip all great it asks if i want to import the clip
when i then move the play head i have two of my characters ?
any idea what i;m doing wrong thanks for your time
Hi Robin,
thank you very much for sending me the new package.
You are right, the activation track was causing the issue. I've implemented a fix in UMotion V1.22p08 (currently pending for the asset store review, should be available in the next one or two days).
Thanks for reporting and I'm sorry for the inconvenience.
Best regards,
Peter

The exported animation does not look like that display in clip editor
I am using Umotion to creat the humanoid hands animations, how ever the exported animation does not look like that in clip editor, please look below pictures compared.
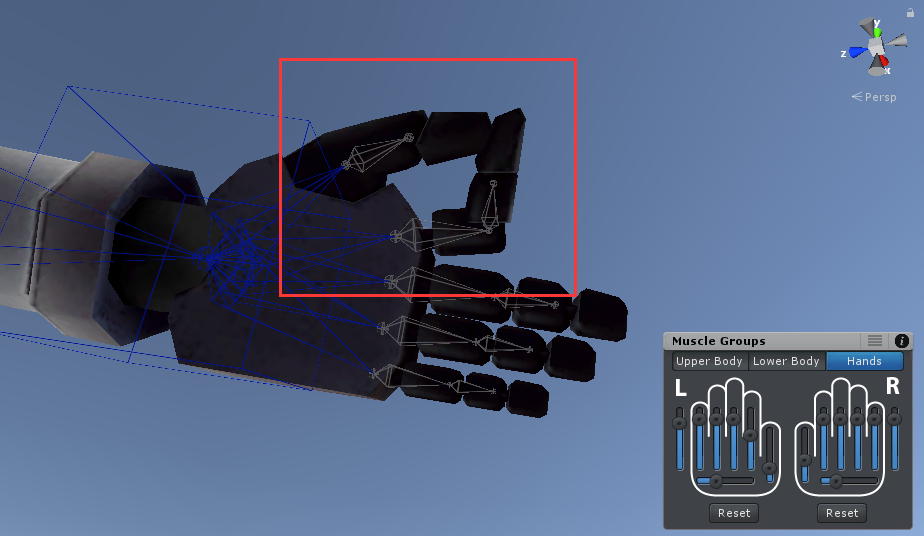
1 In clip editor
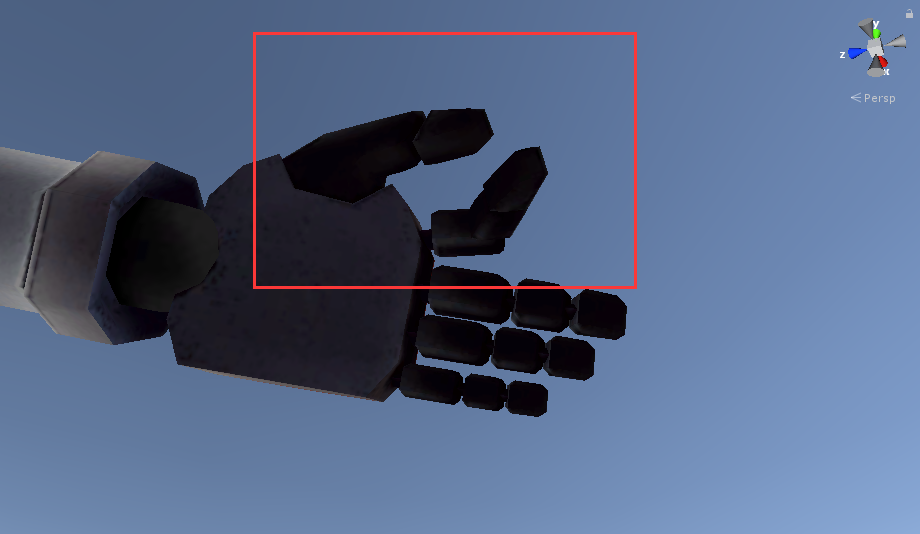
2 Exported animation
Hi,
thank you very much for your support request.
This is an expected side effect of Unity's "humanoid" animation system. Animations stored in the humanoid format implement what's called "animation re-targeting". This is a clever algorithm that tries to fit an animation created for character A to look "quite the same" when played on character B (regular animations can only be played on the character they have been created for). Even if you play a humanoid animation on it's original character the re-targeting algorithm is still applied (--> the animation is still only going to look quite the same, but not 100%). Usually the differences are barely visible for players.
If you want that level of precision shown in your screenshots, I highly recommend to use "generic" instead. A "generic" animation is played 1:1 on the character it has been created for (but can not be played on other characters).
Here is a in-depth article about "humanoid": https://blogs.unity3d.com/2014/05/26/mecanim-humanoids/
Please let me know in case you have any follow-up questions.
Best regards,
Peter
Mirror posture doesn't mirror middle bone such as head, neck, chest etc
When I select every bones and copy to the other side, it only mirror hand and leg, but it doesn't mirror my middle bones such as chest, spine, hip, head and neck bones. Please consider adding this feature as it can save a lot of work. Thank you.
Hi,
thank you very much for sharing your idea.
I think this is a good idea and I'm going to consider implementing this in an update.
Please let me know in case you have any follow-up questions.
Best regards,
Peter

Different position on play mode
Hi!
I try to change sitting position ofthe character. When I try to change it in the play mode - characters position is different:
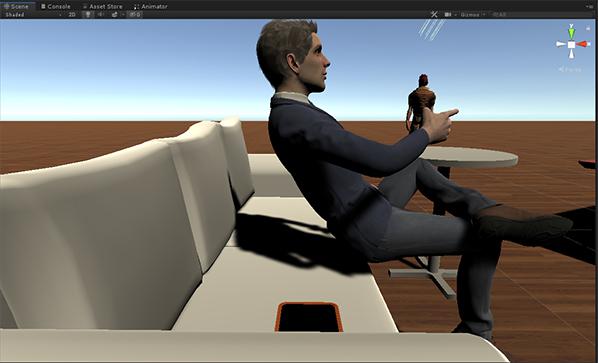
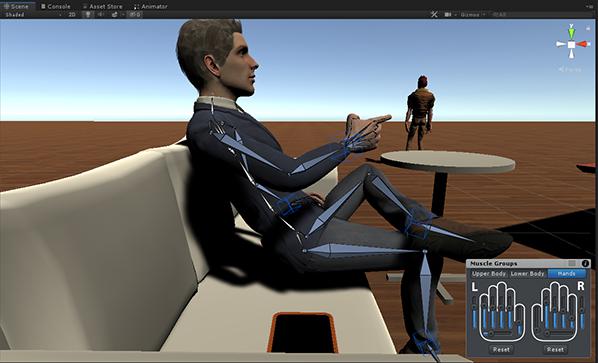
Can you tell me what I'm doing wrong?
Hi,
thank you very much for your support request.
Looks like the root motion settings aren't configured in the way you want them to be. Select the exported animation clip (in Unity's project window). The inspector window is then showing you all the root motion settings:
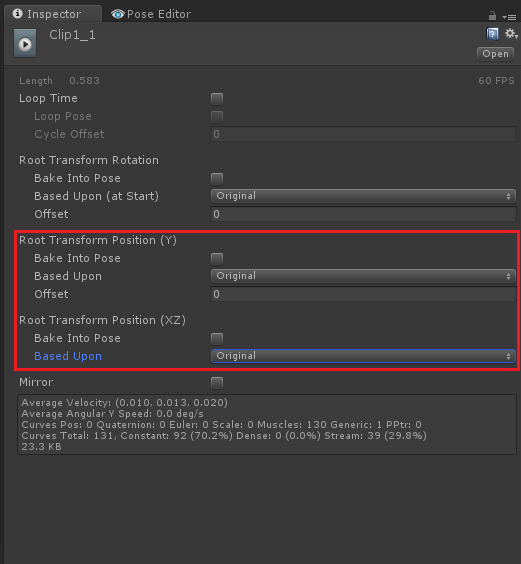
In your screenshot it looks like the "Root Transform Position (XZ)" is set to "Center of Mass". Set it to "Original" instead (this is going to take the XZ position from your animation clip). Depending on your situation, you might also consider using "Bake Into Pose". Please check out the Unity manual to learn more about each of this settings: https://docs.unity3d.com/Manual/RootMotion.html
Please let me know in case you have any follow up questions.
Best regards,
Peter
IK Twists bones while FK does not, but can not modify FK
Hi,
As the title states, when using IK it causes the shoulder bones to twist during the animation, while if I leave it on FK, then the bones are not twisting.
I would like to modify this animation slightly, but given the twisting when trying to use IK, it doesn't appear that I am able to since FK isn't letting me modify all of the transforms?
No Twist:
https://gfycat.com/hauntingthoughtfulalpinegoat
Twist:
Hi,
thank you very much for your support request.
You can control the twist (i.e. the pole rotation) using the pole handle (the wired sphere near the elbow). In the gif you can see that the pole handle orbits around the arm causing it to twist. If you keep the pole handle at the desired place, there should be no twisting happening.
Please let me know in case you have any follow-up questions.
Best regards,
Peter

Error when opening projects
Hi there,
for a few days now I could not open Animation Projects. I always get this error.
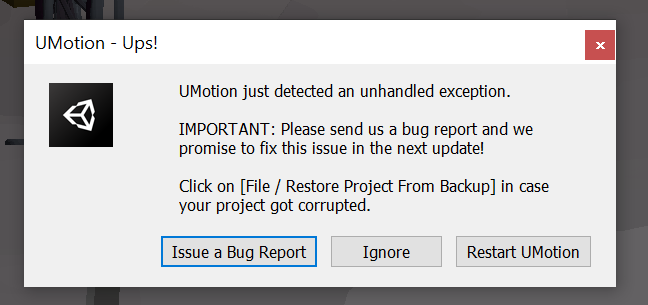
This happens on different project files, not just one. The File - Restore Project from Backup is greyed out. "Ignore" doesn't work, I have to click it many times until I can work again and then everything is bugged. Restarting doesn't work either. So I thought I'd report this bug here :-)
What can I do?
Best,
Jens

[FEATURE REQUEST] Noise additive channel
I've been using UMotion for around a year now and I love it. It's intuitive, the additive and override layers are super useful for adding slight changes to existing animations and the widgets for moving groups of bones (spine, fingers, ...) is without a doubt top notch.
One thing that I find myself doing a lot is creating a "character pose" that looks good and then add an additive layer on top to slightly modify the different bones to add breathing, fingers twitching, etc... Basically a simple way to add idle poses and more organic cycles.
Would you consider adding some sort of Perlin noise modifier for additive layers? So we can add noise to each bone individually.
If you do, here's some thoughts about how to do it: One could select the range of frames at which to apply the noise to a bone/bones. Then, a window appears and you can preview the result, allowing you to modify the strength, speed and magnitude of the noise. Once you click apply, the noise is baked onto each frame of the range. What I am not sure about doing is making so that the end of the frame should match the beginning position, so it's easier to make loopable animations.
Also, inside the options, it would be cool to have access to the "seed" of the perlin noise and being able to apply an offset. That way, one could animate a breathing, while using the same seed, but slightly offsetting it to make the arms follow up the animation a bit behind.
Thanks and have a great week!
Hi Martina,
thank you very much for your detailed feature request. I really appreciate how much thought you've already put into this.
I've added this to my "ideas for the future" list where I collect all ideas so that I can consider them when creating new UMotion versions. At the moment though, my focus is mainly on smaller quality of life improvements and stability improvements of existing features/workflows.
Please let me know in case you have any follow-up questions.
Best regards,
Peter
Customer support service by UserEcho
