
 Parenting to root doesn't match tutorial.
I'm following the tutorial at
However even though my custom IK handle is parented to the root object it still moves with the body.
What am I missing?

Hi,
sorry for overseeing your attached video in the first place. That explains your situation very well.
When you're using the IK setup wizard for setting up IK, it automatically set's it up with respect to IK pinning. That means the IK targets by default move with the rig, if you then select the IK target and enable the "IK Pinned" checkbox in the "Channels" view, the IK target is pinned to world space:
If you setup your IK targets manually and you want them to always be world locked, you shouldn't have chosen "Root" as parent bone (which is counter intuitively the bone used as "hips" in the robot kyle humanoid setup). As of instead you need to choose "Robot Kyle" which really is the root of the character (you need to remove the Child-Of constraint/disable IK Pinning before doing this).
Please let me know in case you have any follow-up questions.
Best regards,
Peter
 Tutorial on setting up non-humanoid IK?
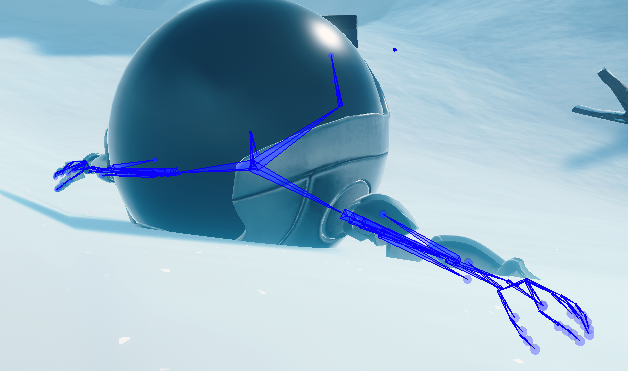
I've been using UMotion Pro without any issues with a humanoid character and IK. However, I've got a flying robot that has humanoid-like arms that I want to animate with IK, but I'm having trouble getting this setup in UMotion. It seems that all of the tutorials relating to IK are for humanoids. Is there any tutorial/information on setting up a non-humanoid?

Hi,
thank you very much for your support request.
You can setup the IK constraints manually (the "IK setup wizard" is a shortcut for setting up humanoid IK). How to setup the IK constraint manually is covered in the second part of the IK video tutorial (starting at 2:36). While demonstrated on a humanoid character, the workflow is the same for non-humanoid characters.
Let me know in case you get stuck, I'm happy to assist you.
PS: I highly recommend that you only use 2 bones in your IK chain (the upper arm and the lower arm). This gives you max. artistic control over the IK bone chain.
Best regards,
Peter
 macro
macro
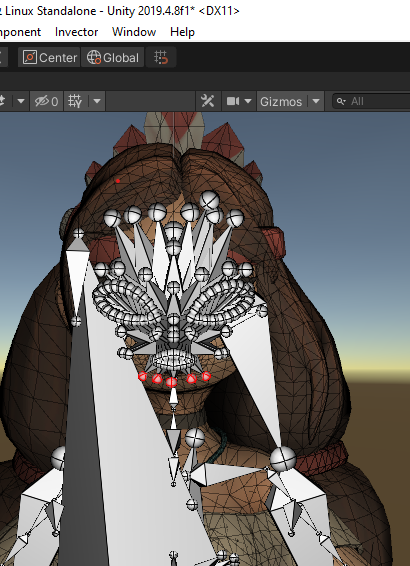
I have a model with a facial rig and cloth and body bones.
my problem is that in order to move e.g. the lower eyelid I have to select tons of bones. Adding to the complication is the fact that there are 3 entries in the clip editor for each bone. this prevents me from just marking a group let's say for movement. It would be great to be able to create groups to be able to move them together when needed.and to be able to filter bones displayed by
a) rotation/scale/position
b) groupID
There should be a 1:n relation between bones and groups
also an IK hierarchy within a group specified ba maybe giving them an order number ?

Hi,
thank you very much for sharing your idea.
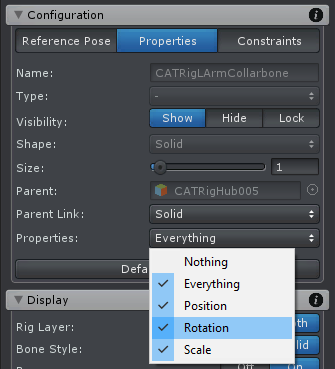
One thing that is already implemented might help you in your current situation: You can disable position/rotation/scale properties individually for each bone in config mode. That way you can greatly reduce the length of the animated property list. Open config mode, select the bones you want to edit. Then in the "Properties" tab use the "Properties" field to deselect properties that should be disabled. For example for traditional bones that are only meant to rotate, you can disable the scale and position properties getting list down by two thirds.
Filtering the animated properties list is a commonly requested feature and is something I plan to implement in a future version but currently have no ETA. Group selection might be very useful in your specific situation, but might probably be not as valuable for the brought audience so I've took a note on my ideas for the future list but with low priority. Reducing the length of the list with the trick mentioned above should already make it easier for you to group select in the animated properties list. Hope this helps.
Please let me know in case you have any follow-up questions.
PS: You can also configure the appearance of the individual bones in config mode, making it easier to select them in the scene view window.
Best regards,
Peter

 Calling function with ENUM parameter in an animation event
Any chance there could be enum parameter support for animation event calling in the future?

Hi Jason,
thank you very much for your support request.
I honestly wasn't aware that enum parameters are now supported by Unity's animation events (I think it was not back in the days when I first implemented animation events into UMotion). Thanks for the hint. Yes I think this would make a lot of sense, thus I've added an entry on my to-do list to be implemented in one of the next updates (I can't estimate the ETA yet, though).
Please let me know in case you have any follow-up questions.
Best regards,
Peter

 FPS animations
Hi
can you create a video tutorial for weapon reload with all of UM pro
features like IK and child constraint then editing those reload clip for
another weapon .
I wanna create fps animations and I'm interested if with UM Pro can create and edit fps animations easy and fast .

Hi,
thank you very much for your support request.
Unfortunately I currently don't have plans to create a dedicated video tutorial for gun reloading. But there are already plenty of resources available that teach you all the basics you need. Here is a collection of already existing resources related to this topic:
Please note that this video tutorial is not using IK as it was meant for UMotion Community users. Using IK instead is fairly easy though (instead of rotating every single bone, you would just move the IK target around). The quick start video tutorial gives you a quick introduction in how to use IK, the dedicated IK video tutorial covers all the details.
Support requests related to this topic:
https://support.soxware.com/communities/1/topics/100-two-handed-animations-for-gun
When doing something like a reload animation, just setup a child-of constraint for the magazine. When the hand grabs the magazine, use the magazine's child-of constraint to make the IK target of the hand the parent of the magazine (then it automatically moves with the hand).
Please let me know in case you have any follow-up questions.
Best regards,
Peter
 Is it possible to export the clip between the playback in and out point?
Umotion Pro user here...
Is it possible to export the clip between the playback in and out point?
I have these really long clips and I'd like to export several smaller clips from the longer clips-
For example can I just export what is between the in/out points here ?
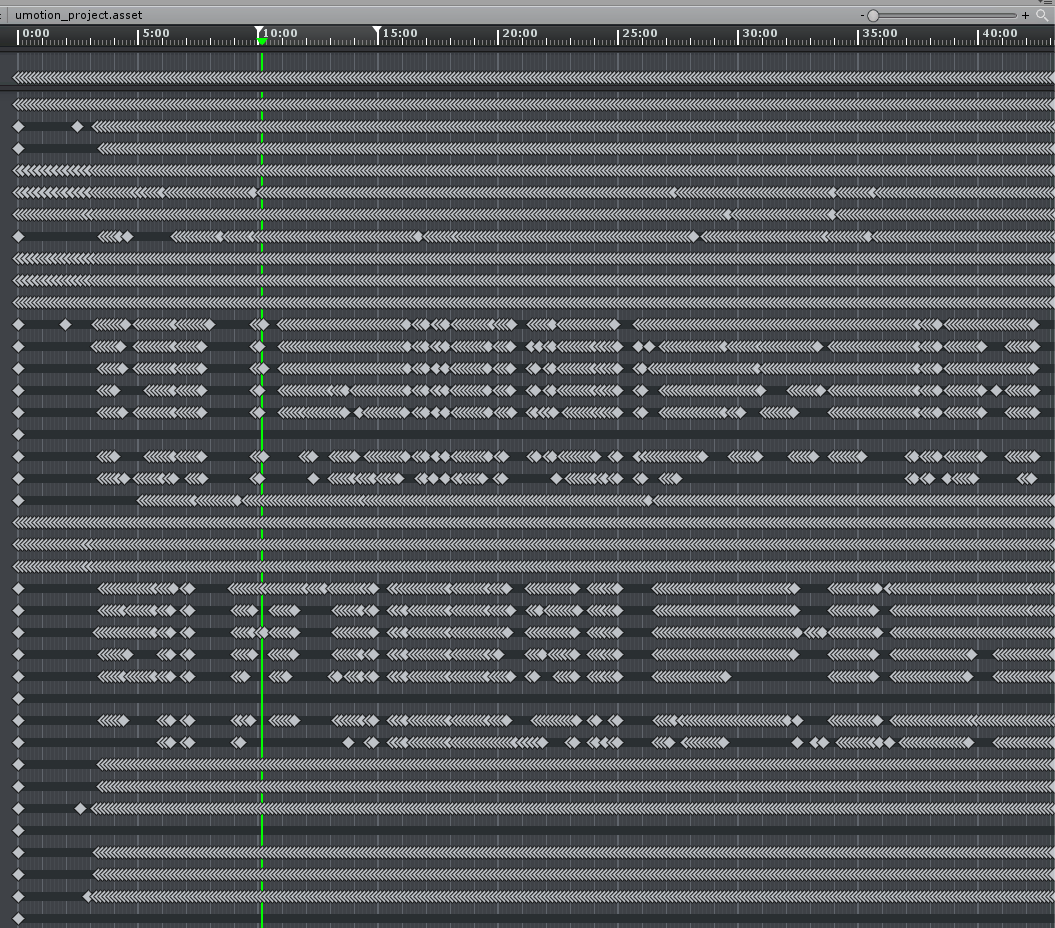
The only way I was able to sort of accomplish this was to "crop to playback" then export but then I have to re-import the original clip and do it again which makes it a very slow process-
Is there a way to do this already? If not I'd like to request this feature.
Thank you for your time.

Hi
thank you very much for your support request.
You are right, "Crop to playback" is currently the only UMotion built-in way to achieve this. But instead of re-importing the animation clip every time, you can just duplicate it several times using this button:
This might make your workflow a little bit faster.
Btw. Unity also has a nice built-in way to split animations. Select your source animation (this only works for *.fbx or similar, not for *.anim though) and in the inspector window open the "Animation" tab. There you can create new animation clips. Via the start/end time you can define which part of the source animation should be taken in your newly created animation clip: https://docs.unity3d.com/560/Documentation/Manual/Splittinganimations.html
Please let me know in case you have any follow-up questions.
Best regards,
Peter

 humanoid rig makes fingertip bones dissapear
Hi,
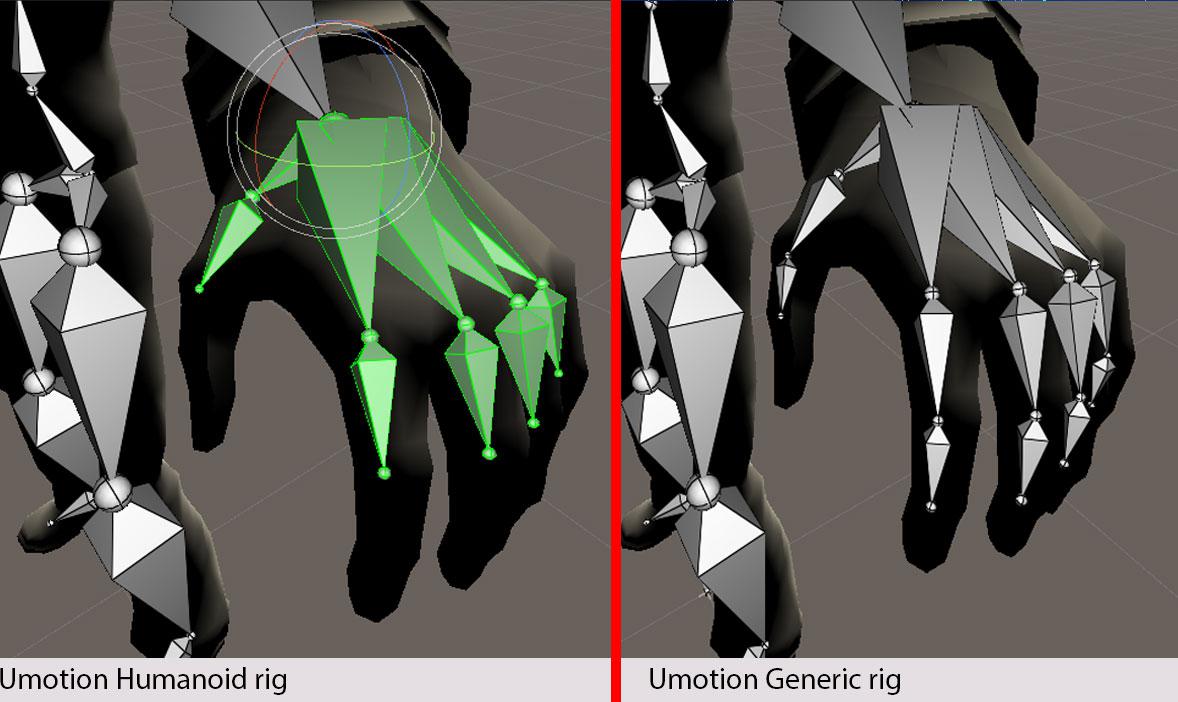
I am exporting a normal bone system with a character geo mesh from 3ds max to Unity, but when i convert it from Generic Rig to humanoid and drag the character into the pose editor, the finger tip bones disappear for some odd reason.
What gives?
Any help on the matter, would be greatly appreciated.
Regards
Kenneth

Hi,
thank you very much for your support request.
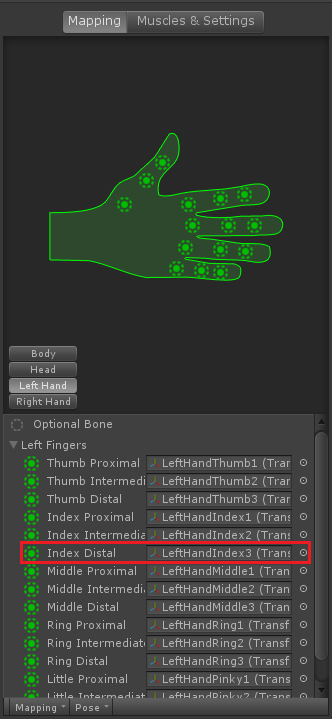
Please check your humanoid avatar configuration (select your character model's source file in Unity's project window, then in the Inspector click on "Rig" and then on "Configure..."). Then click on "Left Hand"/"Right Hand" and check if the correct bones are assigned for the "Distal" finger bones:
After you've made your corrections, I recommend creating a new humanoid UMotion project to have your character correctly setup. You can import your old project in case you want to keep animations you've authored there.
Please let me know in case you have any follow-up questions.
Best regards,
Peter
 Chain length
Hello,
By using UMotion Pro i am trying to animate a xenomorph with a tail made out of 20 bones but when i try to create the tail IK i can only add 10 bones max to the chain length. Is this the upper limit for the chain length and how do i extend it to fit my character?
You mention in one of your video tutorials that you will do a tutorial about Custom IK (generic character). Is that out yet and if so can you please provide the link?
thanks

Hi,
thank you very much for your support request.
Your request is very similar to another one I received in the past so I'm linking my answer here: https://support.soxware.com/communities/1/topics/529-tail-bones-weight#comment-691
As mentioned in my answer linked above, the IK solver's primary use-case is for 2 bone IK situations. More than 10 bones is unfortunately not a use case the solver has been designed for and is thus not supported. Please note that you can of course extend UMotion with any 3rd party (or custom written) IK solvers specifically made for tails using UMotion's callback system. More information can be found in the manual at "Pose Editor / Options / Extending UMotion".
If you have any further questions, don't hesitate to comment in this thread.
Best regards,
Peter
 Expose Pole Target transform for Unity Animation Rigging
Hi,
I'm using an IK constraint from the Unity Animation Rigging Package to do some runtime stuff. Currently I'm animating two Pole targets, the one that is created in UMotion when using the IK wizard but isn't visible in the inspector outside of UMotion and the pole target that I added myself.
My idea is to somehow combine both, e.g. when using the humanoid IK in the IK wizard an option to select an existing transform as pole target.

Hi,
thank you very much for your support request.
This is already possible. Create your pole target transform outside of UMotion (by adding GameObjects to the Hierarchy of your character). Then in the IK constraint of UMotion, select the just created transforms as pole targets.
The IK video tutorial goes in-depth with the IK constraint:
Please let me know in case you have any follow-up questions.
Best regards,
Peter

 animation is different in the preview mode and the edit mode
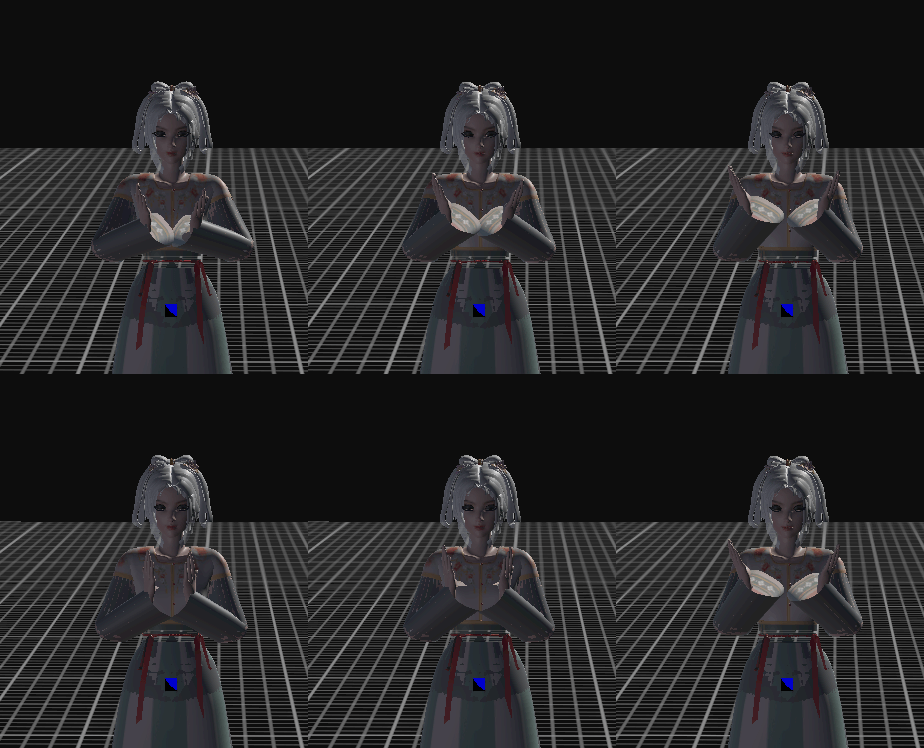
Hi, Peter, I found an animation seems to be different in the inspector preview and in UMotion clip editor.
in Unity inspector
when being edited in UMotion Clip editor
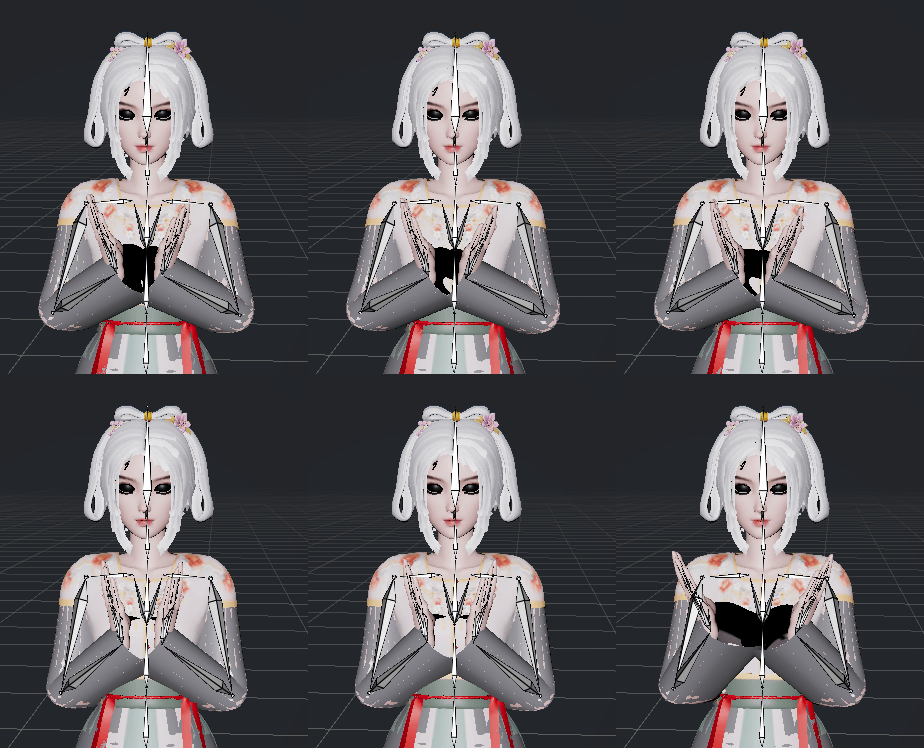
The distance between the hands is different, what may be the reason for that? Thank you.

Hi,
thank you very much for your support request.
Try toggle the "IK" button shown in the preview window. Humanoid is a "lossy" animation format (like jpeg is a lossy image format). That means that the end-result is always expected to have small differences. If you aim for animations that are precisely equal to the authored version, use generic instead (it is the lossless format, similar to how bmp is a lossless image format). Humanoid has the advantage of being capable of playing an animation on different characters (at the expense of animation quality).
More information about humanoid (it also explains the IK feature mentioned above): https://blogs.unity3d.com/2014/05/26/mecanim-humanoids/
Please let me know in case you have any follow-up questions.
Best regards,
Peter
Customer support service by UserEcho
