
 Automatic Renaming on imported clips
When importing multiple clips, it'd be nice to have an automatic rename choice. Most of the Mixamo-animations will have the .FBX with the animation name, but the animation clip is named mixamo.com. As of now, when importing animations with the same name, it'll be overwritted by the next one imported. Having an option with "Rename" > "name of fbx", "numeric" or similar would massivly speed up the process.

Fixed in UMotion V1.22p09 (currently pending asset store review, should be available in the next one or two days).
Thanks for reporting.
Best regards,
Peter

 Disable Transform/ Object in Rig Hierarchy
Hi!
Is it possible to remove Transforms or Objects from the Rig Hierarchy in Config Mode after setting up the character?
To further explain: Basically I have been working for a long time for the animations of a character. Midway through the process we updated the rig to include a facial fig. I updated the Umotion project, it created new references for the new objects in Config Mode, after some adjusting it seemed fine. We decided to animate the face seperate and not in Umotion. I thought I could still just leave them in the project but I am running into a weird problem now. A lot of the animations I have to mirror after the export. Those mirrored animations have messed up rotations for face joints even though there were never any keyframes set for them in the Umotion project. SO basically I wanted to know if there is a way to remove transforms from the Umotion project.
Thank you!
Hi,
thank you very much for your support request.
In case the bones/transforms do not exist anymore (on the actual character model), UMotion will show a "Cleanup" button in config mode. When pressed, it is going to remove all bones/transforms that can't be found in the character model anymore.
In case your character model still has the bones, you can't remove them completely from the UMotion project but you can tell UMotion to ignore them. Therefore, open config mode and select the bone/transform(s) you want to ignore. Then in the "Properties" tab set "Visibility" to "Lock". UMotion now won't show these bones/transforms in the scene view and animated properties list. Furthermore the bones are not included in the exported animation file.
Please let me know in case you have any follow-up questions.
Best regards,
Peter

Change Humanoid FP Arms in runtime...Help?
I am checking to make sure that I am using the proper tool to accomplish my desired result...
I am using UMOTION Pro and have create Humanoid FP Arms from A Humanoid Character using the FPS Mesh Tool Asset...
I am also using the Ultimate Character Controller and the DEMO animator that comes with that asset...
I don't like the way the arms end up looking in runtime and want to adjust the look...
I have to go into run time as the arms don't show until i pick up a sword...
once i do that the arms (left and right) do appear but i want to change the way they bend and such..(also the right hand is holding the melee sword)
is UMOTION Pro the right tool?
I have studied the first video In Practice as it shows FPS and a gun...is this the right direction to go?
The big difference is the arms you use are generic and my arms are humanoid and not sure if that throws a wrench in to the woks?
Can you help me please?
Hi renel,
thank you very much for your support request.
Yes with UMotion you can animate humanoid animations (also generic/legacy animations). You can use UMotion also when pausing the game (this might be interesting in your situation, if you want to first pick up a sword in your game). With UMotion Community (free) you can create new animations and with UMotion Pro you can create new ones or edit existing ones.
As a starting point, check out the quick start video tutorial first:
This video might also go into your direction:
The FPS video tutorial is also a good starting point, yes.
I have to go into run time as the arms don't show until i pick up a sword...
You can check the "Hierarchy" window to see what model has been created for the arms. You can copy it and then paste it outside of play mode (then you can also animate it when not playing the game).
My tip: Use UMotion Community to check if you are able to create a new very basic animation for your hands. If that works, you can use UMotion Pro to edit your existing animations.
In case you have any questions/issues, don't hesitate to ask.
Best regards,
Peter

Rootmotion????
Hi developer, my problem is uMotion no longer supports exporting fbx and root motion. I used to just export my fbx but now the animations look way off after export, I don't really care about rootmotion but it seems like I need it?
So what can I do? Can I get an older version of uMotion that still supports fbx and rootmotion like it used to? am I simply missing something, cos my animations don't look anywhere close to right when I export them, whats the point of having FBX as an option when the animations no longer work like they did in older versions?
I don't want to use anim as export as it adds 6MB per anim to the build, I just want my animations exported as fbx, I dont care about rootmotion but enabling the "Generate Root Curves" option while exporting as anim is the only way that the anims export properly....
Thanks
Alex

UMotion projects get corrupted multiple times a day
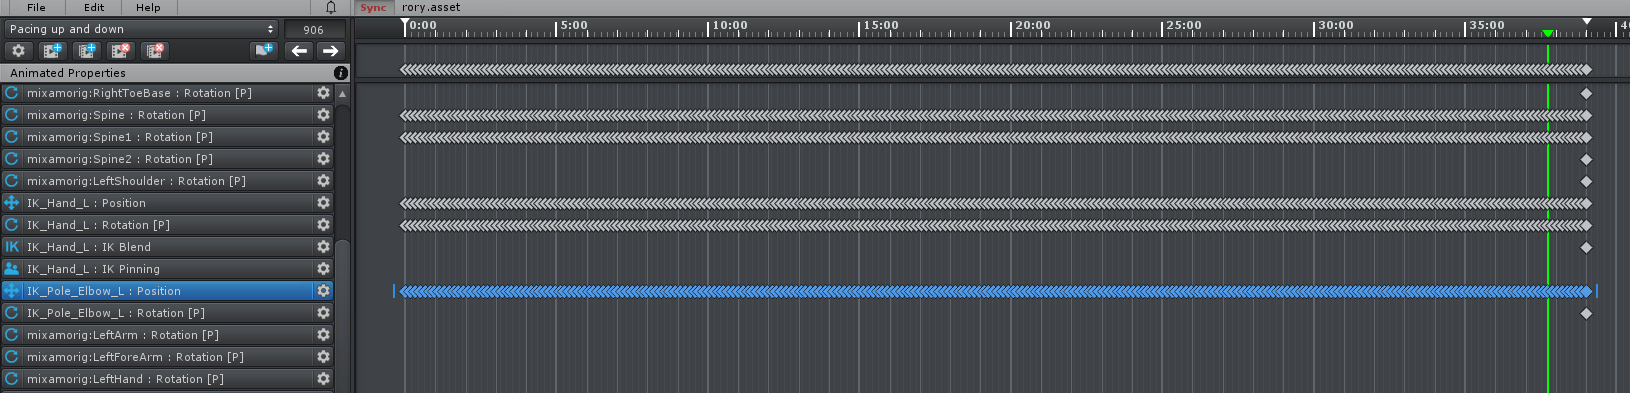
I've been working with UMotion about the past week and a half, and multiple times each day my project gets corrupted, causing me to have to revert work I have done and redo it. Most often these corruptions lead the transforms for joints to apparently get disconnected from the joints themselves. The position and rotation controls when a joint is selected are offset from the joint itself, and moving them does not move the joint, but rather just the outline of an unknown cube shape. See video here: https://streamable.com/lhje74
Additionally, these corruptions sometimes cause UMotion to crash repeatedly (clicking the button to relaunch UMotion causes it to relaunch and then immediately crash indefinitely), and sometimes Unity as a whole to crash (trying to open UMotion's Clip Editor window causes Unity to crash every time until I revert to a prior commit).
There are two of us working on animations with UMotion. The other member of my team never has these issues, although we are doing roughly the same kind of work.
An example of steps that led to such corruption:
- Import clip into UMotionInteractions
- Rename clip
- Add Additive layer
- Set positions of fingers
- Set initial keyframes for fingers and hands
- Move playhead to new position
- Select IK_Hand_R : Position
Which my teammate says are steps he has taken tens or hundreds of times with no problem.

Pose looks different in clip editor
Firstly, Awesome asset!
My characters pose is different in the clip editor
Here is my aim animation

Here is the same animation imported to clip editor
This is the same for most of my animations
I know I could just move the right arm out a bit in this pose but I was hoping the imported animations would be the exact same so I would just need to do minimal edits
Hi,
thank you very much for your support request.
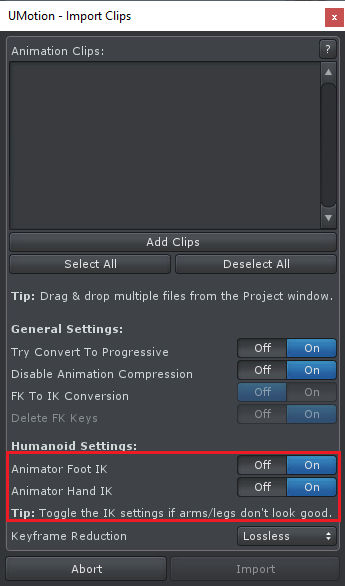
Is your animation of type "humanoid"? UMotion can import "humanoid" animations in two ways, with applied humanoid's corrective Animator IK applied or without. The humanoid IK tries to match the hand/feet position the original animation was using (see this blog post to learn more; headline "Original hands and feet position"). When you play an animation in Unity it doesn't use "humanoid IK" by default while UMotion imports them with enabled "humanoid IK" by default.
Try to re-import your animation and disable IK for your hand this time:
Please let me know in case you have any follow-up questions.
Best regards,
Peter
Hi Robin,
thank you very much for your support request.
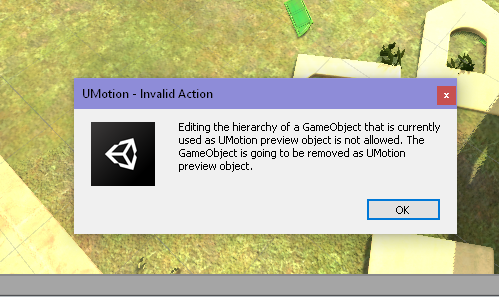
When you assign a character/object to UMotion's Pose Editor, UMotion occupies the object for itself. If you want to edit the character/object outside of UMotion, click on the "Clear" button in the Pose Editor so that UMotion set's your character/object free again.
This error message just says that UMotion set your object free automatically.
Please let me know in case you have any follow-up questions.
Best regards,
Peter
Does it work with Puppet3D?
I read somewhere that people were having problems to use umotion to animate rigged models from Puppet3D. Do they work together?
Hi,
thank you very much for your support request.
UMotion has no official support for Puppet 3D, you can try it if you want but I can't promise anything. For rigging characters, I would recommend using Mixamo (a free service for auto-rigging characters). For rigging non-biped characters or objects, I recommend using a 3D modeling application (like Blender). Rigging is very easy in those applications.
Please let me know in case you have any follow-up questions.
Best regards,
Peter
Layer masks or importing masked clips?
Good day
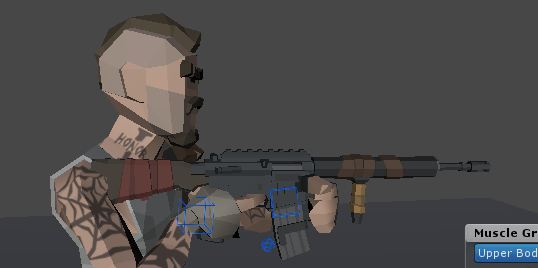
I have a UMotion Pro question. In Unity, I have created an Animator and used layer masks to combine two separate animations (one for the lower body and one weapon attack that only uses the arms and torso). Now I want to edit the resulting combined animation in UMotion (there is some clipping in the attack animation).
Is there a way to have avatar layer masks on the UMotion layers?
Alternatively, is there a way to import the clips in such a way that they are appropriately masked?
I know I should be able to copy only the keyframes I need, but I'm finding this quite challenging.
Hi,
thank you very much for your support request.
Using the mask in the import settings in Unity might work (haven't tried that myself yet).
How I usually approach this:
- Importing both (not-masked) clips into UMotion.
- Open the upper body animation (the attack animation in your case) and select all keys (CTRL + A) and copy them (CTRL + C)
- Open the lower body animation (your base animation).
- Create a new animation layer of type "override".
- Set the frame cursor to frame 0 and paste your keys (CTRL + V).
- Now go through the animated properties list and remove the keys of the animated properties of the lower body bones.
Pro Tip: Hold CTRL while selecting all the animated properties (you want to mask), then right click on a selected animated property and click on "Select All" to select all keys of all the selected animated properties at once.
Let me know if you have any follow-up questions.
Best regards,
Peter

 just a few ideas after using umotion for awhile
hi
Peter
after using umotion for a few months now
i have a few ideas that might make your fantastic software even better
some are probably just the way i use it and dont make sense to others but i thought i would send you my thoughts
would it be possible to have a default save folder ( so if none set it would just save say in assets or assests/Umotion/Animations .etc.
making the export clip dialog box all one something like this
make exporting clips much easer
as i have to click the settings then close it then click export
then relise i didn't give the clip a name or set the frame rate as i wanted it?
make double click or say alt click on an item in the clip editor window highlight all frames of that parameter
like this
as i often want to remove all keys from something then just add some where i need them
when sycning clip in the timeline it imports the clip
but when exporting it dosn't remember where the clip was imported from
would it be possible to set that as export path
i imported a clip altered it exported it then couldn't work out why it hadnt changed then realised it had exported to a different folder than were it had imported from came from anim/walks exported to anims
( probably my fault having my clips in different folders ie anims/walks
anims/runs
anims
anims/pickups
anims/walks
etc)
I love that you can click on muscle groups slider buttons to add a key( I love the muscle groups one of the best things about umotion)
would it be possible that when you click on the muscle group slider and or alter it. it highlighted it in the clip editor
(the same as it does if you select a bone or ik target)
as would help keep track of were your animating is going
thanks again peter for your time and great software
Hi Robin,
thank you very much for your ideas and suggestions. I really appreciate them.
- When setting the default export directory, you risk that you accidentally overwrite clips with the same name. Lets say you have two umotion project's and both have a clip named "walk" but are for two different characters. If you are not forced to set the export folder manually, it might be very easy to forget that there is already an existing clip in that folder with the same name. I could of course add a warning each time you overwrite an existing clip, but that warning might be very annoying in the default use-case (when you iterate on an animation and export it several times).
I think it's good practice to have one animation folder per character (and one UMotion project per character) so that would mean that you have to set a different export directory for each character anyway. - For selecting all keys of a property: Currently you can right-click on the property (or click the gear icon with the left mouse button) and click on "Select All". There is currently no way to assign a shortcut to this operation, I've took a note in my to-do list to either bind the double click to it (fixed) or allow to bind a custom shortcut to it.
- Yes setting the export directory to the directory of an imported clip could be useful in some situations (like when editing a timeline clip). I'll probably add a dialog during the "sync/edit clip" process that asks you if you want to do that.
- Regarding muscle groups: The selection is always synchronized between the scene view and the clip editor. So that would mean that your requested feature would also automatically select the bones in the scene view. I'm not sure if there aren't some cases in which this is not desired.
Best regards,
Peter
Customer support service by UserEcho
