
 Animations override
So, i discovered a problem with mixamo, earlier i was trying to make the animation works when exporting,but the problem is, when using "update existing one" the first animation exported from mixamo seems to override the umotion one, even if it's just a t-pose, if i try to delete the bones before exporting from umotion, a warning "mixamo:hips" appear, so i don't see any solution at all to my problem, should i delete all key frames of the mixamo rig animation before exporting? how do i prevent the first animation to override the umotion one without messing up the rig?

Hi,
thank you very much for your support request.
When you export to an FBX file (using "update existing one") it either adds a new animation clip to the existing FBX file or if there is already an animation clip with the same name present in the FBX file, it overwrites that one. That's how it works on a FBX file level. Then the Unity importer comes into place importing this FBX file. It considers all the animation clips that exist in your FBX file as one large combined animation clip. You can then define which section of this "combined" animation clip you want to import as a separate animation clip defined by a start and end frame. So chances are, that the start/end frame in your import settings aren't correct (thus you're getting parts of a different animations mixed together).
For more information about how the animation import works in Unity, please checkout the related Unity manual chapter: https://docs.unity3d.com/Manual/class-AnimationClip.html#ClipProperties
If this doesn't help you solve your issue, please show me a video of what you're trying to do step-by-step. Then I get a much deeper insight into your issue and can provide a less generic answer.
Best regards,
Peter

Timeline Sync EditClip
Hi,
I would like to modify Walking animation in Timeline to get downward.
As you see the attached video, the character moves down only at the frame which has modified keys.
How can I keep the modified offset between those frames?
Regards,
Scott Hong
Hi Scott,
thank you very much for your support request.
How does the position curve of the hips of your character look like? Maybe you haven't offset the position of all key frames of the hips (that's why it jumps back at some frames). You can use the curves view to easily adjust multiple keys at a time. Tip: Use the eye icon shown in the animated properties list view to hide all but the Y curve.
Btw. if you want to add offsets to an existing animation that has a lot of key frames (e.g. a mocap animation), instead of having to offsetting each key frame manually, you can use an additive animation layer to add an offset curve on top of the existing animation. Please check out the animation layer chapter in the manual for more information. There is also a video tutorial in which I'm using this feature in practical use-cases:
Please let me know in case you have any follow-up questions.
Best regards,
Peter
invisible fbx
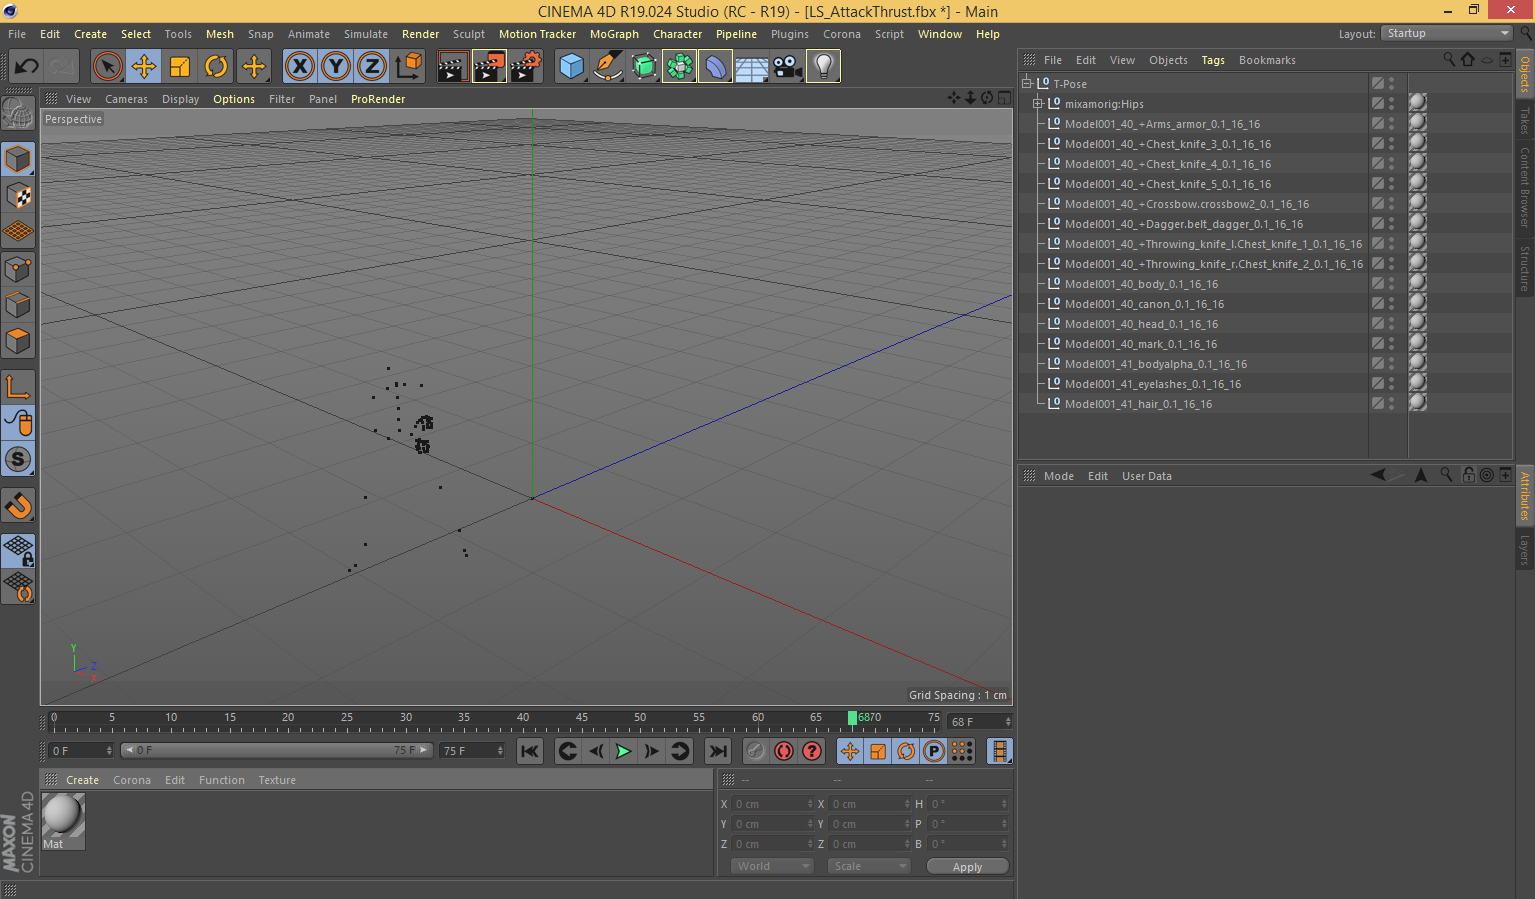
i create an rig using mixamo and imported (humanoid) i edited some animation clips using the rig as game object and everything looks fine, but when i export to .fbx (tried ascii and binary) my character are invisible, i can see the animation because there are little dots in the cinema 4d preview, but my character are not visible. i tried to change to "Update existing one" but then, the animation don't play and the character stay in t-pose forever
Cinema 4d view:
Hi,
thank you very much for your support request.
Exporting as a fresh FBX file does only include the rig and the animation (not the mesh), that's intended. If you want to export your animation together with the mesh, then you have to use the "Update Existing File" mode and select your character's FBX file as destination file.
You mentioned that you've already did that, please verify that your settings are correct (e.g. that you've really selected your character's FBX file as destination file). Also check if there are any warning/error messages shown in the export log window. Before importing the FBX into an external modeling application, you can verify if the animation was added correctly to the character's FBX file in Unity. If the animation shows correctly in Unity, then the issue must be related to the import settings of your 3D modeling application.
For more information, you can also take a look at the related chapter in the manual (simply press on the question mark button in the export settings window to open the related manual page). You might also want to check out the FAQ section in the manual.
Please let me know in case you need some further assistance.
Best regards,
Peter

FK to IK conversion twists skin
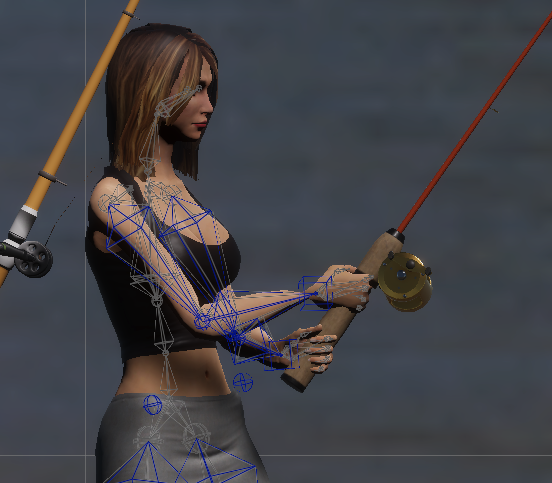
When I use the Edit/FK to IK conversion it twists the skin of my character. See the right hand below.
Before conversion
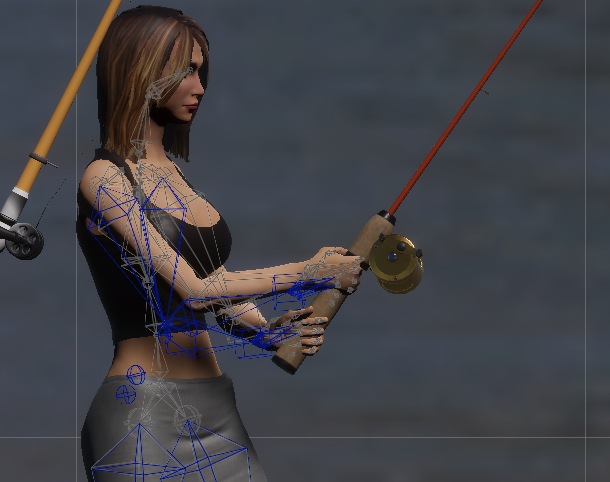
After conversion
I have tried to fix this by adjusting hand rotation, and elbow position and rotation (although the rotation doesn't seem to do anything?) and nothing works.
Any help would be appreciated.
Thanks
Hi Elsiehar,
thank you very much for your support request.
This might be an issue with how the IK is setup. Please try the following:
- Creat a new UMotion project
- Assign your character
- Open config mode and make sure that your character is in a T-Pose (standing straight, both arms stretched to the side). If it is not, you might want to try pressing the "Apply Bind Pose" button. If that doesn't help either, you can also manually rotate the bones. Once you fixed the pose, click on the "Save Reference Pose" button. For more information about config mode, see this video tutorial).
- Execute the IK setup wizard.
- Import your animation and convert it to IK again.
Does this fix your issue? If not, please send me your character, the animation you are importing and the related umotion project file as a *.unitypackage via the email support form (or request a link to my dropbox via said email form if file size is too big). That way I can make further investigations.
Best regards,
Peter
Keyframes locked
I'm probably missing something easy but I can't figure out how to move keyframes in the timeline as shown in this video at 3:15. When I try to drag&drop a keyframe it doesn't move. Thanks for helping out!

Thanks for posting the video.
Your UMotion version is very dated. Please try to update to the latest version from the asset store which should be V1.25p03 as of the time of writing.
Please let me know if you need any further assistance.
Best regards,
Peter

Need help for an IK move
Hi,
I have serious difficulty applying an IK move.
I just one foot locked and all the body including the hips (root) move around it.
However, I couldn't unlock hip and move with other IK parts
Can you help me about this?
Hi Fatih,
thank you very much for your support request.
I'm not 100% sure I understand your question so I'm giving you some general information in the hope that it answers your question:
IK pinning a foot means that it's IK target stays at the current world space position. So even when you move the hips, the pinned foot stays in place. When you un-pin the foot, it again moves with the hips.
If your hips move when you move your foot, then you have made something wrong when creating your character (as that would mean that the hips are a child of the foot and not the other way around).
For more information regarding IK pinning, you might want to watch the IK pinning video tutorial:
Does that answer your question, if not, please show me a video or explain in further detail what problem you have. I would be happy to help.
Best regards,
Peter

animate speedtree model
I've created a speedtree plant model consisting of several branches, each with its own bone. But if I try to use UMotion to animate it as a generic model, I only get position, scale and rotation parameters for the whole model. No bones are assigned for the branches. What am I doing wrong? Thanks.
Hi Peter. Thanks for the speedy response. On further testing, it now seems that the problem lies with Speedtree. When I export the tree as an .st model specifically for Unity, the rig is missing and there is no option to include it. However, when I export as an .fbx model, I have the option of including bones. And voila, the rig is imported and can be configured for animation with UMotion. Thanks for your help!

Modify an existing rig to align bones with the skinned mesh?
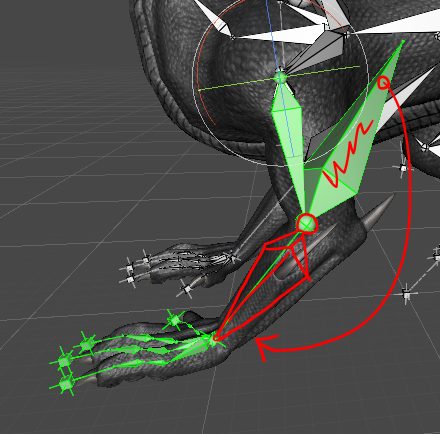
I got a free dragon rig specifically to play with Umotion.
It had some issues and I had to move some points in the hierarchy to connect the feet to the legs (Otherwise it didn't work at all) but now the bones making the connection between leg and foot all face the wrong way. Can these bones be rotated and aligned with the mesh in Umotion or do I need to redo the rig in a modeling software? (I don't think Mixamo will work as its not humanoid, is that right?)
Also I have seen mention in posts that new bones can be added in Umotion but without skinning. Is there a video tutorial for this?
Thanks.
Hi,
thank you very much for your support request.
In UMotion bones are always oriented in such a way, that they point to the next child joint in the hierarchy. You can not rotate the visual representation of the bone in UMotion. If you want to make adjustments to your rig (like adding new bones, adjusting vertex weights, etc.) you have to use a 3D modeling software in order to do so. But that doesn't mean that you have to redo the whole rigging, it's enough to make the adjustments that you want. Mixamo only works with human like chracters, yes.
Yes you can add new "helper" bones that are not binded to the mesh of your character in UMotion. There are also a few settings related to the visualization of bones/transforms that can be useful to get a cleaner looking rig. Both is explained in this video tutorial:
Please let me know in case you have any follow-up questions.
Best regards,
Peter

Export Humanoid Animation to FBX has wrong head facing direction and twisted fingers.
Hi, I'm not sure what I did wrong here. So basically I've tried to create some humanoid animation clips in UMotion, and noticed the exported result in FBX format has some issues.
As long as the body and head facing starts to turn to a different direction other than directly aligned with character's Z axis, the exported result in FBX format will have a wrong head facing direction and twisted fingers.
I've tried my own models, the official models from Unity (Ethan and Ellen), and the Robot Kyle model came with UMotion asset. They all have the same issues.
However, when exported into Anim format, the result looks fine. But I don't wanna use Anim format because I'd love to recut the clips in my final project.
Here are the screen shots of the issue:
1. the original clip in UMotion Clip Editor
2. when exported to anim format, everything looks fine
3. when exported to FBX format, the head is not facing the correct direction
4. and the fingers on right hand looks twisted, they're supposed to held together like a not so tight fist.
So I'm not sure what I did wrong here. Please advice. I did use the original Robot Kelly model came with UMotion. I created IK with direction aligned with character Z axis. I tried with root motion and without it. Nothing works.
Please advice. Thx
Hi,
thank you very much for your support request.
Please make sure to use the "Update Existing File" write mode in your export settings in UMotion. Then select the original robot kyle fbx file as destination file.
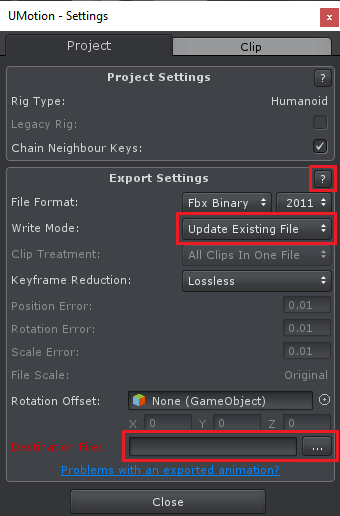
This is going to export your animation directly into the FBX file of your robot kyle character. I highly recommend using this export mode whenever you are using the humanoid animation system as it ensures that the animation uses the correct humanoid avatar.
Please let me know if that works for you.
Best regards,
Peter

Exported FBX missing model and bones
I exported my model into an FBX file and I just got a mess of empty objects with no models, with each object animation being separated by action. The model is generic and was built in blender, but I added on some empty game objects to the object before I animated it, changing the object hierarchy, and the object the animator was originally on.
Is there anyway to fix this model so it exports like a normal object?
Hi MrK,
thank you very much for your support request.
I guess you've exported the animation with the "Export As New File" mode. This is going to generate an fresh FBX file that only contains the skeleton and the animation. If you want to export your animation together with the mesh of your animated 3D model, use the "Update Existing File" write mode. This mode is also especially recommended when you are using your animation together with Unity's humanoid animation system!
In the "Update Existing File" mode, you select the FBX file of your 3D model (or a duplicated version of it) as destination file. The animation is then written into the existing FBX file (now containing your animation and the mesh of the 3D model).

For more information about all the export settings, click on the "?" button to jump to the related section in the manual.
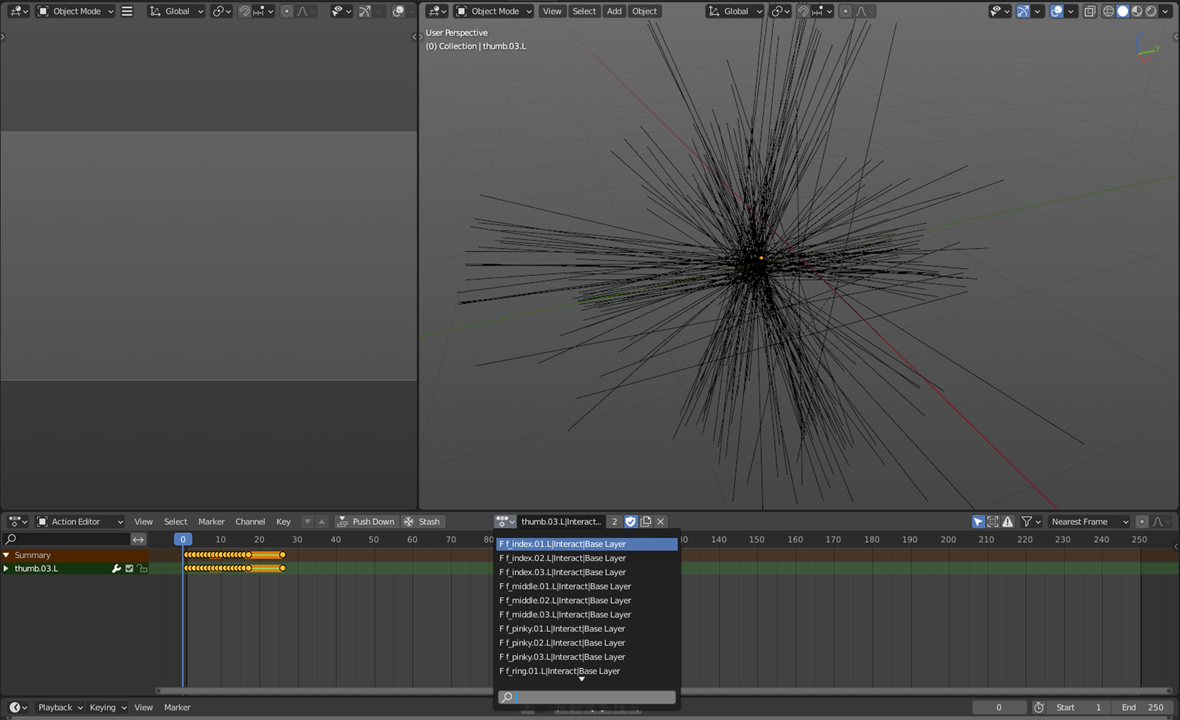
Please also check out this support request that was related to importing an FBX animation into Blender: https://support.soxware.com/en/communities/1/topics/808-fbx-files-from-unity-to-blender
Please let me know in case you have any follow-up questions.
Best regards,
Peter
Customer support service by UserEcho
