
 Editing the hierachy of a GameObject that is currently used as UMotion preview object is not allowed.
Hi, my issue is the same as the one in this link https://www.support.soxware.com/en/communities/1/topics/677-editing-the-hierachy-of-a-gameobject but there were no solutions.
I have tested the file here and the problem still persists.

 Foot IK Behaviour in uMotion
Hi,
I'm trying to understand the differences between the way uMotion manages animations in relation to feet position and the vanilla Unity system. This question is not specifically about uMotion IK system, but rather a more general point including root motion and unity "foot IK" setting. Apologies as I'm sure this behaviour is explained somewhere in the video tutorials, but I can't quite link this to any of the features explained there.
From the comparison I have made below, it seems that uMotion adds a "foot IK" of sorts in the exported animation even when the IK constraints have not been created in uMotion. I say "of sorts" because the behaviour is slightly different:
- #2: feet are "pinned" (despite no IK in either uMotion or Animator state) but the left thigh make a jerky rotaion movement
- #3: feet are floating (as expected as no "foot IK" is selected in Animator state)
- #4: feet are pinned (as "foot IK" in animator state is selected) with a smooth thigh rotation
The basic problem here is that uMotion produces a jerky rotation of the thigh in the exported animation that is not present in the uMotion editor animation. But in addition to trying to resolve this issue, I would also like to understand how uMotion manages the addition of a "foot IK" behaviour in the vanilla setting export.
#1 - Animation in uMotion editor
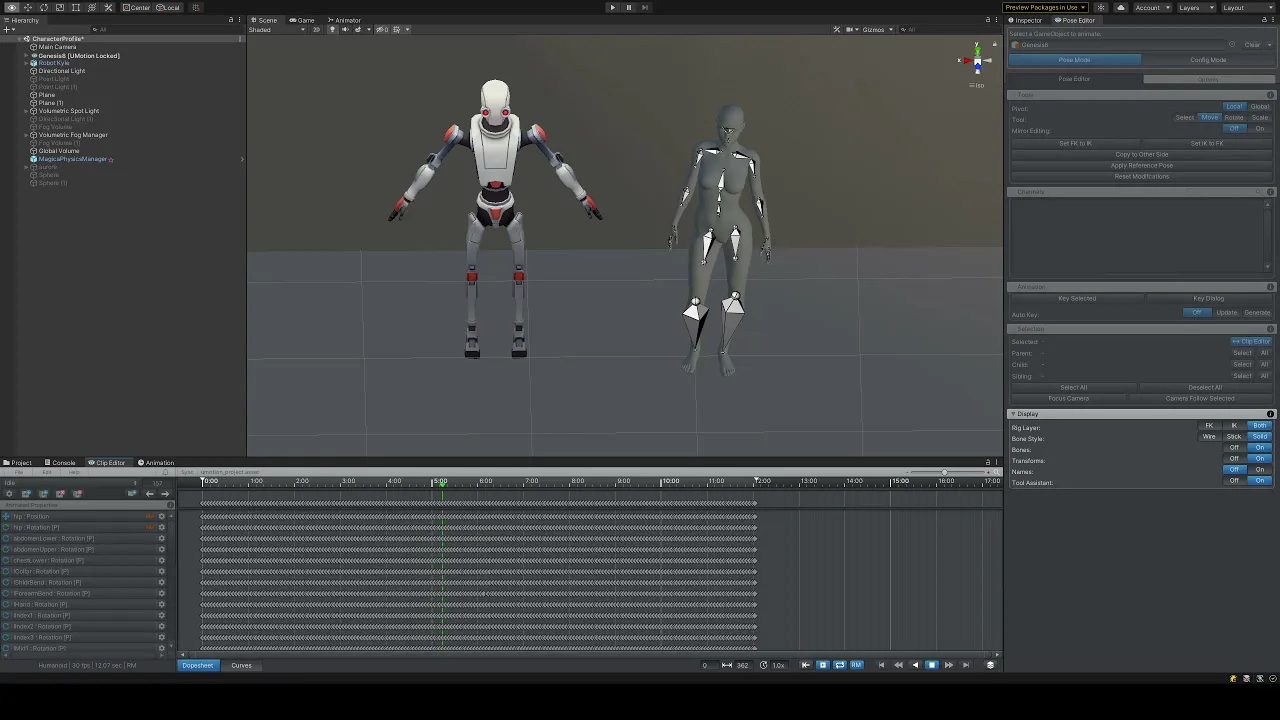
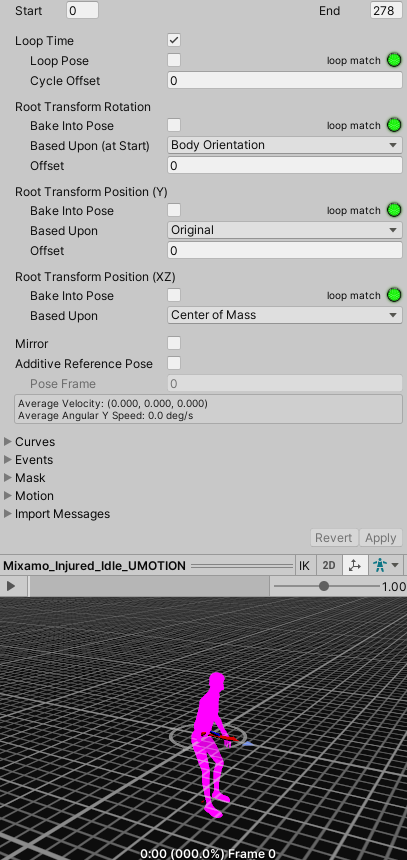
#2 - Exported in-game animation

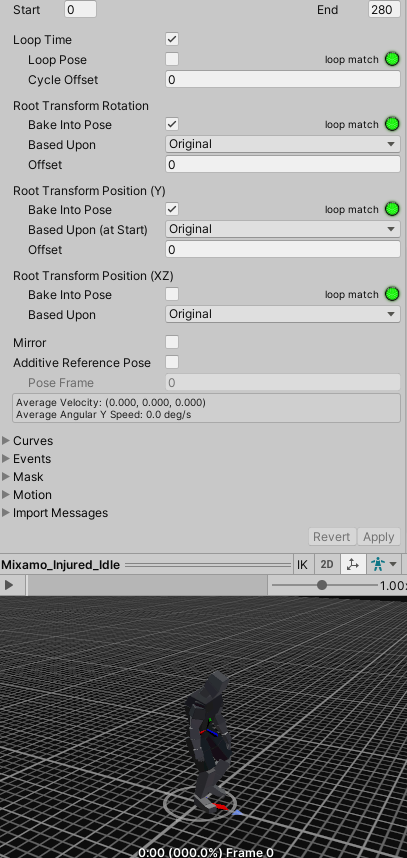
#3 - Original animation without Foot IK

#4 - Original animation with Foot IK

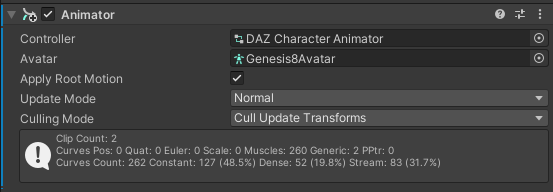
Settings
Character settings
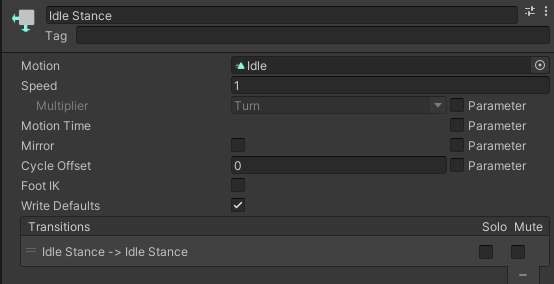
Animator state settings (note: foot IK is enabled in the 4th sample above)
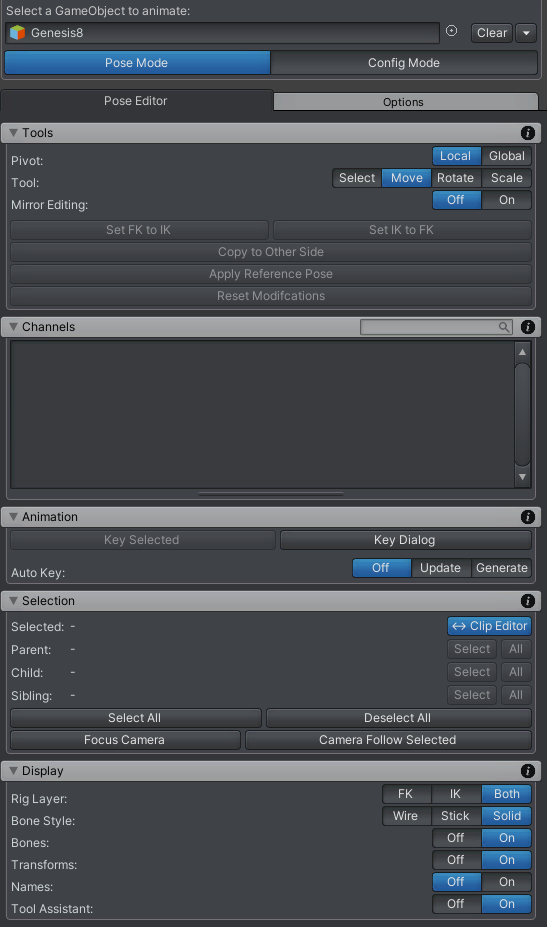
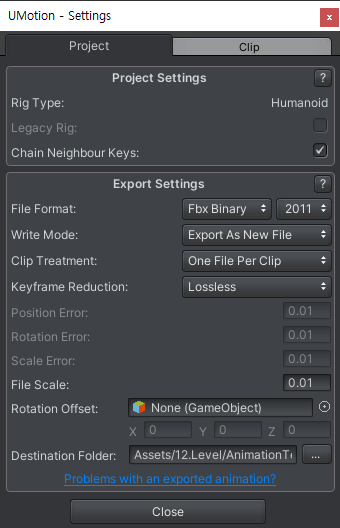
uMotion Settings

Import blender humanoid
I have a mesh that I modified in Wings3d that I pulled into Blender and rigged with Rigify humanoid with face and fingers.
I also use the Blender Rigify to Unity option. I export as fbx and import to Unity.
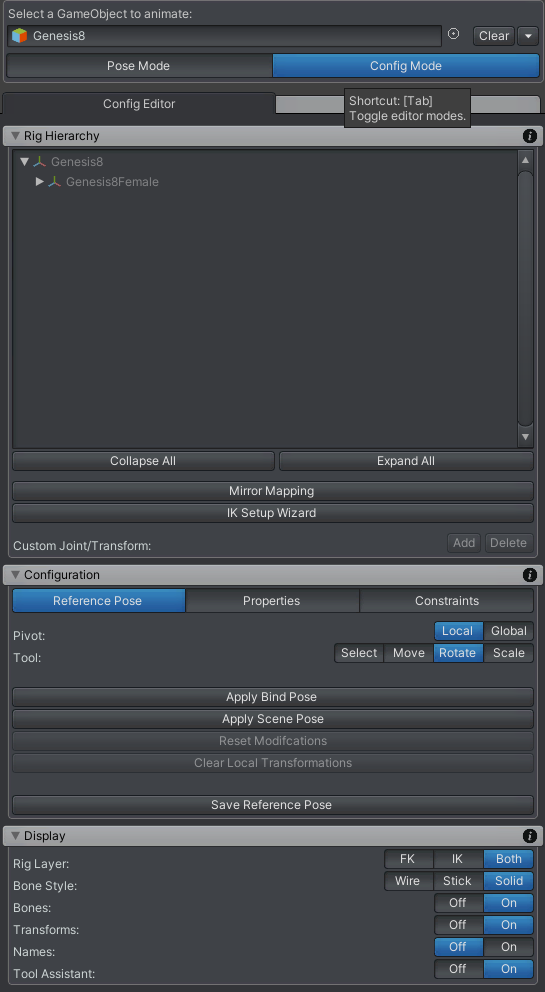
When dropping the Gameobject into the pose editor I get the 'Hips' already defined.
Is there a workflow of Blender that highlights the process to get a rig to Unity?
I see too many of the basic rigs that I could not use. I need IK fingers so I can grab a finger and pull to a pose all the way up to a shoulder. If I have no finger IK but only hand IK for posing that is ok as long as I can pose the fingers separately.
Learning this model rigging has been a nightmare.
In this project I did get a rig to animate in Unity animator but I want to use Umotion as it seems to give more control.

Hi,
thank you very much for your support request.
When dropping the Gameobject into the pose editor I get the 'Hips' already defined.
That happens when you drop a humanoid character into a UMotion project initially created for a different humanoid character. A separate UMotion project has to be used for each of your characters. If you're character is of type humanoid and you want to use/edit a humanoid animation you created for a different humanoid character, just export said humanoid animation from the UMotion project A and import it in UMotion project B (with the correct characters assigned to the pose editor respectively).
For IK rigging, you can use the IK Setup Wizard in UMotion. It automatically creates IK chains for the legs and arms. Unless you're doing something like a "playing the piano" animation where precise finger movement is very important, I would recommend not to use IK for the fingers. It's usually easier to just use the finger sliders in the muscle tool assistant. Another trick is to select each finger bone, then use the rotation tool which will equally apply the rotation on all finger bones at once making it bend nicely.
Please let me know in case you have any follow-up questions.
Best regards,
Peter

HumanDescription import message
Hi,
I have a problem on Importing FBX animation which was exported from UMotion.
If I export it with Anim format, of course there is no importing problem.
#1 Same character between Unity and UMotion
I used a same character for testing, modifying and importing (avatar).
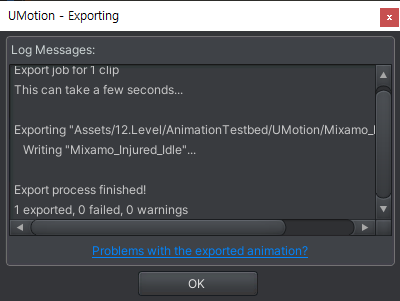
#2 Just exported
I imported the original animation clip in UMotion editor then exported it right away in another folder rather than the original one exists. I did not modify the clip at all.
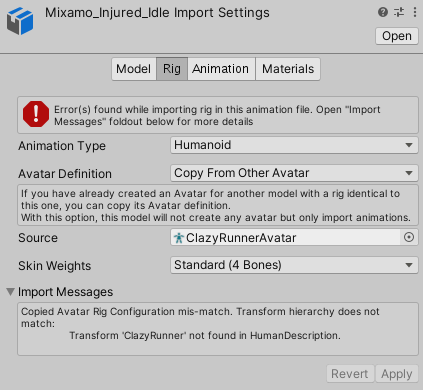
#3 Importing error
I cannot use an avatar of the character, but exported FBX's.
That means I should use the avatar of FBX, not the original character's.
It will increase project size and memory.
#4 Bad root
Even the root location of the exported version has an error. The below pink one is from UMotion.
Regards,
Scott Hong
Hi,
thank you very much for your support request.
When working with humanoid, I highly recommend setting "Write Mode" to "Update Existing File" (in the UMotion export settings). Then select the fbx file of the character that you have assigned to the pose editor as destination file. When you now export, your animation is written into the FBX file of your character. Meaning that it is imported with all the correct settings automatically.
For more information, please check out the manual (click on the question mark button in the export settings to open the corresponding manual page).
Please let me know in case you have any follow-up questions.
Best regards,
Peter
Timeline Sync
Hi,
I still have a issue in Timeline sync feature.
By the way, I found a reproduction path. Of course the character is a humanoid.
Because of working on the Timeline, a weapon is equipped on a hand bone. When running UMotion - Sync - Timeline window - Edit selected clip with this weapon equipped, I found that UMotion was not sync with Timeline. Sync works well when the character registered in the Timeline track has no weapon. For this reason, I removed the weapon from the character and added to the Timeline track then sync problem has gone in UMotion.
When I go back to the Unity Timeline, the animation I modified is not applied. I exported the animation to a different path than the animation used in the Timeline. It works fine when I replace it with the animation modified by UMotion in the Unity Timeline. As a confirmation, I registered the weapon equipped character to the Timeline track again and repeated the same operation. Again, animations modified in UMotion do not run properly in Unity Timeline. Please check the Timeline sync feature again.
In addition, the animation clip which was modified with a weapon does not work on the original character which has not the weapon because of rig differences.
Regards,
Scott Hong
Hi Scott,
thank you very much for your feedback.
I'm sorry to hear that you are having such a hard time working with UMotion and Unity Timeline.
When you want to modify a timeline animation, you need to make sure that you export into the correct directory so that the animation that is used in Unity Timeline is updated/overwritten. If you select an animation clip in your Unity Timeline and then click on the animation clip field shown in the Inspector window (and if you have Unity's project window opened), Unity is going to highlight you the file in your project window.
Then open UMotion and make sure that in the export settings, the export directory points to the exact same directory. In order to avoid confusions, I also recommend that you use unique names for your animation clips throughout your whole Unity project.
If the export directory is not correctly setup in your UMotion project, UMotion is going to export the animation to a different location in your project. Unity Timeline is then still using the old animation.
In addition, the animation clip which was modified with a weapon does not work on the original character which has not the weapon because of rig differences.
Humanoid animations are rig independent (due to animation re-targeting). So if you create a humanoid animation for humanoid character A, it can be played on humanoid character B as well. But please note that none humanoid bones (e.g. additional weapon bones) might not translate well between characters because re-targeting only works on humanoid bones.
If you just want to edit an animation of your character with the weapon, you should be able to directly work on that character (and his weapon) within UMotion. There should be no need to remove the weapon before working with UMotion. What problem did let you think that this is necessary?
I hope this sheds some light into your situations. If you have any further questions, please let me know.
Best regards,
Peter

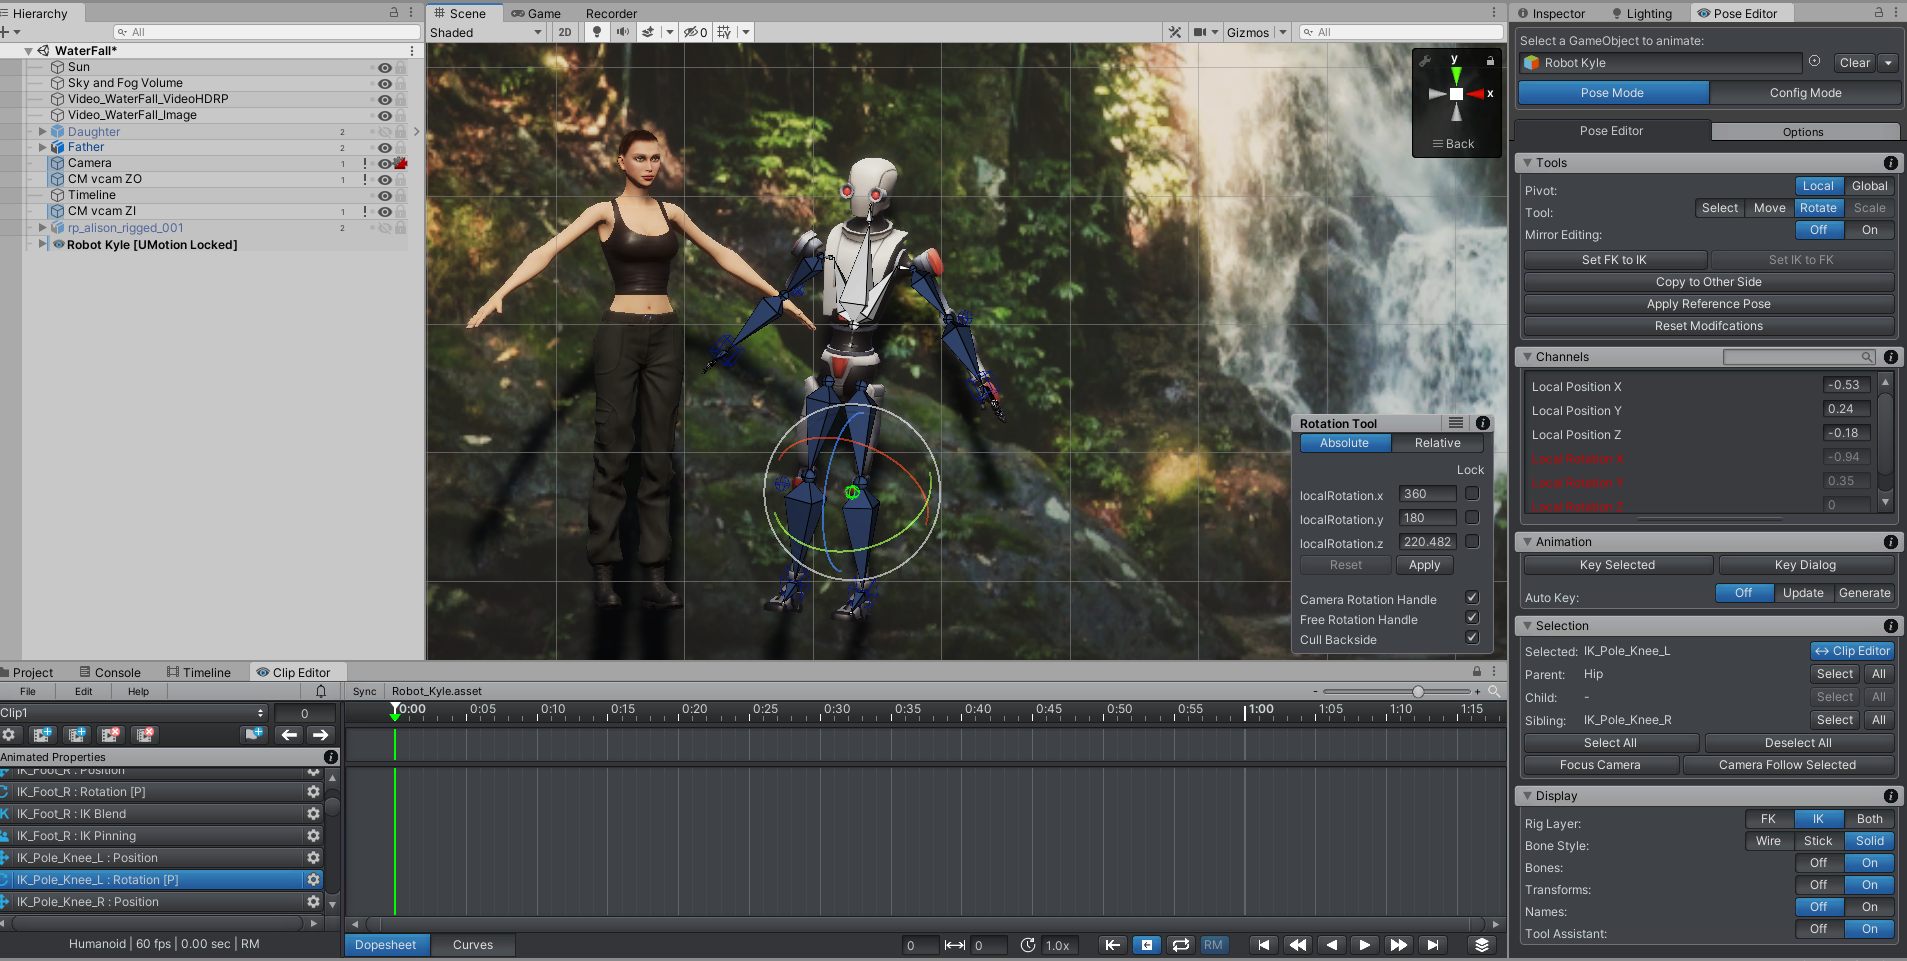
I can't rotate knee to swing legs when using IK
I want to get my character to swing their lower legs below the knee. I have set up the IK wizard, but after I select all and set the FK/IK Blend to 1, rotation doesn't seem to work. Nothing happens when I try to rotate the leg (the position works okay). I thought it might be the way the character is rigged but I am having the same issue with Robot Kyle. The only rotation that seems to work is the shoulder & hand?
If I change the FK/IK blend back to 0, I can get it to work using the FK, but is this how it is supposed to work?.
I have looked at the manual under FK to IK conversion but I really don't understand it and am not sure if it applies to my situation.
I am sorry if this is a silly question, but I am not sure what I am missing or how this should be done.
It also won't let me select the IK bones in the scene just the poles, is this correct?
Hi Elsiehar,
thank you very much for your support request.
Yes this is expected, that's how IK works. The IK rig (the blue bones) are controlled solely by the IK algorithm. This algorithm automatically adjusts the rotations of the individual leg bones in such a way, that they reach the IK handle of the corresponding foot. So if you select the IK handle (this is the wired cube at the ankle) and move it with the move tool, your legs are going to bend/rotate so that they end up at the IK handles position (FK/IK Blend needs to be at 1). By moving the pole target, you can define where the knee is pointing to.
The FK rig on the other hand gives you full control by allowing you to rotate every bone manually with the rotation tool. As you might already think, both methods have their advantages that's why the FK/IK Blend control exists which allows you to switch between them (even during an animation) so that you can use the best fitting solution for your animation scenario.
I recommend that you play around by moving the IK hande/pole handle so that you get the hang of how things behave. Btw. rotating the IK handle is going to rotate the foot bone.
For more information, please check-out the IK video tutorial:
Please let me know in case you have any follow-up questions.
Best regards,
Peter
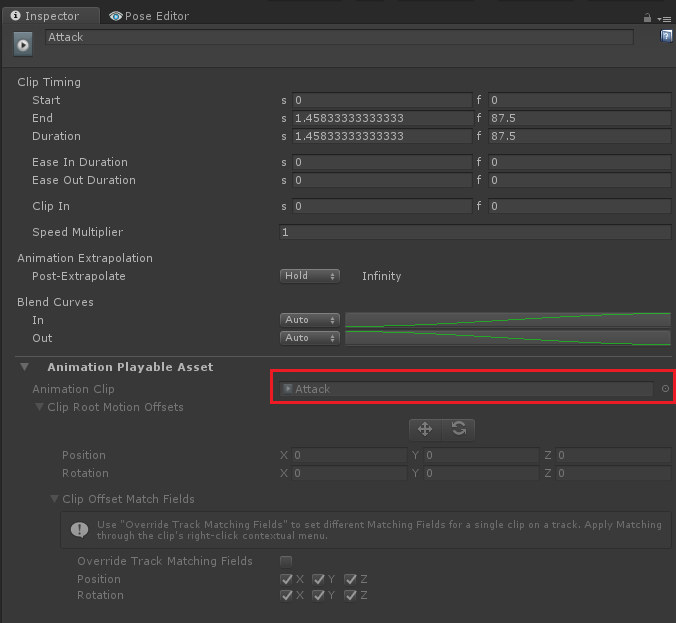
With Timeline
I am editing the animation to fit the Timeline. When I run the edited animation on the Timeline, the coordinates were slightly out of sync with what I did with UMotion. So I modified it in UMotion again and brought it into the Timeline, it did not work again. So I modified again. Again it was not right. Coordinates go and back. I'm going crazy!!!
Hi Superip,
thank you very much for your support request.
Make sure you are using the latest version of Unity Timeline (you update Unity Timeline via the Unity Package Manager). Also make sure that your UMotion Version is 1.15p02 (there was a bug fix that fit's the symptoms you described in 1.15p02). You can see what version you have installed by clicking on "Help --> About Umotion..." in the UMotion Clip Editor. You can update UMotion via the Asset Store. After performing the update, please verify that the version shown in "Help --> About Umotion..." reads 1.15p02.
If that does not help, please show me a video illustrating your problem so that I can take a closer look.
Best regards,
Peter
Usage for project file
What does UMotion project is used for?
I just considered it as a general project file such as VisualStudio so that it stores Config settings.
After a lot of trial and error, I doubt that the unique information that has been previously worked is stored in. In other words, even though the GameObject is the same, it should not be used continuously as a single project file, and it seems to have to be created every time the animation changes. Whenever UMotion behaves abnormally, I created a new project file and there was no such a problem.
Hi,
thank you very much for your support request.
The project file contains all the rig configuration (e.g the IK setup) of your character, all the animations you create, etc. The project file is "per character" and should/can not be used with other characters. So you would create one UMotion project file per character.
Escpecially when working with characters that are configured as humanoid, you should not create a fresh UMotion project every-time you want to make changes to the same animation (as that would require to import the animation every time into the UMotion project, make your changes then export again,...). Not only would it be tedious, but as the humanoid animation system requires re-sampling of the animation on every import/export, this will also loose information --> reduce quality if you repeat this step multiple times.
Please let me know in case you have any follow-up questions.
Best regards,
Peter
GameObject import error
I have used the attached project file.
I had to modify another animation so that I reopen the project in UMotion and attached the same gameobject.
The gameobject is just shown skeleton without its mesh.
UMotion is killiing me.
Hi,
thank you very much for your support request.
When you assign a character to UMotion for the first time, it stores all the position/rotation/scale values of all bones/transforms of that character (as reference pose). When you then re-assign the character another time, UMotion applies these stored reference pose. In your case, this "old" values seem to not be in-line with the characters current values. Thus the skinning produces this weird mesh that you see. This happens if the model was changed outside of Unity (using an external modeling application) or if you e.g. changed the scale in Unity's import settings or some other cases...
Please try the following:
- Backup your UMotion project.
- Assign your character to UMotion.
- In the pose editor, open config mode.
- In the "Configuration" fold-out click on "Apply Bind Pose".
- Your model should look normal again.
- Now click on "Save Reference Pose" to save your changes.
- Go back into pose mode.
- Unless you keyed position values, your animations should be working again. Existing position keys would still be scaled like your character was before so they might still be off by that factor.
Please let me know in case you have any follow-up questions.
Best regards,
Peter
local coordinate system
Hi,
This time is about local coordinate system.
I'm making an animation of walking down stairs.
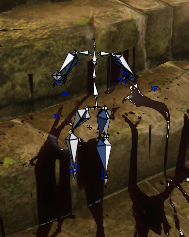
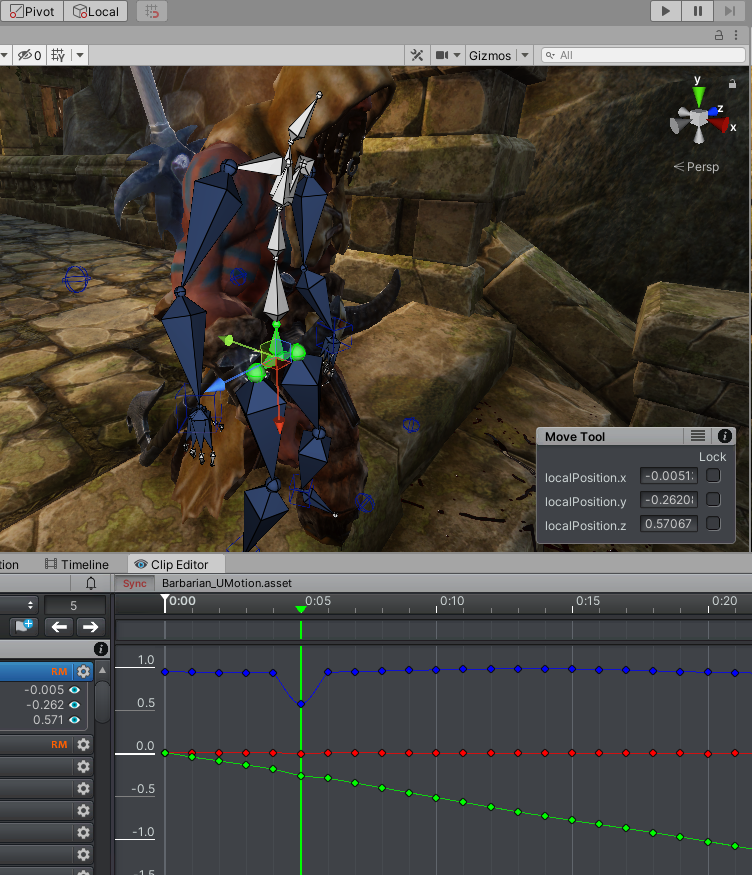
At frame 5, I dragged the red guide of pevis down. However, if you look at the UMotion curve graph, the blue curve changed. If I modified the red guide, doesn't the red curve need to be changed? It doesn't fit my concept, so it's very difficult to understand what the curve graph coordinates means. In some cases, my understanding is correct. It's going to be very crazy.
One more question.
I cannot drag keys on curve graph, but sometimes I can move.
Please help!
Regards,
Scott Hong
Hi Scott,
thank you very much for your support request.
At frame 5, I dragged the red guide of pevis down. However, if you look at the UMotion curve graph, the blue curve changed. If I modified the red guide, doesn't the red curve need to be changed? It doesn't fit my concept, so it's very difficult to understand what the curve graph coordinates means. In some cases, my understanding is correct. It's going to be very crazy.
The red, green, blue in the curves correspond to the x, y and z axis of the local position coordinates. This are the same local position coordinates as shown in UMotion's channels view and (in case of default Unity) as shown in the inspector window.
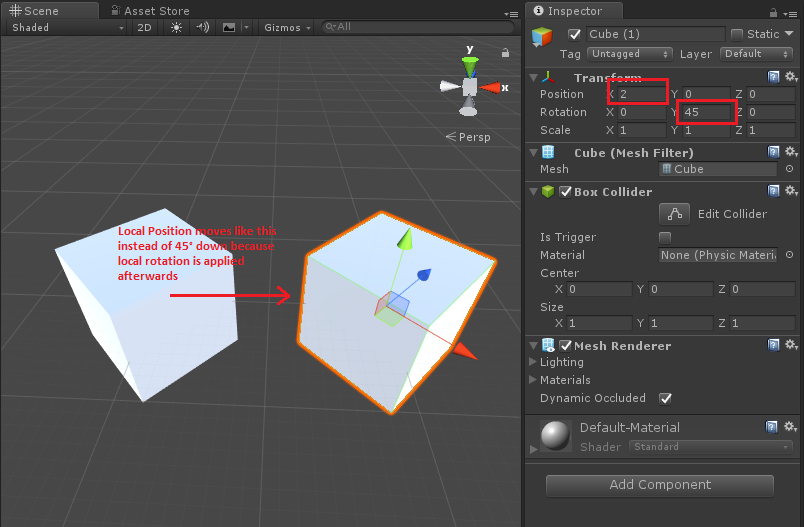
The reason why the move tool gizmo colors do not line up is because the gizmo is rotated by the local rotation. The local position though is applied without being affected by the local rotation. That means that if you have 90° or more local rotation, then the colors are reversed. If you have rotations that are not a power of 90, you even have the gizmo pointing in completely other directions. This is default Unity behavior and UMotion is just staying in line with that.
You can test this yourself by creating a cube in unity. Set the local rotation y to 45. Notice how the move tool gizmo (in local mode) rotates 45 degrees with the cube. Now increase the local position x value and notice how it does not move along the red line of the move tool gizmo.
I cannot drag keys on curve graph, but sometimes I can move.
You should be able to drag all position and scale keys (except when they are greyed out). If you have rotation keys, you can only drag horizontally. In order to drag them vertically, you need to be using euler angles (because the values of quaternion based rotations are not directly editable because quaternions are 4 dimensional values that are hard for humans to directly interact with as you can't really imagine 4 dimensional values). More information regarding the different rotation modes can be found in this video tutorial:
If you can't drag/move your keys in cases where you should be able to according to my description above, then this might be a bug and we should take a closer look. In that case, please show me a short video demonstrating the issue.
Please let me know in case you have any follow-up questions.
Best regards,
Peter
Customer support service by UserEcho
