
 hips
hips
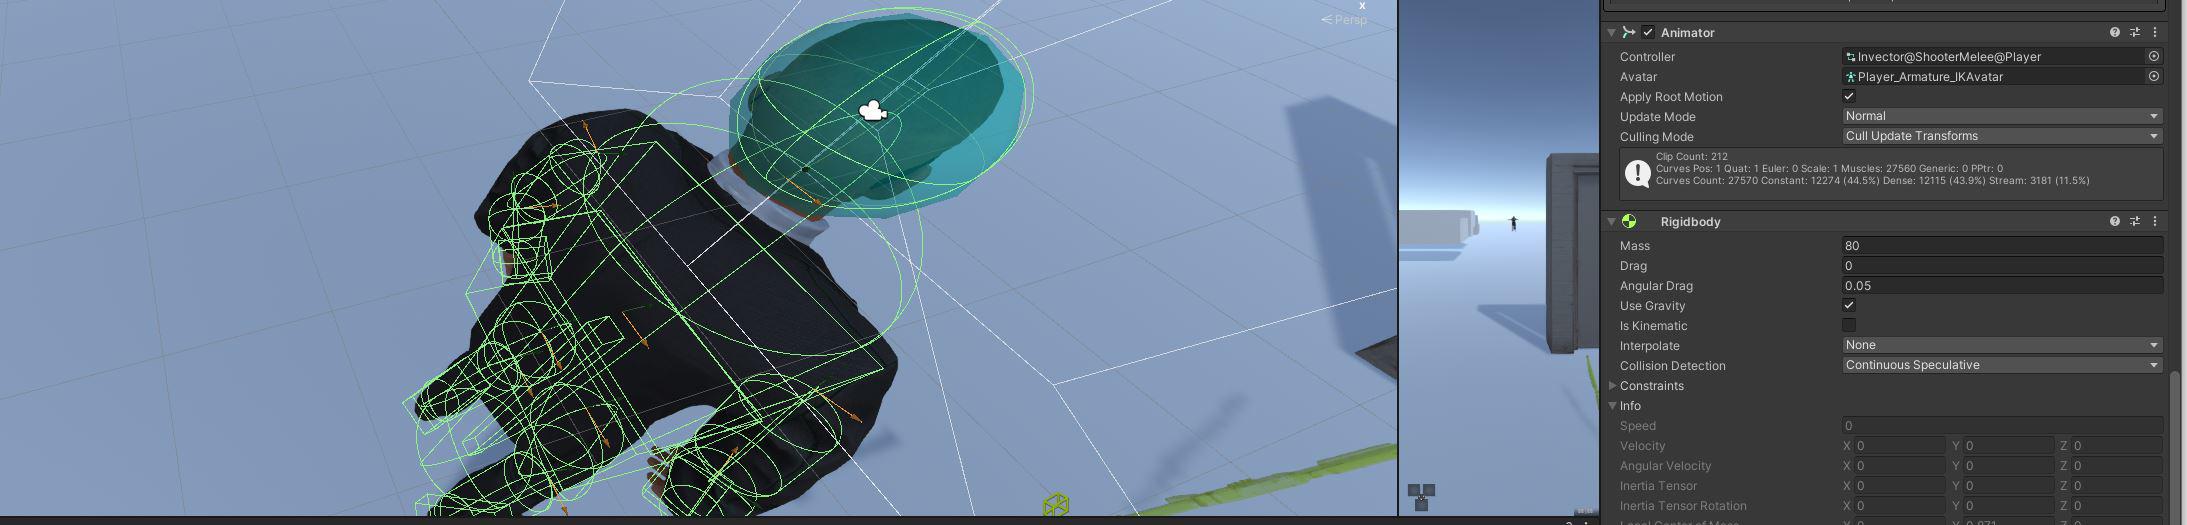
This asset is what i thought it would be. extremely easy to use and set up and makes animation a breeze. The only thing thats missing is IK for the Hips /Pelvis. I did the whole ik pinning for the feet but what about the spine? every time i adjust the hips I have to adust the spines neck and head too. Why isn't there ik for the hips? I want that. I need that. its an important part of my animation techniques,

Hi,
thank you very much for your support request.
The UMotion IK constraint can be used on any type of bones. It's just that the IK setup wizard does not create IK for the spine. You can add IK to your spine manually.
Please watch the IK video tutorial to learn how IK constraints can be setup manually (first part of the video covers the IK setup wizard, second part the manual setup):
I personally prefer using FK for the spine though. When you select all the spine bones and use the rotation tool, the rotation is automatically smoothly distributed between all selected bones. That creates a really smooth bending while still maintaining full control over each and every individual bone (due to FK), something you loose when using IK instead.
Please let me know in case you have any follow-up questions.
Best regards,
Peter

Change hand (for example) position in multiple animations.
Hi,
I am looking to change left hand position/rotation of a lot of animations, with each change being the exact same offset. So in other words changing the position/rotation on the left hand position of the weapon for all my weapon animations. I thought maybe this was something a copy and paste onto a new layer could do, however that way changes the actual position of the hand animations, and not the offset. Do you have a non tedious way of doing this?
Hi tecd,
thank you very much for your support request.
If you're doing your offset in an additive animation layer, it should work by copy and pasting the key(s) from the one animation's additive animation layer to the other animation's additive animation layer (I just double checked that). Keys in an additive animation layer are stored as "offsets".
Please let me know in case you have any follow-up questions.
Best regards,
Peter

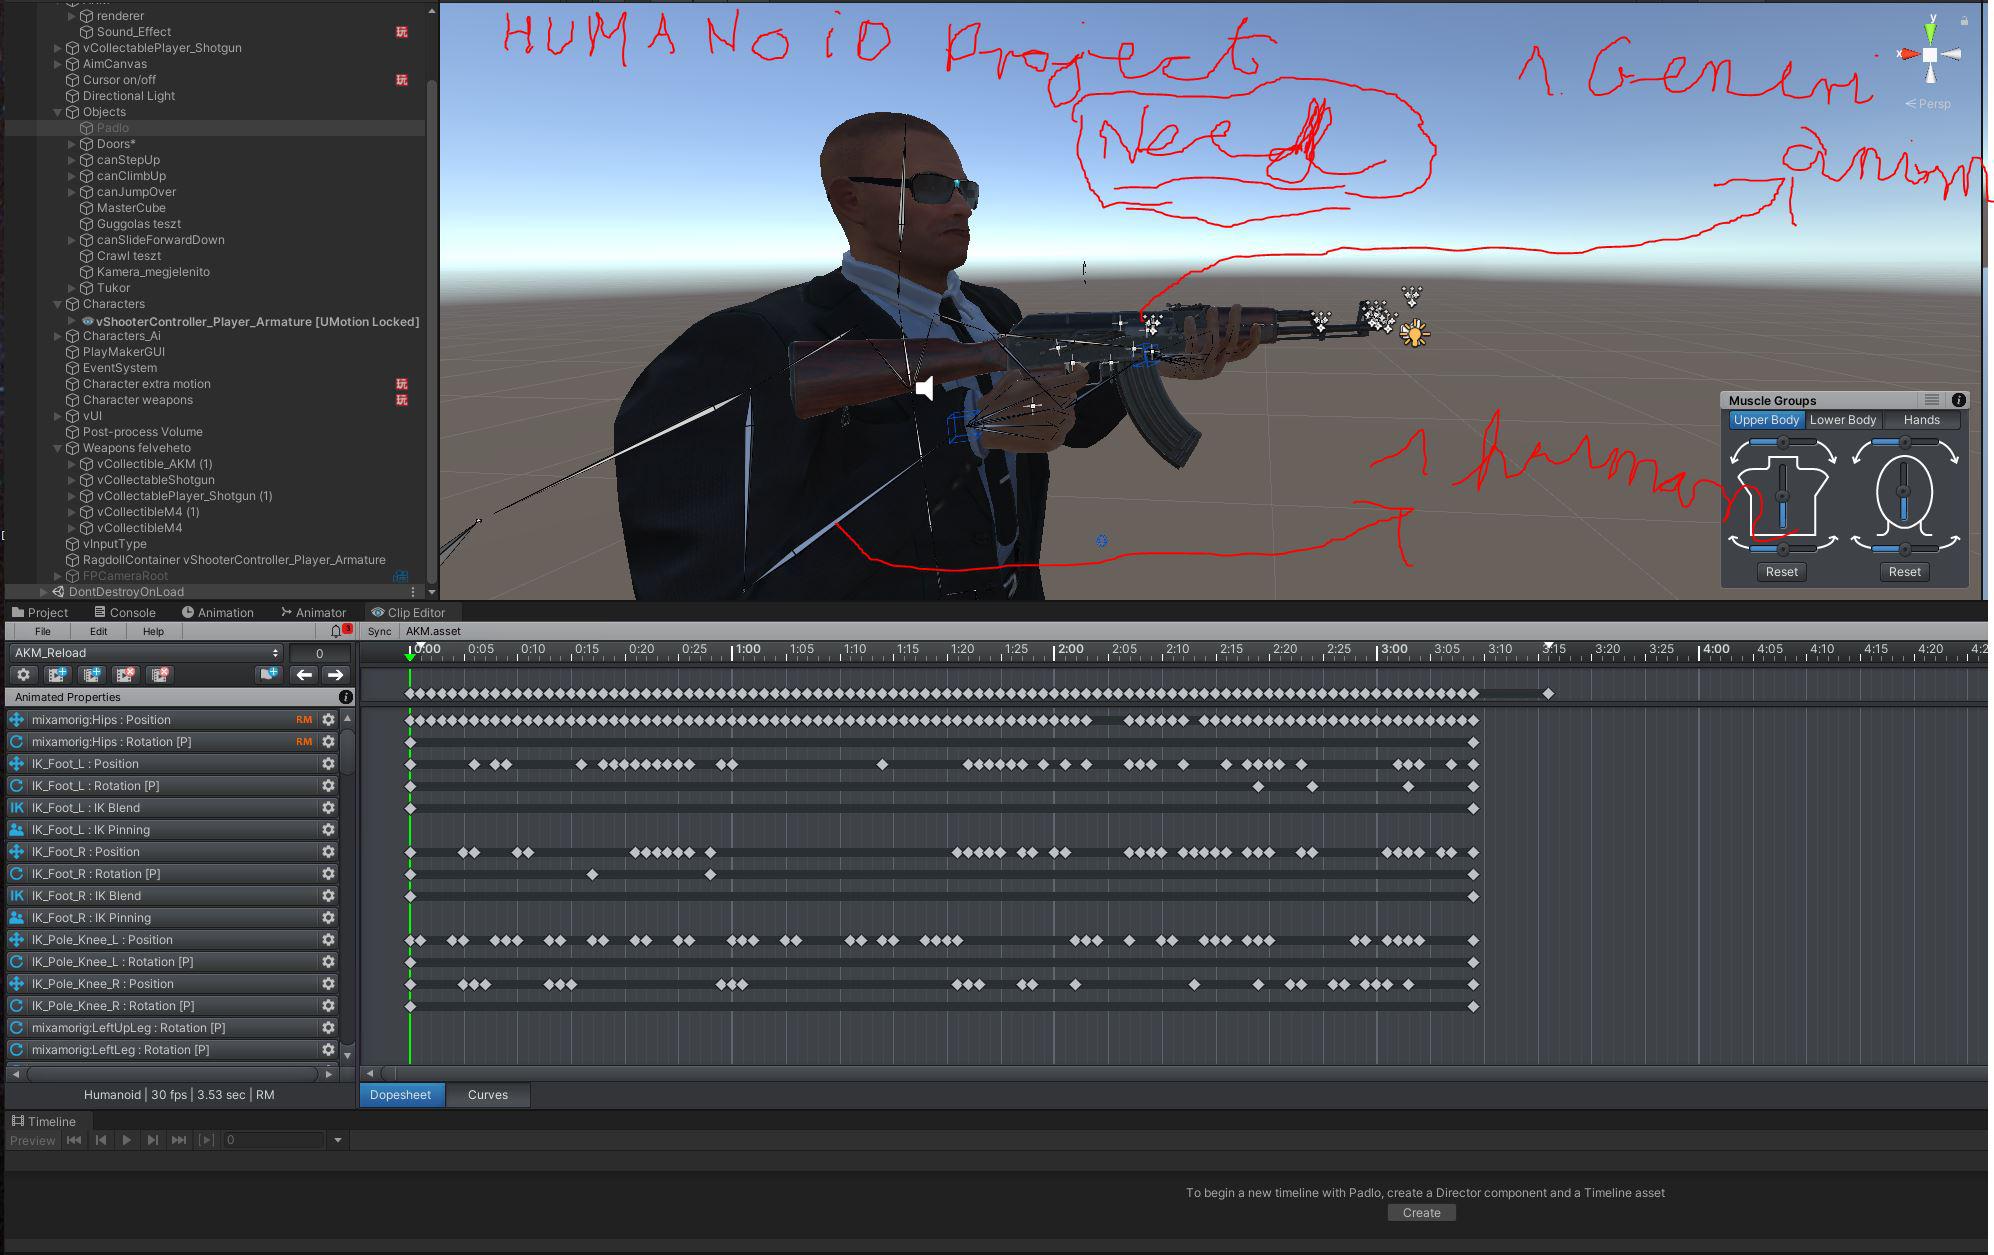
Humanoid and weapon (generic) animation export
Hi,
My problem is, how can I separate from one humanoid project to a generic (weapon) and humanoid (character) animation?
The timeline does not work in a humanoid project.
Animation cannot be convert to humanoid to generic or gen. to human.
Only character movement is played.
There are two different animators, one for the weapon, one for the character, so I need a generic and human.
Would also solve my problem if I somehow could play the weapon animation, to adjust the character, but it doesn't work because you can't play it at once which is fucking annoying, because so it makes no sense to the program.
I did the animations in blender, but I'm fucked because they're not fucking correct, however, animation cannot be combined with this program.
It's just fantastically complicated and useless... HELP
it's just that I can do generic animation, it just won't be correct for the character if I convert to humanoid.

Hi Tabornok,
thank you very much for your support request.
The timeline does not work in a humanoid project.
You mean Unity Timeline? Unity Timeline does support humanoid characters. What makes you think that Unity Timeline does not support humanoid characters?
Animation cannot be convert to humanoid to generic or gen. to human.
You can convert animations with UMotion. Exporting to FBX is one way to do it (you can then decide in the FBX settings if you want the animation to be generic or humanoid).
When you want to directly export to *.anim, this is the way to go:
- Duplicate your humanoid character's FBX file.
- Change the rig of the duplicated character to "generic".
- Instantiate your generic character in the scene and assign the gun to it (at the same place in the hierarchy as in the original humanoid character).
- Create a new generic UMotion project and assign your new generic character + gun setup.
- Now import the animation clips of your humanoid UMotion project by selecting your humanoid UMotion project instead of individual *.anim clips.
- Now you have your humanoid animations imported in your generic project thus converted to generic and you can now export them to a generic *.anim.
There are two different animators, one for the weapon, one for the character, so I need a generic and human.
I recommend to only use two separate animators when the animations don't interact with each other. As in your case, the character and it's hands interact a lot with the gun, it's counter intuitive to use two separate animators. Try to use only one animator instead.
Please let me know in case you have any follow-up questions.
Best regards,
Peter

Locking rotation axis for specific bones
Hello. There is a neat feature that allows you to lock some rotations while editing animations, but issue is that I want to lock them only for specific bones, not globally. For example - allow knees and elbows rotate only at single axis, so you won't accidentally rotate them, resulting later in weird interpolations.
Is it possible to implement somehow? Or it can't be done without modifying sources?
Hi,
thank you very much for your support request.
While there is no feature to lock the rotation axis, you could use "euler rotation mode" for the bones you mentioned (e.g. the lower leg bone). As you only rotate the knee around one axis (if the rig is setup correctly), you're not going to suffer from gimbal lock (gimbal lock is the downside of euler). In euler mode you would see it in the curves view if you've accidentally rotated around a wrong axis axis (onle one axis should contain actual data, the other 2 should be completely flat).
More information on the different rotation modes can be found in this video tutorial:
Please let me know in case you have any follow-up questions.
Best regards,
Peter
 Optimize Game Objects bug
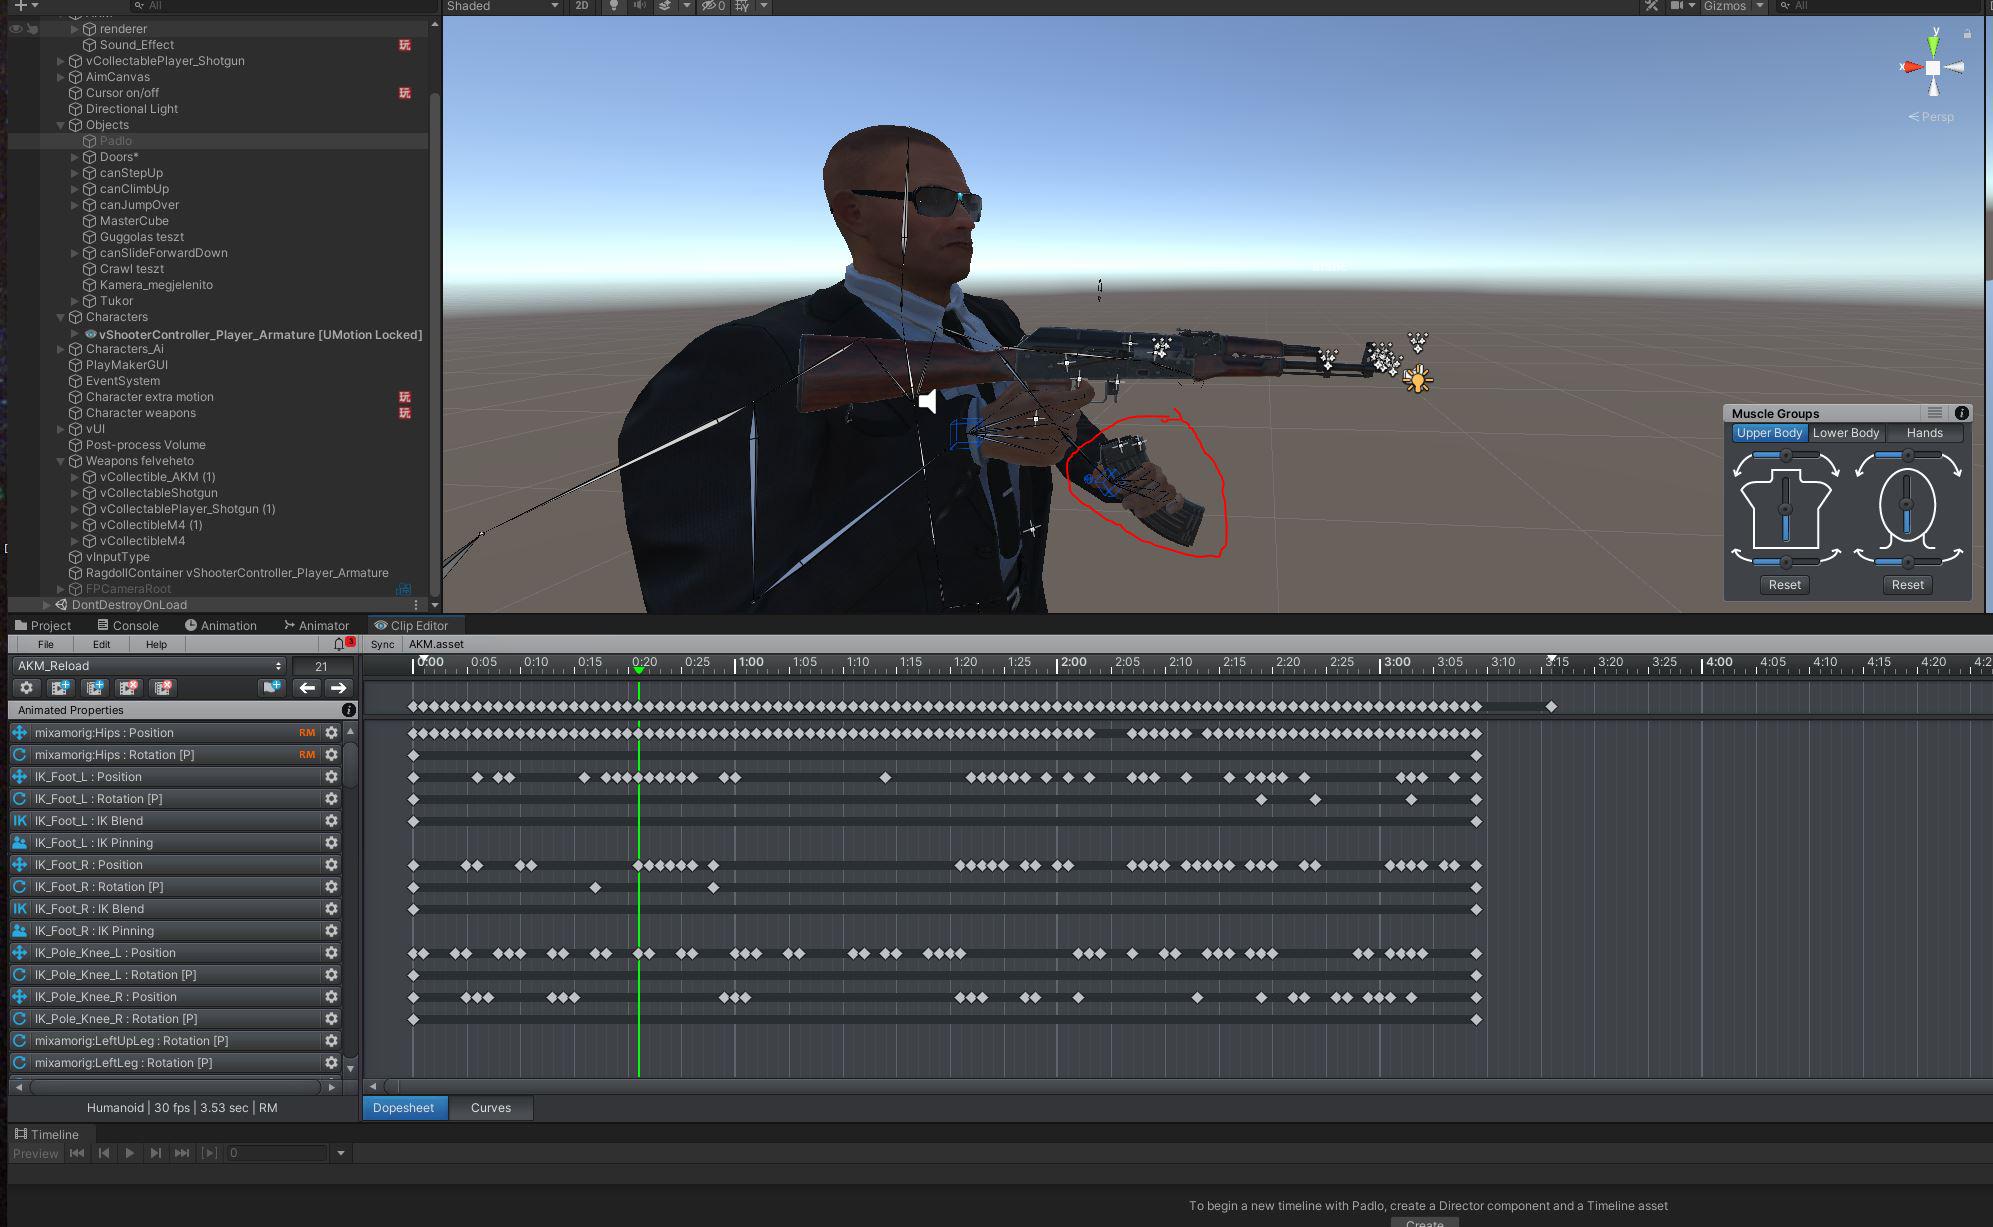
Hello, I am currently animating an archer. The archer is using generic animations and has "Optimize Game Objects" enabled in the importer, the Hands are exposed though, so I can add weapons.
When I add a bow as a child of the hand, that is also rigged, and then try to animate the character in UMotion, including the bow, the bows skinned object (not the container/parent) somehow is now located at the root of the character instead of the hand, hierachy and position wise. If the character is not optimized, it works and the bow stays in the hand.
This isn't a huge problem, but I still have to disable optimization every time I animate, which is not the best workflow.
Maybe a reason could be that both, the character and bows first child is called "Armature"?
Thanks for sending me the example project. It was very well structured and made it easy for me to investigate, thanks for that.
From your email:
I think this could be related to the bow having the bones parent called "Armature" as well (Which also gives a warning). I sadly can't change the name, as blender does this automatically for rigs.
Yes that's exactly what's causing the issue. The de-optimize method thinks that the bow's "armature" is the same as the "armature" of your character. Thus the de-optimized setup ends up with a different rig hierarchy (where the bow is a child of the character's "armature" bone instead of the "Wrist1" bone).
Unfortunately this isn't something that I can fix in UMotion's code as this problem is coming from within a Unity API method called AnimatorUtility.DeoptimizeTransformHierarchy(). Luckily the fix for you is rather easy, just rename the "armature" bone of the bow to something unique (e.g. "armature_bow"). You can do this in your prefab in Unity, no need to do this in Blender.
Please let me know in case you have any follow-up questions.
Best regards,
Peter

How to keep staring at the point
Hi,
Could you explain a little bit how I can let the character staring at a point.
I am making an aiming animation.
I would like to set the neck and head to keep its position and rotation to stare at a point
regardless of the movement of the arms or spines.
Is there a way to do this in UMotion?
Regards,
Scott Hong
Hi,
thank you very much for your support request.
Doing an "aim" inside an animation means that it is baked into the animation and won't adapt at the target's position at real time. That's why usually a real-time IK solution is used for this (on top of the regular animations) which calculates the pose at real time based on the current target position. This for example is final IK's aiming solution:
Link: Final IK - Asset Store
If you have a special case where you want to bake the result into an animation clip (because you're targets don't change at realtime) you can extend UMotion's functionality by (e.g. Final IK's Aiming solution) using the UMotion callback mechanism. That way you can preview and key the behavior inside UMotion. For more information regarding the UMotion callback mechanism and how to use it with Final IK, please check out the UMotion manual at ("Pose Editor / Options" headline "Extending UMotion").
Don't hesitate to contact me in case you have any follow-up questions.
Best regards,
Peter

Face cap fbx not recognized
I have rigged a blender character using the FACEIT' app to use the ARKIT shapekey system found in apples Face Cap app. I finished a normal rigging with auto rig pro and out put a humanoid FBX of character. when I bring the character into umotion pro it recognizes and lists the shapekeys in the character but keyed action does not show in the character. I have imported a face cap action fbx and just get an error that it appears as generic not humanoid.
Umotion would be a perfect tool to tune face cap dialogue and make it the goto tool for unity mocap animation...if I could get this to work, any suggestions?
Hi Woodyy,
thank you very much for your support request.
Ok so the face rig is using blend shapes for the facial expression or is it using bones? Are you sure this isn't a problem with your character / your import pipeline? You can verify if the blend shapes on your character are working by dragging your character to the Unity scene. Then look for the GameObject that has the SkinnedMeshRenderer component and open the "Blend Shapes" foldout in the inspector. Here you can play with the blend shape weights (100 means full influence of the blend shape):

If the blend shapes also don't work in that case, you might want to double check your setup in blender and your import/export settings. If they do work using the method mentioned above, it might be a problem with UMotion not previewing the blend shapes correctly for some reason. If that is the case, I would love to take a look at it. Please send me your character (without textures if you want) and your UMotion project file via email support form (or request a link to my dropbox if file size is too big for email transmission).
Please let me know if you need any further assistance. I'm happy to help.
Best regards,
Peter
I want to export a custom transform but the solution described by you on the unity forum doesn't seem to work
Maybe it is something intended as I want to export the four custom transforms created by umotion, the IK_Pole ones. for both hands and legs.
I need their positions in the animation file or if this is not a good idea to have them put there, maybe some way to save them to a custom separate file of some kind could also work.
all four objects are marked as custom transforms and have the visibility on Show but don't appear to included in the animation file (which I think make sense, not a bug, except I need them :D )
With UMotion V1.26 I introduced an easier way to update a custom transform to a real transform:
Create new empty GameObjects in your character's hierarhcy (outside of UMotion) that are named like the custom transform inside UMotion and are located at the same position in the hierarchy.
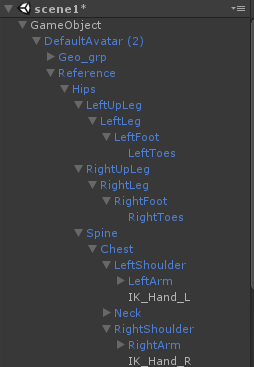
When you then assign the character to the pose editor, UMotion is automatically going to ask you if it should convert the custom transform definitions to real transform. All other steps mentioned in my previous post are not necessary anymore in this case.
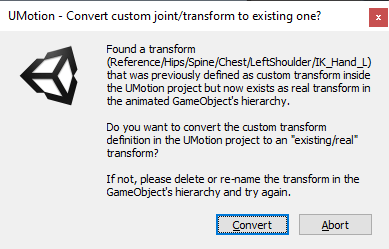
The animation data for those transforms is then automatically included in the exported animation.
UMotion V1.26 is shipping in the next one or two days via the asset store.
Please let me know in case you have any questions.
Best regards,
Peter

When Timeline, Character animation shaking / jittering / vibrating
Hi !
I hope you're doing well ^^
I made some custom animations with UMotion Pro, they are all running very well when I watch them in the preview. But when I launch them with the Unity Timeline, the character is acting ok on some animations, and is shaking/jittering on some others. It's not some bones, it's the whole body. And it doesn't seem to be his collider neither, as shown on the video I made.
I'm aware it can be not related to UMotion at all, but I'm kind of lost, so I just ask if you have any idea by any chance. No worry if not.
Thanks for your help, take care !
Best regards,
Hi Antoine,
thank you very much for your support request.
Let's narrow down the cause of this issue:
- Select one of the exported animations (that you use in Timeline and that jitters) in Unity's project window. In the inspector preview section at the bottom, play the animation. Does it also jitter in the preview window?
- You can also try to drag & drop the character you use in Timeline from Unity's scene into the preview window. This is going to preview the animation using the correct character. Does the jitter appear in that case?
- If the problem is not present in point 1 or point 2, does it happen if you scrub through the Unity timeline (when not being in play mode)?
Please let me know the results of your investigations, so that I can further assist you.
Best regards,
Peter

Editing the hierachy of a GameObject that is currently used as UMotion preview object is not allowed.
Hi, my issue is the same as the one in this link https://www.support.soxware.com/en/communities/1/topics/677-editing-the-hierachy-of-a-gameobject but there were no solutions.
I have tested the file here and the problem still persists.
Customer support service by UserEcho
