

Hi,
thank you very much for your support request.
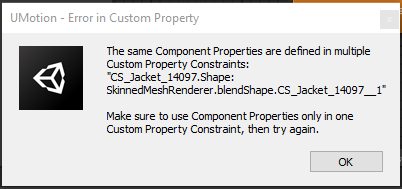
In UMotion's Pose Editor, go into config mode. Select the "CS_Jacket_14097.Shape", open the constraints tab and resolve the error by removing the duplicated custom property (by clicking on the X).
Here is the documentation of the custom property constraint: https://www.soxware.com/umotion-manual/CustomProperty.html
Please let me know in case you have any follow-up questions.
Best regards,
Peter

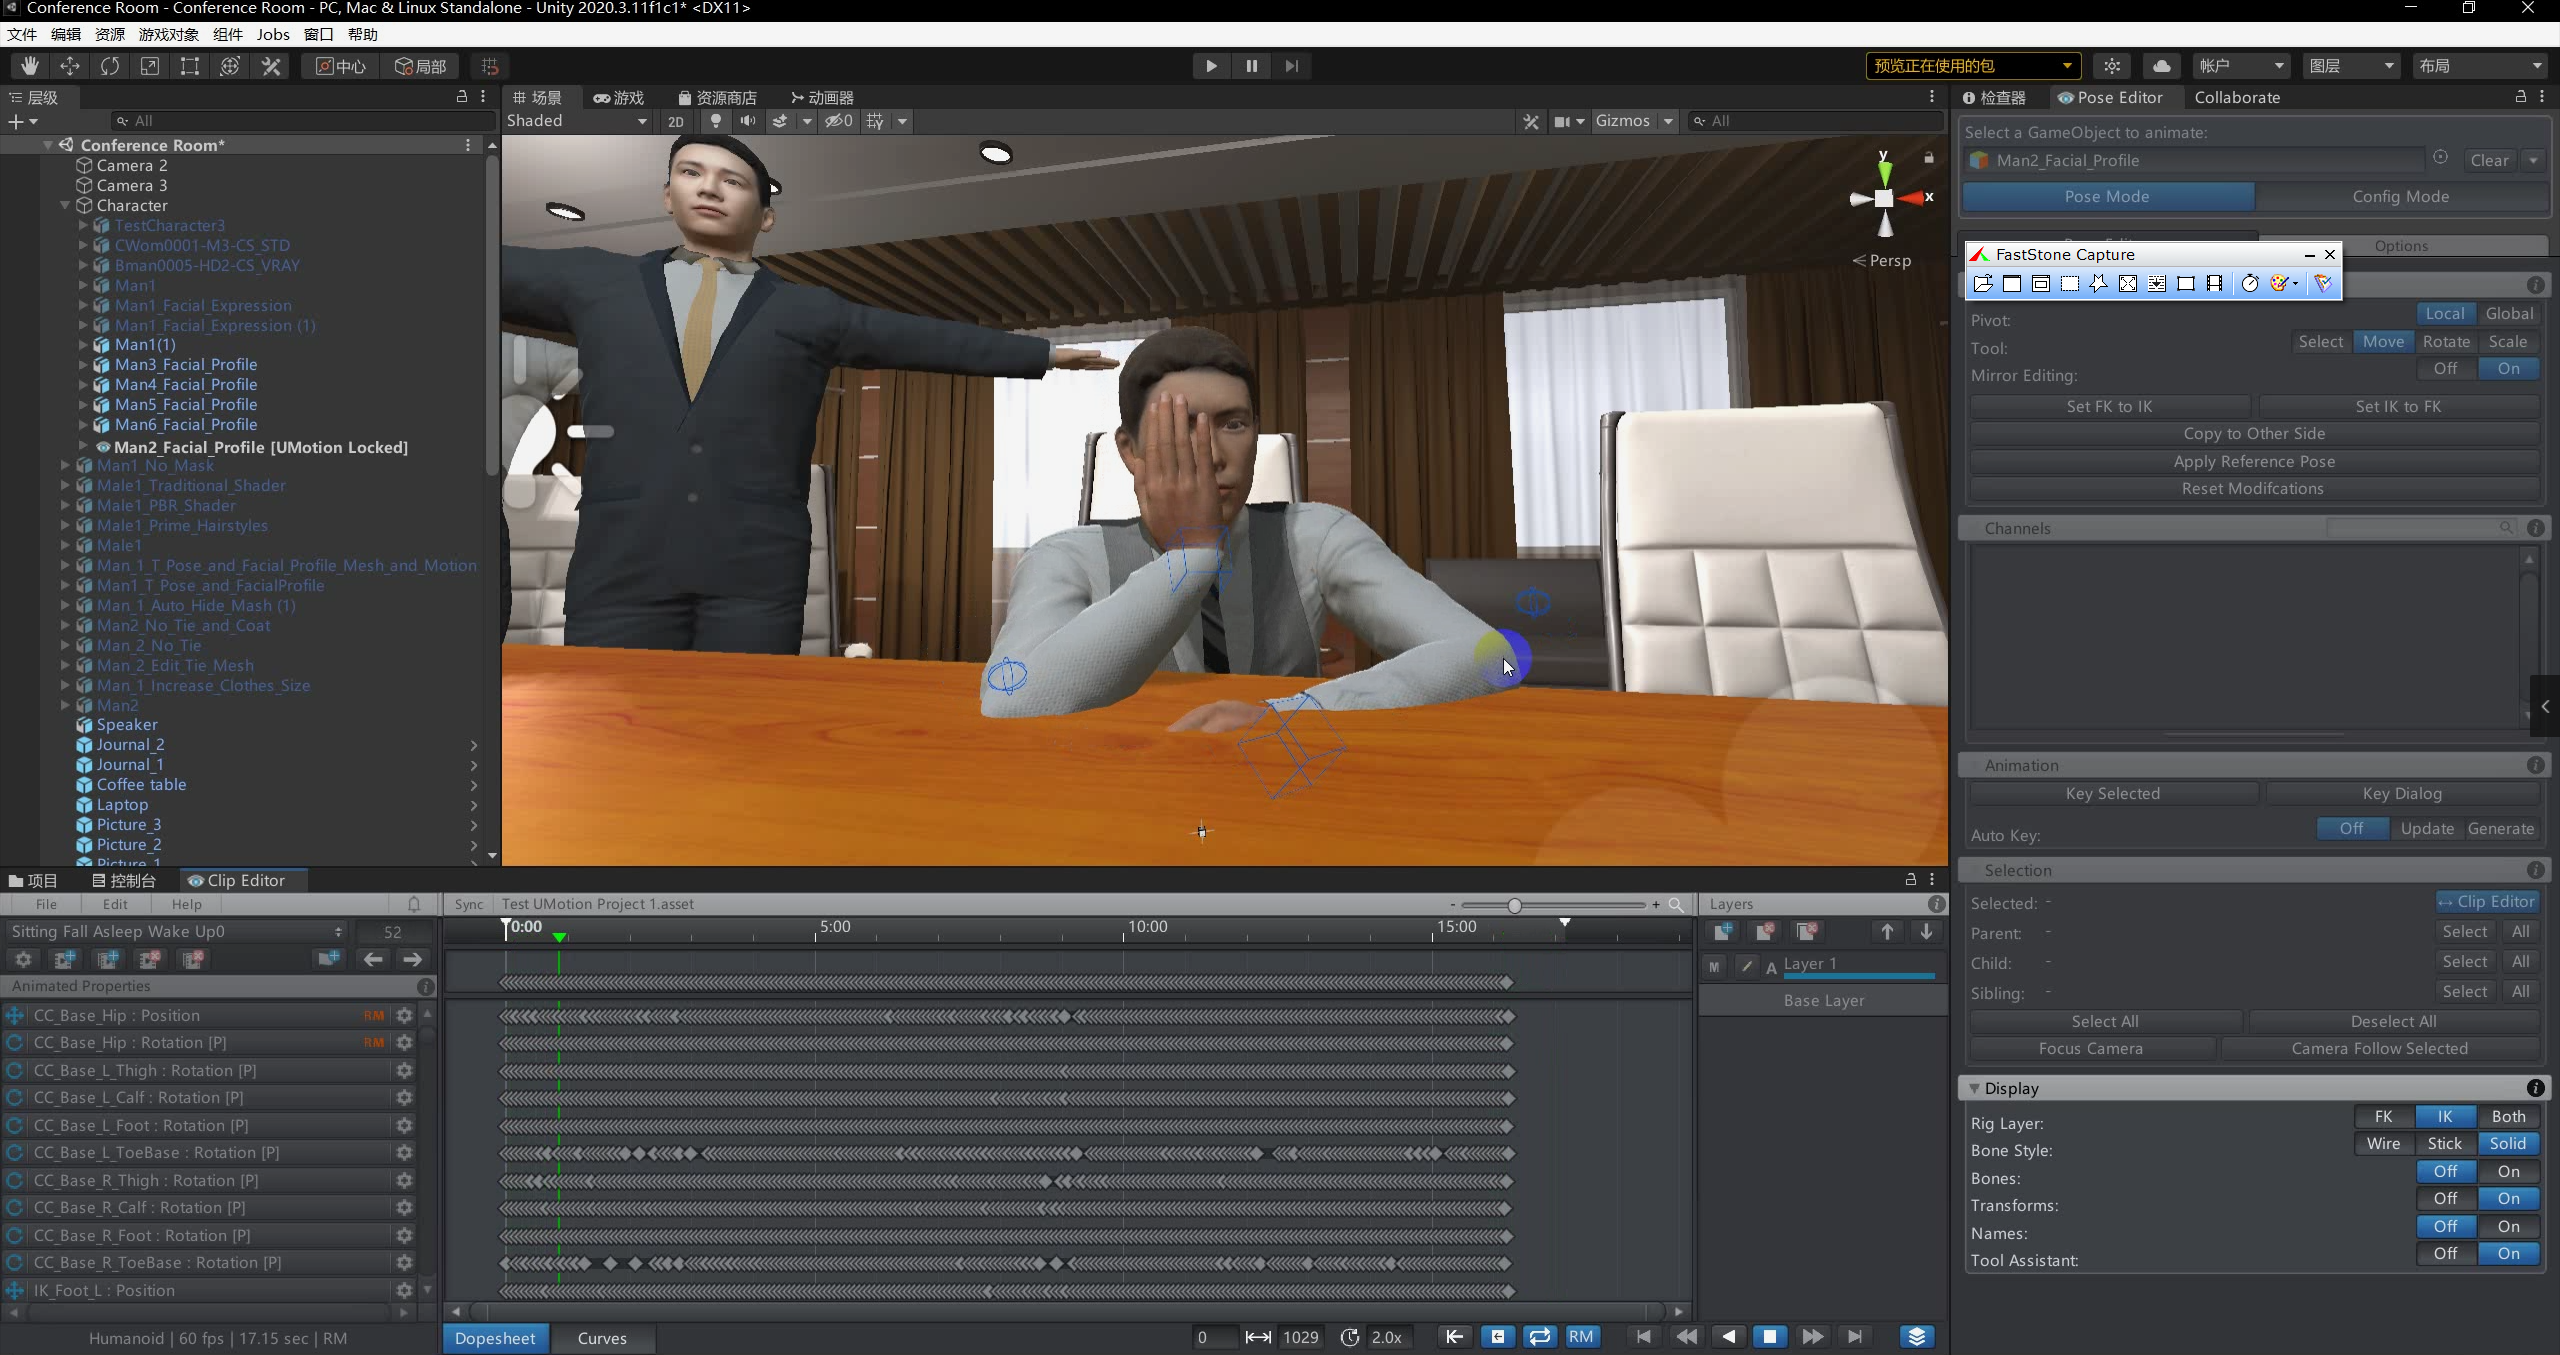
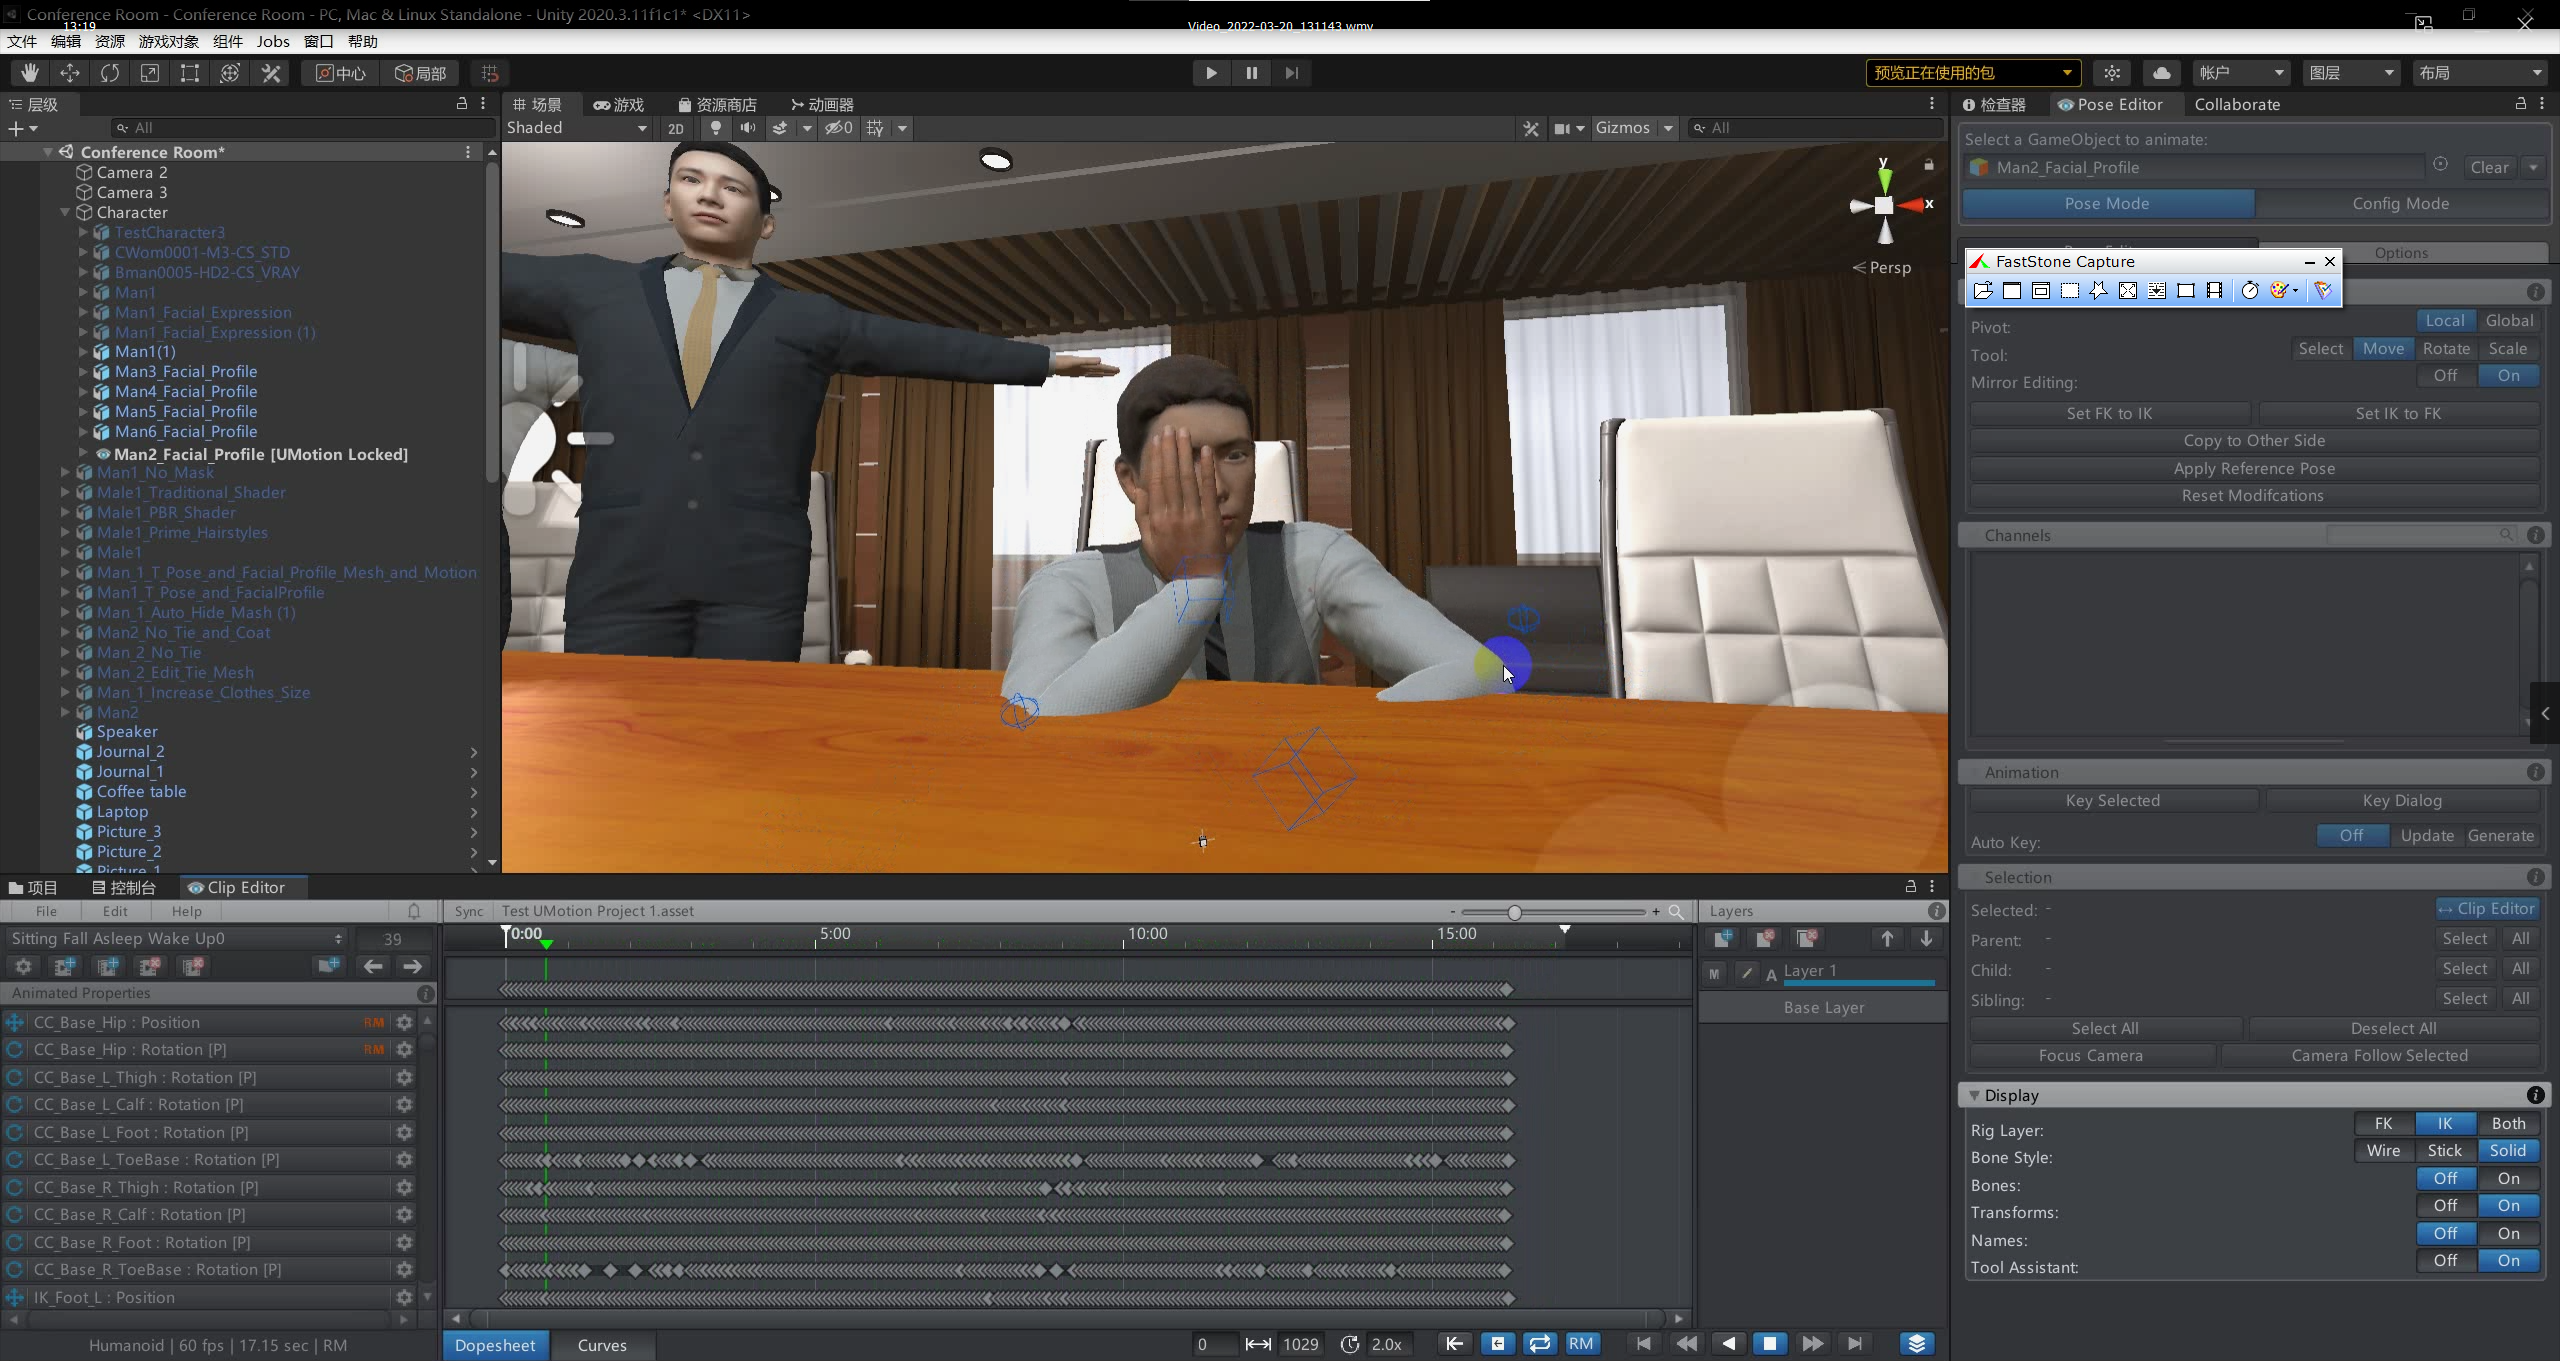
 Position of the character will be lower and lower every time the animation passes through a loop.
After the animation is imported into UMotion, the position of the character will be lower and lower every time the animation passes through a loop.
The same problem occurs when I export the animation from UMotion and use animator for looping playback.
However, if I use animator to play the original animation that has not been processed by UMotion, there will be no problem.
I can't find any solution to this problem on the Internet. If someone can help me solve it, I will be very grateful!
Please see the video file I uploaded


Hi,
thank you very much for your support request.
Select the source *.anim file that you want to import. In the inspector window, change the "Root Transform Position (Y)" setting to this:
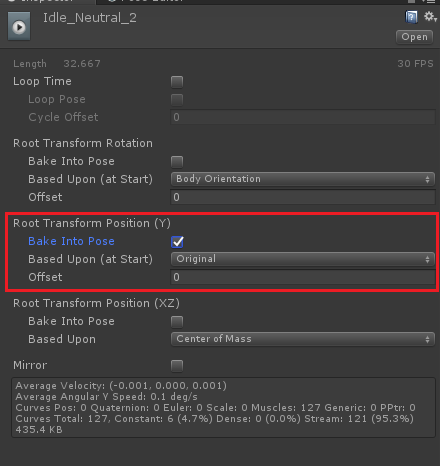
Do the same for the exported animation.
Btw. in UMotion, you can also flatten the y curve of the root bone (hips). Select the hips in the animated properties list, open the curves view and hide the x and z curves by clicking on the eye icons (in the properties list). Then select the first y key, and take a note of the value. Then select all y keys, right click on one and select "Edit Key". Then type in the value you've previously noted.
If you have some intended y movement in between, only ensure that the first and last key frame have the same value. Might also need some correction of the values of the last few frames to smooth out a potential hick-up.
Please let me know in case you have any follow-up questions or if this does not solve your issue.
Best regards,
Peter

Setting a new rig for existing animation
Hello,
I have an existing rig created with Mixamo which I used in several of my animations.
Unfortunately, I found out too late that the Mixamo rig does not support facial rig anymore.
I have created a new rig with facial bones, and with the new rig all of the bones have the same names as the old bones (besides the facial bones of course).
For some reason, in Unity, I get this when applying the new model and rig to the animation:
(This is a normal human model)
Why is this happening? Thanks
Hi,
thank you very much for your support request.
Just equal bone names is not enough for a rig to be identical. You also need to have the exact same scaling (on the whole hierarchy) and the same local position/local rotation values on all bones.
Please let me know in case you have any follow-up questions.
Best regards,
Peter

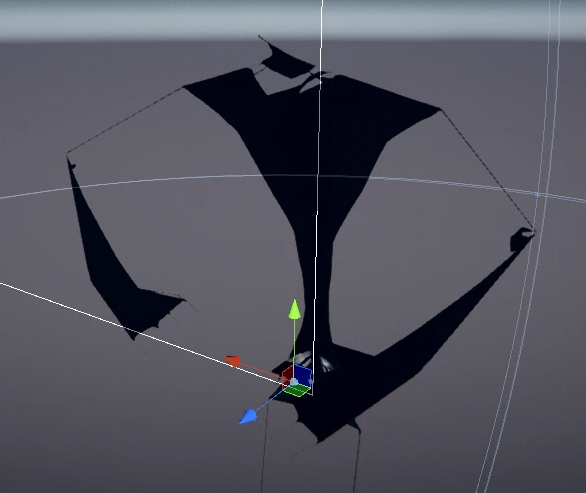
IK Rotations
Hi. I have an arm with IK. The IK is set on the wrist bone. Here is the example:
I want to have better rotation control over each part of the arm. With IK I can manipulate only the position of the arm starting from the wrist bone (IK handle). I can manipulate the shoulder rotation with the IK pole rotation option. However I want to manipulate the 2 remaining bones rotations as well. As far as I understand this is impossible to do only with IK ?
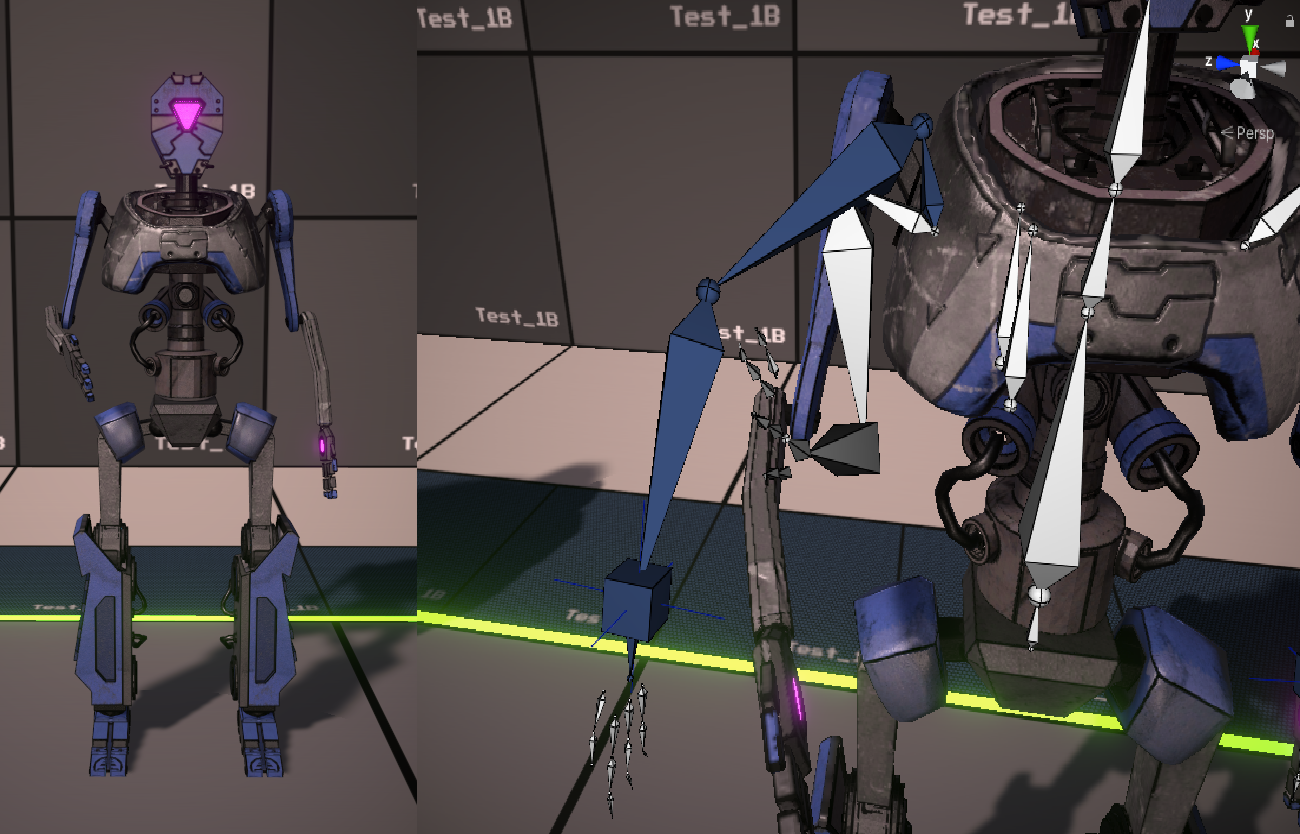
My workaround is to set the IK handle FK/IK blend to 0.5 and to view both IK and FK bones at the same time.
Technically this is going to work, but in practice it is very messy and confusing. You can see in the right image.
IK and FK are affected only half way (because of the ik/fk blend) and there is a difference between the bones visually.
In the long run this leads to having IK bones flying around in some random direction away from the actual model + FK being somewhere far away as well.
Ideally what I want is to just be able to select the bones between the IK handle and end of pole rotation and be able to rotate them there and then. It would save so much trouble than my current way of animating.
Can you please tell me how to resolve this. I have been watching the tutorial videos, but am unsure if this is the proper way of doing things.
Hi,
thank you very much for your support request.
I think the reason you're having so much trouble is because you included the shoulder bone in your IK chain. That's not really an ideal setup because with the more bones you add to the IK chain, the less individual control you have.
I would recommend using the IK setup wizard for automatic setup of your human like character. It automatically generates a 2 bone IK solver for your arms and legs. Because your elbow joint is a one dimensional joint anyway, with the IK handle (for end-point position) and the IK pole handle for elbow orientation (= rotations around the shoulder joint) you have control over all degrees of freedom that are meaningful possible by this character. Using FK, you can control the shoulder bone.
Hope this makes sense. Please let me know in case you have any follow-up questions.
Best regards,
Peter
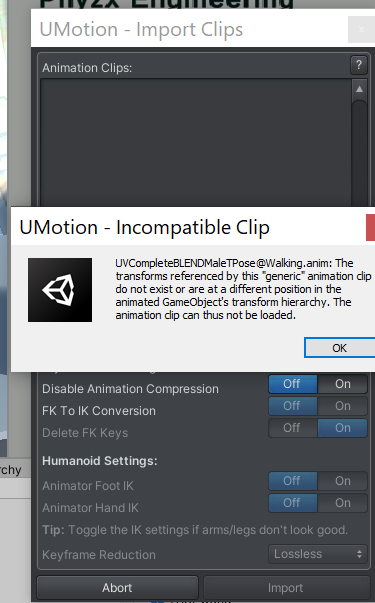
Can't import mixamo animation
I imported a Mixamo rig with the walking animation.
What is the workflow for getting that animation into the clip editor?
I am also trying to get it into the Unity animation editor because I am thinking that all these are some how dependant on each other.
Am I wrong in this thinking? Thank you for this great product.
Hi,
thank you very much for your support request.
In a first step, let's try to get your animation working with your character in a default Unity scene (without involving UMotion at all). If your animation is stored inside your character's fbx file, you can leave the rig type as generic if you want. If your animation is stored in a separate fbx file than your character, the animation might use a different rig than your character so you might have to use humanoid on both of them.
There are a few Mixamo + Unity tutorials on youtube that might help you in this process.
As soon as you have a character in your scene that plays the animation correctly, we can continue with UMotion:
- Create a new UMotion project and make sure to select either humanoid or generic, depending on how you configured your character.
- Assign the character from the scene view to the pose editor's "Animated GameObject" field and confirm the appearing dialog.
- Click on "File --> Import Clips" in the clip editor and select the fbx file that contains the animation clip that you've previously assigned to the character in your scene.
- Click on import --> your animation should now be ready to use.
Please let me know in case you have any follow-up questions.
Best regards,
Peter
How to move the model's eyes with IK?
こんにちは!素晴らしい資産をありがとう。
すでに登場している場合はごめんなさい。IKで目を動かす方法があるか知りたいです。
モデルの目を1つずつ直接動かすことができました。
ただ、片方の骨やゲームオブジェクトを動かして両目で見られる方が楽だと思います。
ブレンダーを使えばIKでそれができましたが、UMotionでたくさん試しましたが、それは困難でした。
それを行う方法はありますか?
モデルはヒューマノイドです。
Hi,
thank you very much for your support request.
There is currently no native implementation of a "Look-At" constraint in UMotion but by using the UMotion callback system you can add that functionality with just a few lines of code. I've created the script for you, please create a file named "UMotionLookConstraint.cs" in your Unity project and copy & paste the following code. Then follow the comments in the code to learn how to use the script:
using UnityEngine;

// Outside of UMotion, assign this script to both the left and right eye bone of your character.
// Create a new empty transform, name it something like "Eye Target" and assign it to the "Eye Target Transform" field in the inspector.
// Pro tip: Use one separate target per eye and one parent empty transform to move both at the same time. That allows you to animate/control eye convergence.
public class UMotionLookConstraint : MonoBehaviour
{
    public Transform EyeTargetTransform = null;

    // Open the "Options" tab in the clip editor and in the "Extending UMotion" foldout add "UMotionCallback" into the "Callback Name" input field.
    // Documentation: https://www.soxware.com/umotion-manual/Options.html#ExtendingUMotion
    public void UMotionCallback()
    {
        // Assumes that the z-axis is the forward axis of the eye.
        // Use ".right" (x-Axis) or ".up" (y-Axis) in case a different axis is the eye's forward axis.
        // Put a minus in front of the parenthesis if the axis is pointing in the opposite direction.
        transform.forward = (EyeTargetTransform.position - transform.position);
    }
}
If you have any questions how to use the script, please let me know. I'm happy to help.
Best regards,
Peter
Repeat keys
Here is an example:

Is there a way to repeat those keys for the entire animation without me having to manually copy paste the same keys over and over again ? I have seen this done in other animation programs, but am unsure if it exists in umotion.
In other programs you just select the keys right click -> "repeat forever" or repeat for 30 sec or smth like that.
Hi,
thank you very much for your support request.
Unfortunately, such a feature does not exist in UMotion at this point. I've added it to my "ideas for the future" list so that this feature is considered for future updates.
Manually copy & pasting currently is the only way to achieve this.
Please let me know in case you have any follow-up questions.
Best regards,
Peter

 Exporting Anim files is very slow in Unity 2021.2 ~ 2022.1.0b8.
I used the original 2020.3.xx Unity editor and upgraded the existing project to 2021.2~2022.1b Unity editor.
The animations I was working on were about 40 frames long, and I was using a rig with a complicated hierarchy.
And after locking unnecessary properties, after importing Animations, I tried to export about 10 Anim files as they are.
Exporting seemed to be done normally until the second Anim, but after that, a message like 'Waiting for script to be executed..?(should've captured..)' appears and the export starts to take a very long time.
And if I downgrade the same project to 2020.3.xx, this exporting issue disappears.
I did a similar test on several similar projects, and exporting was too slow on all [2021.2.8, 2021.2.11, 2022.1.0b8 Unity editor].
I'm not sure if this was an issue that only happened to me and Since I can downgrade the Unity editor anytime so it's not an urgent issue.
However, I think this is an issue worth checking out, so I am writing this report.
Best Regards
Thanks again for reporting this issue and for the time you've spent investigating this. That helped a lot and I really appreciate that.
This issue is fixed in UMotion V1.28p01.
Please let me know in case you have any follow-up questions.
Best regards,
Peter
How to export only animated?
I animate just left hand. When I export animation it exports animation for all items in the clip editor with a start and end time key. How can I export just animated keys?
Hi,
thank you very much for your support request.
Humanoid animation clips always need to be "well-formed". That means a humanoid animation clip always has to define keys for all body parts. Use an avatar mask in your animator controller to mask away other parts of your animation:
When using "generic" or "legacy" as animation type, things would behave like you expected it (only the keyed parts are included in the exported animation).
Please let me know in case you have any follow-up questions.
Best regards,
Peter

Copy IK keyframes between UMotion projects
Hello, Id like to ask you if it is possible to copy keyframes between clips in different project.
Why do I need this - I have 2 Umotion projects, one humnoid and one generic. I have IK setup on both. In theory, it should be possible to copy keyframes between them and then just adjust rest of the animation. However now it seems that when I copy the keyframes and then switch UMotion projects, the copied keyframes are lost and cannot be pasted. Is there any otherway to achieve this, or could it be added as a feature? It would greatly help me as I cannot turn this rig into humanoid and I need to transfer animations from humanoid rig.
Thanks
MVD
Hi,
thank you very much for your support request.
Key frames are addressed using transform paths. An example of a transform path would be: "Root/Hips/Spine0/Spine1/ShoulderL". This path would address a bone/transform named "ShoulderL" that has a parent named "Spine1". If you copy a key frame in one project and try to paste it in another, the transform paths must match in order for the pasting to be successful. Otherwise UMotion cannot know, where the key frames belong to.
What you could try, if you do know a bit about Unity C# scripting is using the UMotion API to craft a tailored solution for your situation:
- In the first step, create a script that loops through the whole animation clip and stores all the world space position/rotation values of the IK handles.
- In a second step, create another script that then writes the previously stored world space position/rotation values to the other model's IK handles. Simply hardcode the names of the IK handles in your script to map them correctly.
Here is some further information regarding the UMotion API: https://www.soxware.com/umotion-manual/UMotionAPI.html
https://forum.unity.com/threads/umotion-animation-editor.490618/page-13#post-7801521
Please let me know in case you have any follow-up questions.
Best regards,
Peter
Customer support service by UserEcho
