
 Generic Helicopter shake with Blade Movement animation
I have a generic helicopter with a blade movement animation on Blades but now I want to add a "shake" animation to the Helicopter. How can I combine the 2? Small helicopter shake with blades doing a normal helicopter rotation in hover.
The shake will be suttle but blades as you know rotation fast so I can't make one animation clip with adjusting helicopter and blades from start to end. If that make sense. Really love your product- It makes working with Animations enjoyable!

Hi,
thank you very much for your support request and I'm glad to hear that you enjoy working with UMotion. That means a lot to me.
Maybe using an additive animation layer for adding the shake would help in your situation?
Layers in the Manual: https://www.soxware.com/umotion-manual/Layers.html
Video tutorial that uses an additive animation layer: https://www.soxware.com/umotion-manual/InPractice2.html
Please let me know in case you have any further questions.
Best regards,
Peter

Exporting FBX without the model
Hello,
I'm importing FBXs with animation files and no meshes from my motion capture software. I'd like to export the animations back into an FBX (can be new or update existing) once I've modified the animation. When I export to an FBX it includes the mesh and other game objects within my player object into the FBX which I do not want.
My desired FBX output would only include an empty Reference GameObject (if necessary) and the animation file.
I do not want to export only the .anim file as it'll be much larger than the compressed version stored in an FBX and take up a lot of space within my project. I have thousands of animations and the storage space increase would be far too large.
Hi,
thank you very much for your support request.
In my experience, when you want your animation to be compatible with humanoid, exporting your animations with a mesh results in less problems. Unity automatically creates a working humanoid avatar for you, which is not always working that great for animation files that have no mesh assigned to them. You can export multiple animations into a single FBX file if you don't want to have the same mesh over and over again.
If you really don't want to have a mesh in your FBX file, just select the original FBX file that you've used to import your animation as destination file. The skeleton hierarchy present in that FBX file is kept. UMotion does not add any mesh data.
There is also a mode to export as a fresh FBX file in UMotion (in the settings, simply change the "Write Mode" to "Export As New File"). This also includes no mesh data. Make sure to add a T-Pose as a first frame, otherwise Untiy's humanoid animation system most likely does not create a working humanoid avatar for that animation.
Further reading
Export settings: https://www.soxware.com/umotion-manual/ProjectSettings.html
Export feature: https://www.soxware.com/umotion-manual/ImportExport.html
Please let me know in case you have any follow-up questions.
Bets regards,
Peter
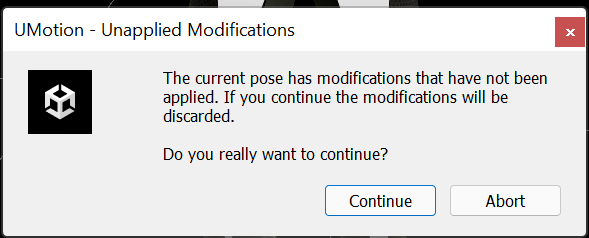
"If you continue the modifications will be discarded". How do I apply them?!
I think I have clicked all possible buttons with no result...
Hi,
thank you very much for your support request.
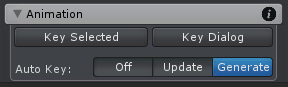
By default, in UMotion you have to manually create key frames for each change you make to a bone. Of course there is also auto key which (like in Unity by default) creates a key as soon as you modify a bone.
To create a key frame manually, select the modified bones (they are displayed in red) and click on the "Key Selected --> Key All" button in the Pose Editor. Set "Auto Key" to "Generate" in the Pose Editor if you want UMotion to automatically create keys for you every time you modify a bone.
Btw. I highly recommend watching the quick start video tutorial. It's 5 minutes long and covers stuff like this:
https://www.soxware.com/umotion-manual/QuickStart.html
Please let me know in case you have any follow-up questions.
Best regards,
Peter

CameraSetting
Is it possible to set the camera in edit mode?
I'm working on a first person animation,
I need the active camera to correct the animation.
And another question is the skeleton class of the parent-child state.
Humanoid(main skeleton)=>Item(child skeleton)
This way there is no need to create a new UMotion project for every item..
Hi,
thank you very much for your support request.
When doing a first person animation, use the "Game" window to check how your animation is going to look like from the first person perspective. Changing the "Aspect" setting in the game window to your target aspect (e.g. 16:9) helps showing the correct protion of the screen even if the game window isn't maximized (full screen).
With UMotion you can animate camera settings, but only if the camera is a child object of the character you are currently animating in UMotion. Generally speaking, an animation can only reference objects and properties that are children of the "Animator" component that actually plays the animation file.
In order to animate properties like the camera's settings, use a "Custom Property Constraint" in "Component Property" mode.
Please let me know in case you have any follow-up questions.
Best regards,
Peter

UMotion won't detect Feet Ears and fingers Bones/Weights :v
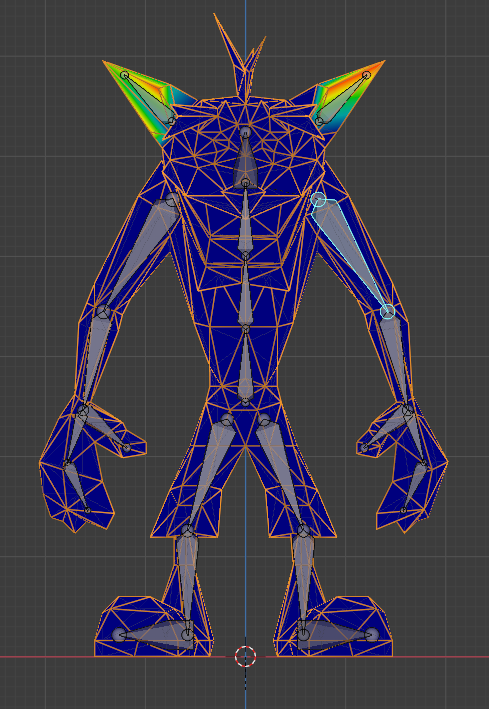
Even though my FBX file has Bones and weights in ears feet and fingers like this example in blender
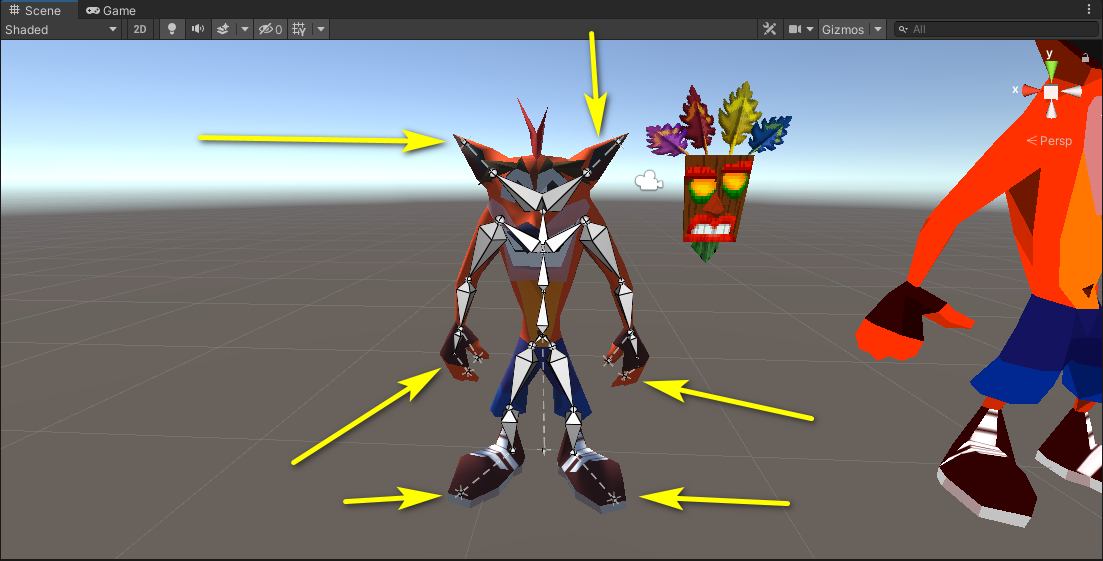
I don't know why in UMotion it won't detect them like showed in the following screeshoot
but every other bone like spine legs and arms detect it well 🤔 don't know why 😮
Hi,
thank you very much for your support request.
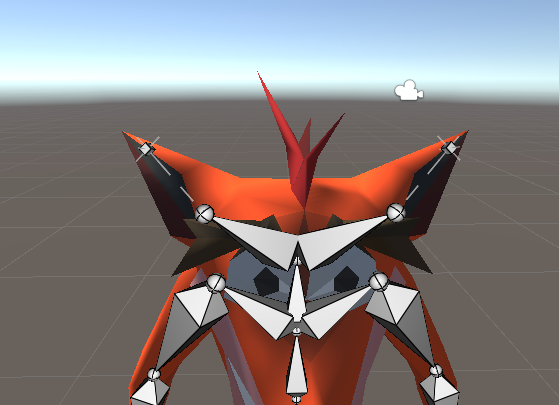
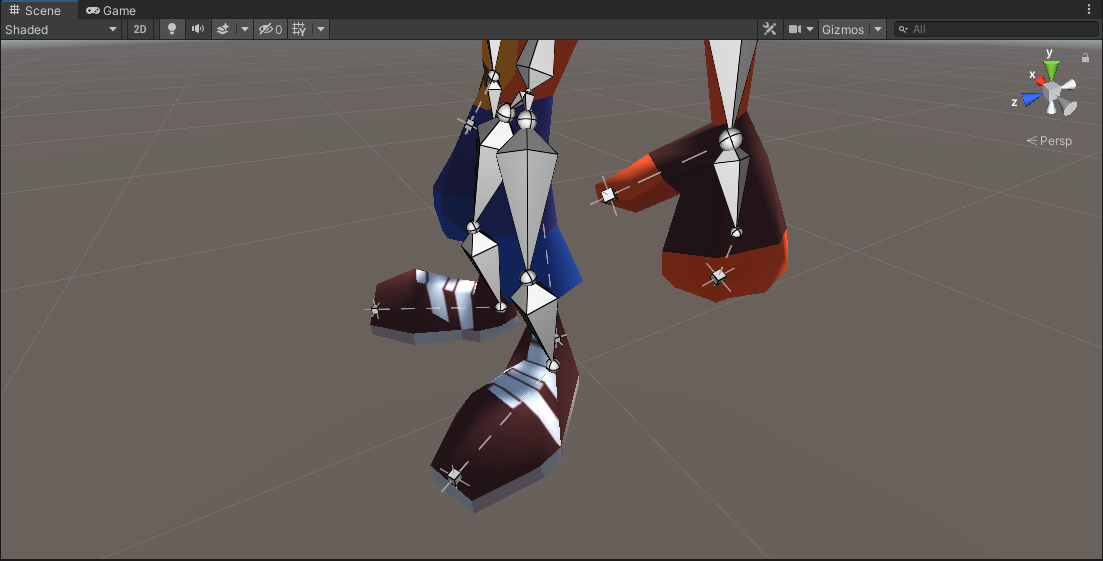
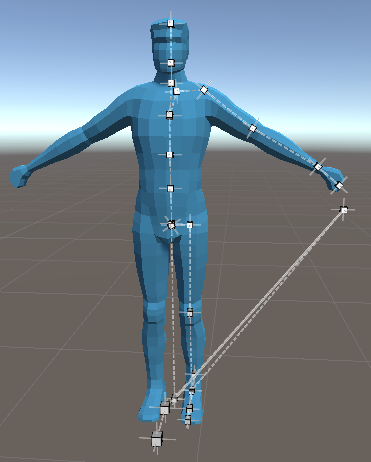
Only the last joints (e.g. the ones marked in the picture below) have actual vertex weights assigned to them:
That's why the last transform (the end joint in Blender) is displayed as regular transform because it has no vertex weights assigned and Unity thus does not treat it as a bone. The end joints only purpose (in Blender) is to define the length of the bone visualization.
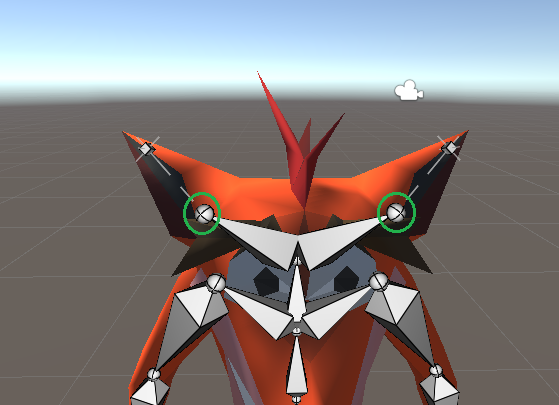
So in order to manipulate the last bone, click on the joint (the sphere) marked above.
If you want to have a complete bone displayed, you would need to extrude the joint (marked in green) in UMotion and hide the unnecessary transform that was imported from Blender. The config mode video tutorial shows you how to extrude end bones and how to show/hide transforms: https://www.soxware.com/umotion-manual/Lesson5.html
Please let me know in case you have any follow-up questions.
Best regards,
Peter
Exported animation doesn't play
Moderator: Moved from Unity forum (original post).
Hey! I wanted to ask for help. I am making a very simple animation for my penguin - in the uMotion editor everything works as expected:
However after exporting the anim and placing it in the animator, the animation just doesn't play at all:
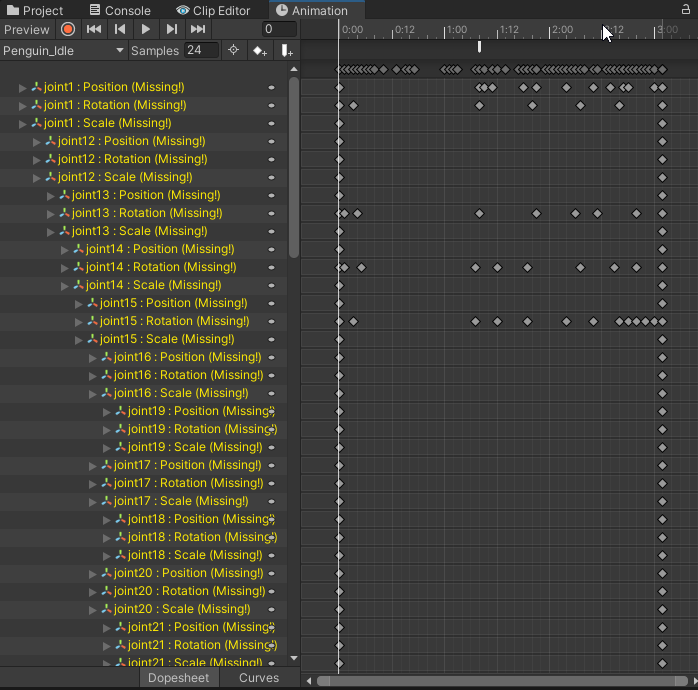
The penguin is from the Unity Asset pack (https://assetstore.unity.com/packages/3d/characters/animals/low-poly-animated-animals-93089) and comes with some animations of his own, which works just fine. However those animations work, but the animation window is reporting the bones as missing:
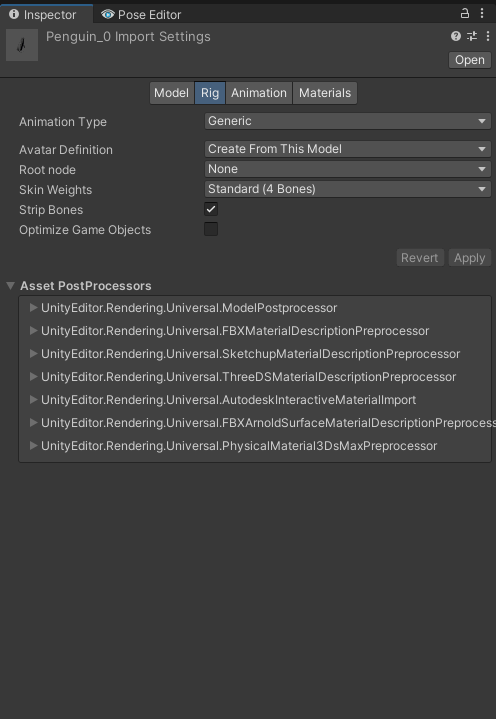
Here is the import setting of the penguin in case it is important:
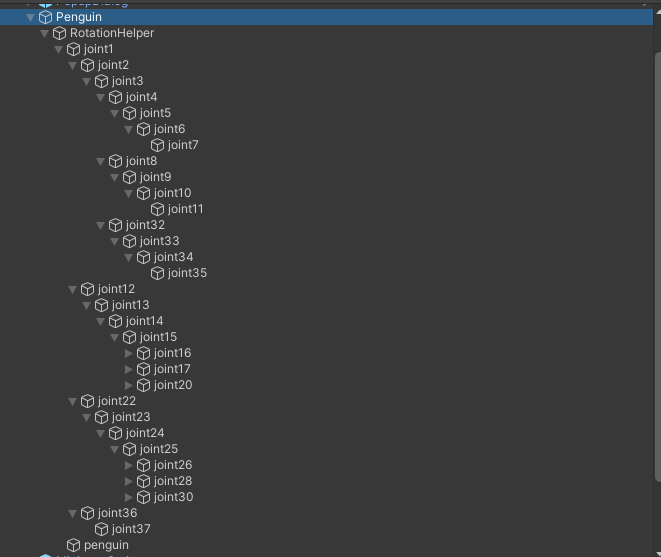
And lastly here is the bone structure as I see it in the hiearchy:
I know it is hard to help without much details and that there are a lots of things which may be wrong, but I am just completely lost.
I would HIGHLY appreciate even a suggestion about what to check / where to look / how to troublehshoot it in general .... I have no idea... I just need to be able to create some simple custom animations for the penguin and that is why I bought the uMotion Pro, which is otherwise great!
Thanks a lot for any advice
Thanks for sending me the project.
The problem seems to be coming from the "RotationHelper" transform. This transform is not present in the penguins avatar definition (this is the file that provides the rig structure information to the Animator component). So the Animator expects all transform paths that are used to bind the animation curves to the actual bones/transforms to ignore the "RotationHelper" as well.
The original animations do ignore the "RotationHelper", but Unity's Animation window does not (that's why it displays all the bones as yellow, as their transform paths are not correct because they do not contain "RotationHelper"). But the preview in the Animation window works (which Animator is responsible for) as Animator ignores "RotationHelper".
There are 2 ways to deal with this:
- Use the original penguin FBX file (that does not have "RotationHelper") for creating your animations with UMotion (instead of the prefab that got the "RotationHelper" added).
The resulting animations do not contain "RotationHelper" in their transform paths and are thus played correctly. - Remove the "Avatar" from the Animator component's avatar field of the penguin prefab. Now the "RotationHelper" is not ignored anymore. The original animations that came with the penguin are now not compatible anymore (they are missing the "RotationHelper"). But the "Nod" animation you've created previously (that contains the "RotationHelper") would be played correctly.
As the animation you've created is rather simple, I would choose method 1 and would quickly re-do the "Nod" animation.
Please let me know in case you have any follow-up questions.
Best regards,
Peter
Cannot see bones/make UMotion to work
Hello Community to be honest I'm totally new to new UMotion tool I've already watched the official and not official video tutorials and tried a lot of times myself to try to resolve this but with no luck. First of all I have a 3D character with armature made in Blender I exported the model in FBX file format then used Unity version 2020.3.33f1 according to tutorials first of all in Clip Editor windows I have to create a new .asset file and then in Pose Editor in the "None (GameObject)" option I have to drag and drop my character but when I do that 2 thing happens
#1 my character automatically appears with this "[UMotion Locked] message
#2 Instead of appearing the bones to manipulate like all video tutorials shows it appears in the character this odd white cubes which If I try to change it's transforms nothing happens
I've been days with this problem I can't continue with my project

Hi,
thank you very much for your support request.
#1 my character automatically appears with this "[UMotion Locked] message
That is normal. UMotion locked means that the character is occupied by UMotion (= assigned to the pose editor). As soon as you click on "Clear" in the pose editor, the character isn't locked by UMotion anymore.
#2 Instead of appearing the bones to manipulate like all video tutorials shows it appears in the character this odd white cubes which If I try to change it's transforms nothing happens
The cubes that you are seeing are bones that do not have any vertex weights assigned (this makes them a regular "Transform"). You might have done something wrong in Blender when creating the rig (assigned no vertex weights to bones or something the like). If the bones show correctly in Blender and the mesh also deforms correctly when rotating the bones in Blender, the problem might be related to how you've exported the character to Unity. Try to place the *.blend file directly in your Unity project, Unity can read *.blend files (hint: requires Blender to be installed).
This problem isn't really related to UMotion, the bones would also not work if you select them in Unity's regular Hierarchy window and rotate them, the mesh would also not follow the bones.
You can try using a character from the asset store that is rigged and skinned correctly (or the robot kyle character that comes with the UMotion examples folder) together with UMotion to see how things would look like when the model is setup correctly.
Please let me know in case you have any follow-up questions.
Best regards,
Peter

character moves up in idle
I have problem with idle animation cycles with NPCs. If I use Root motion, they move naturally, but all the time slightly move upwards although the angular velocities are zero in the created clip. Any ideas?
Hi,
thank you very much for your support request.
This happens due to the fact that humanoid generates the root motion curve out of the center of gravity of the character (and that might shift around even while you idle).
The simplest way to tell humanoid to stop incrementing the root motion along Y is by selecting the animation clip in Unity's project window. Then in the inspector window, set the tick mark at "Bake Into pose" under the "Root Transform Y" headline.
Please let me know how this works for you and don't hesitate to reach out again in case you have any follow-up questions.
Best regards,
Peter
cannot select weapon slide to animate
I am following the uMotion pro tutorial making fps pistol fire... Actually jumping back and forth (uMotion pro / community version) so as to use IK rather than FK which takes forever. I have the initial pose created, but cannot access the slide of the pistol. It does not show up in the animation properties, I can select the slide in the hierarchy and it shows in the selection window with children, but cannot select the slide and the only option is SELECT. move, rotate etc. will not enable. Not sure what I did wrong. Cannot select, move or rotate the gun itself thus cannot animate the slide moving back when fired.
Hi,
thank you very much for your support request.
Are you using the gun in combination with a humanoid character? In humanoid UMotion projects, all none humanoid bones are disabled by default. You can easily make none humanoid bones visible by going into config mode, select the slide transform from the "rig hierarchy" tree view and then under the "Properties" tab set "Visibility" to "Show".
If that does not help, may I ask you to post a bunch of screenshots or a short video illustrating the issue?
Best regards,
Peter
ik reset
if i messed up on my ik, how would i start over? do i have to reimport my models? when i tried to remove all the of the applied ik there was some blue left and it didn't have that delete custom.
Hi,
thank you very much for your support request.
Yes removing all IK constraints is the way to go. If a bone is still in blue, there might still be an IK constraint controlling the bone.
oh wait after I changed scenes or possibly reimported the project, its gone now.
Sounds like the issue is already solved for you. Don't hesitate to contact me again in case you have any follow-up issues.
Best regards,
Peter
Customer support service by UserEcho
