 Bug in the Clip Settings Window
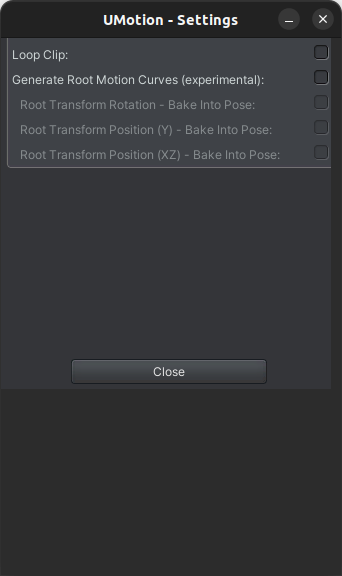
There is a bug in the Clip Window, it's not drawing correctly on Linux Ubuntu, I can't rename the clip name neither clip on any of the toggle options.

Fixed in UMotion V1.28p04 (available for download via the asset store). Thanks again for reporting this issue.
Best regards,
Peter

Fixed in UMotion V1.28p04 (available for download via the asset store). Thanks again for reporting this issue.
Best regards,
Peter

 Suggestion, scrub selection
trying to select a part of the animation and stop selecting at a specific point in the animation without having to count
an option for the clip editor that makes it scrub through the animation at the same time of using the marque select at the top of the window. it would make it much easier to know when to stop selecting.
 WWF Smackdown style animation
Moved from Unity forum by Mod: https://forum.unity.com/threads/umotion-animation-editor.490618/page-13#post-8109905
Hi there
I've got a question if it's okay? I tried using the forum search, and couldn't find any questions about child-of, apologies if there are some that I couldn't see on my trawling.
I've bought the Umotion Pro Asset, and have finally got an excuse to put it through its paces (it looks incredible!), and I am particularly interested in the child-of contraints. I've watched the guides and read the documentation, then had a quick go at using it and it seems to do exactly what we need, but I've got two complications for our use case that I'm unsure are possible in Umotion?
The first is if I could set the childof contraint at runtime so that the same animations can be applied on different humanoid targets at runtime?
In the example video below, the two animators are independent, but then at roughly 4 seconds in there's a move where one wrestler picks up the other and they're both momentarily seemingly playing a 2 person animation, and that's the exact thing we'd love for our project.

The second is if we'd make the receiver of the attack animate using a separate controller or if Umotion would be able to work out what it needs to map to and apply that to our child node?
Thank you so much for your time and best wishes,
Adam :-)

Hi Adam,
thank you very much for your support request.
If you create such a "paired" animation, there are several things to consider:
- The same position/rotation offset the characters had during authoring of the animation should be present at runtime. So your movement code needs to make sure that both your characters have the correct starting position/rotation offset before playing the animation. The simplest form would be to "teleport" the characters to have the correct offset.
- UMotion does not perform any runtime code. So no, the child-of constraint or UMotion's IK system is not available at runtime. UMotion solely creates *.anim files that contain the ready made animation. In order to adapt an animation to runtime situations, a runtime IK solution like animation rigging or Final IK is needed.
- To animate two characters at the same time in UMotion, you have the following options: https://support.soxware.com/en/communities/1/topics/726-animate-two-or-more-models-at-the-same-time
Please let me know in case you have any follow-up questions.
Best regards,
Peter

 how rotate two ik on the center pivot
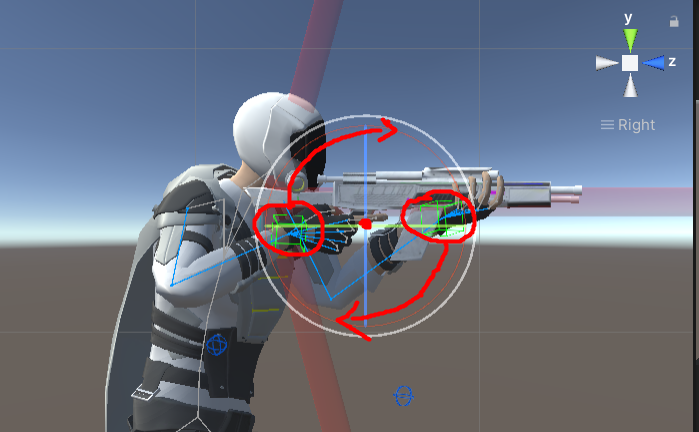
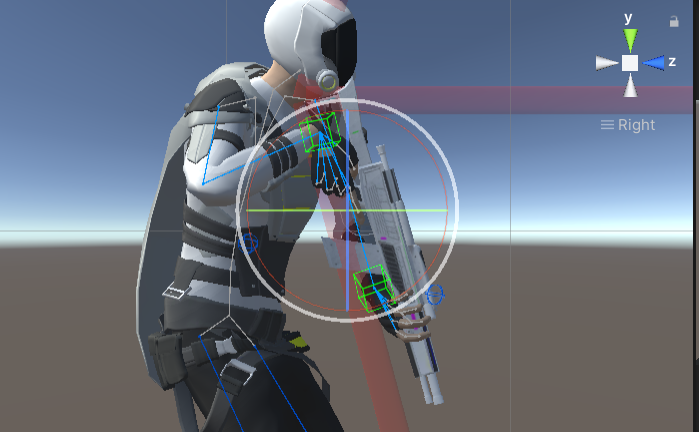
how to rotate the two iks in the center between two selected iks, so that the position is also changed by the rotation as in the image below

Hi,
thank you very much for your support request.
I would suggest to make the left hand a child of the gun (or a child of the right hand) using the child-of constraint. Then move and rotate only the right hand and the left hand follows correctly.
- Go into config mode and select the IK handle of the left hand.
- Open the constraints tab and scroll down to the child-of constraint. Remove the tick mark from the "IK Pinning Mode" field.
- Return to pose mode.
- On the first frame of your animation (or on the first frame where your left hand grabs the gun):
Select the left hand's IK handle and in the channels view, set either the right hand's IK handle or the gun as parent. - Create key frames for your changes (using the "Key Selected" button).
More information: https://www.soxware.com/umotion-manual/ChildOf.html
Unfortunately, there is currently no "rotate around center" functionality in UMotion. This is due to the fact, that usually using the child-of constraint is the superior/more robust approach. It ensures that the (left hand in your case) stays glued to the gun. Using the rotate around center approach is a more manual approach that can get tedious to correct once you accidentally got a little offset in your left hands position somewhere in the middle of the animation.
Please let me know in case you have any follow-up questions.
Best regards,
Peter

 Generic Helicopter shake with Blade Movement animation
I have a generic helicopter with a blade movement animation on Blades but now I want to add a "shake" animation to the Helicopter. How can I combine the 2? Small helicopter shake with blades doing a normal helicopter rotation in hover.
The shake will be suttle but blades as you know rotation fast so I can't make one animation clip with adjusting helicopter and blades from start to end. If that make sense. Really love your product- It makes working with Animations enjoyable!

Hi,
thank you very much for your support request and I'm glad to hear that you enjoy working with UMotion. That means a lot to me.
Maybe using an additive animation layer for adding the shake would help in your situation?
Layers in the Manual: https://www.soxware.com/umotion-manual/Layers.html
Video tutorial that uses an additive animation layer: https://www.soxware.com/umotion-manual/InPractice2.html
Please let me know in case you have any further questions.
Best regards,
Peter

 Exporting FBX without the model
Hello,
I'm importing FBXs with animation files and no meshes from my motion capture software. I'd like to export the animations back into an FBX (can be new or update existing) once I've modified the animation. When I export to an FBX it includes the mesh and other game objects within my player object into the FBX which I do not want.
My desired FBX output would only include an empty Reference GameObject (if necessary) and the animation file.
I do not want to export only the .anim file as it'll be much larger than the compressed version stored in an FBX and take up a lot of space within my project. I have thousands of animations and the storage space increase would be far too large.

Hi,
thank you very much for your support request.
In my experience, when you want your animation to be compatible with humanoid, exporting your animations with a mesh results in less problems. Unity automatically creates a working humanoid avatar for you, which is not always working that great for animation files that have no mesh assigned to them. You can export multiple animations into a single FBX file if you don't want to have the same mesh over and over again.
If you really don't want to have a mesh in your FBX file, just select the original FBX file that you've used to import your animation as destination file. The skeleton hierarchy present in that FBX file is kept. UMotion does not add any mesh data.
There is also a mode to export as a fresh FBX file in UMotion (in the settings, simply change the "Write Mode" to "Export As New File"). This also includes no mesh data. Make sure to add a T-Pose as a first frame, otherwise Untiy's humanoid animation system most likely does not create a working humanoid avatar for that animation.
Further reading
Export settings: https://www.soxware.com/umotion-manual/ProjectSettings.html
Export feature: https://www.soxware.com/umotion-manual/ImportExport.html
Please let me know in case you have any follow-up questions.
Bets regards,
Peter
 "If you continue the modifications will be discarded". How do I apply them?!
I think I have clicked all possible buttons with no result...
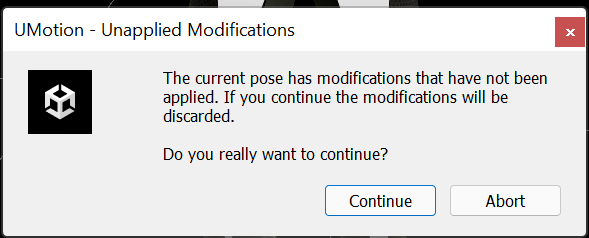

Hi,
thank you very much for your support request.
By default, in UMotion you have to manually create key frames for each change you make to a bone. Of course there is also auto key which (like in Unity by default) creates a key as soon as you modify a bone.
To create a key frame manually, select the modified bones (they are displayed in red) and click on the "Key Selected --> Key All" button in the Pose Editor. Set "Auto Key" to "Generate" in the Pose Editor if you want UMotion to automatically create keys for you every time you modify a bone.

Btw. I highly recommend watching the quick start video tutorial. It's 5 minutes long and covers stuff like this:
https://www.soxware.com/umotion-manual/QuickStart.html
Please let me know in case you have any follow-up questions.
Best regards,
Peter

 CameraSetting
Is it possible to set the camera in edit mode?
I'm working on a first person animation,
I need the active camera to correct the animation.
And another question is the skeleton class of the parent-child state.
Humanoid(main skeleton)=>Item(child skeleton)
This way there is no need to create a new UMotion project for every item..

Hi,
thank you very much for your support request.
When doing a first person animation, use the "Game" window to check how your animation is going to look like from the first person perspective. Changing the "Aspect" setting in the game window to your target aspect (e.g. 16:9) helps showing the correct protion of the screen even if the game window isn't maximized (full screen).
With UMotion you can animate camera settings, but only if the camera is a child object of the character you are currently animating in UMotion. Generally speaking, an animation can only reference objects and properties that are children of the "Animator" component that actually plays the animation file.
In order to animate properties like the camera's settings, use a "Custom Property Constraint" in "Component Property" mode.
Please let me know in case you have any follow-up questions.
Best regards,
Peter

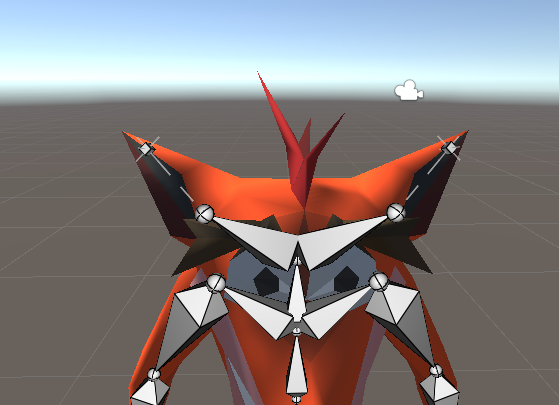
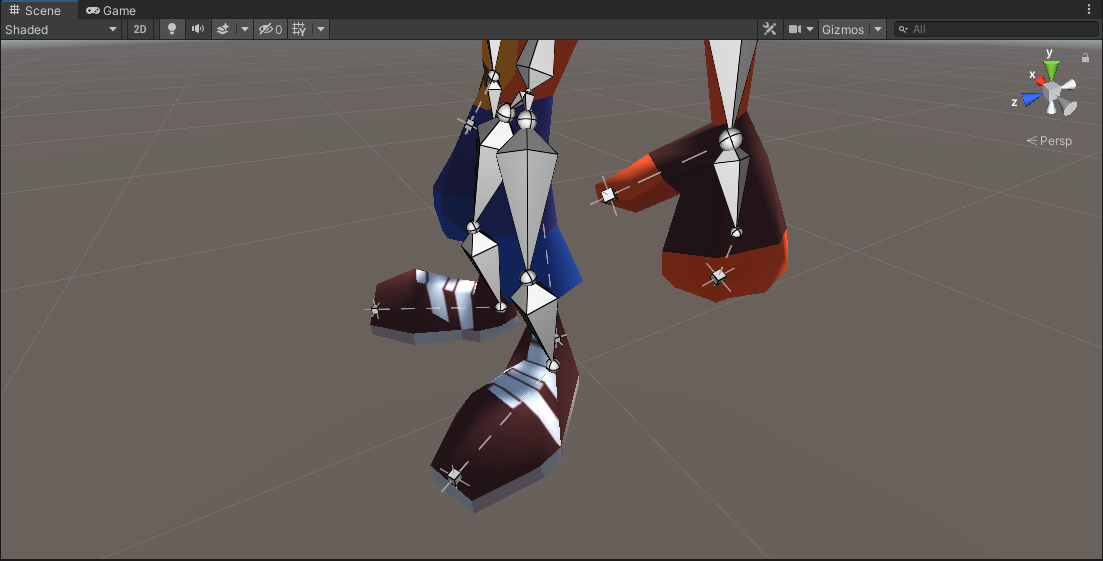
 UMotion won't detect Feet Ears and fingers Bones/Weights :v
Even though my FBX file has Bones and weights in ears feet and fingers like this example in blender
I don't know why in UMotion it won't detect them like showed in the following screeshoot
but every other bone like spine legs and arms detect it well 🤔 don't know why 😮
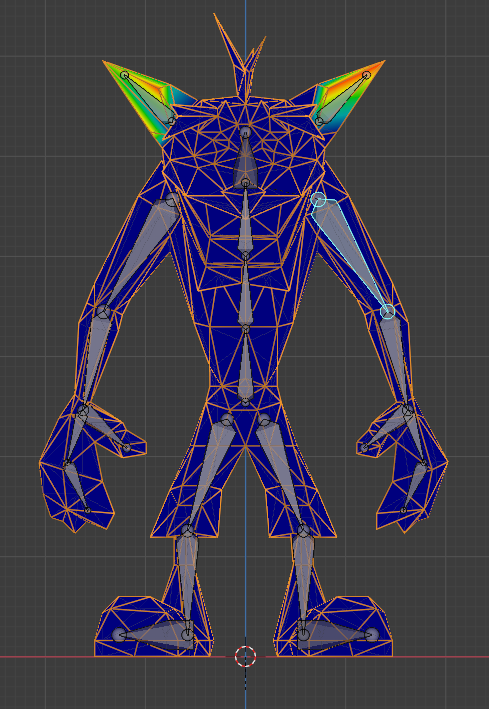

Hi,
thank you very much for your support request.
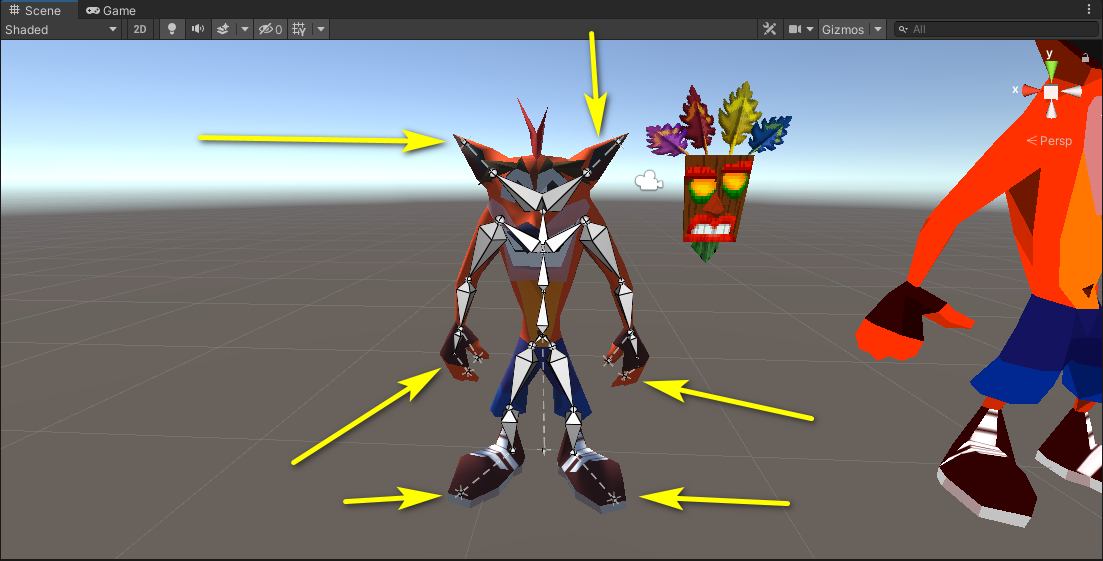
Only the last joints (e.g. the ones marked in the picture below) have actual vertex weights assigned to them:
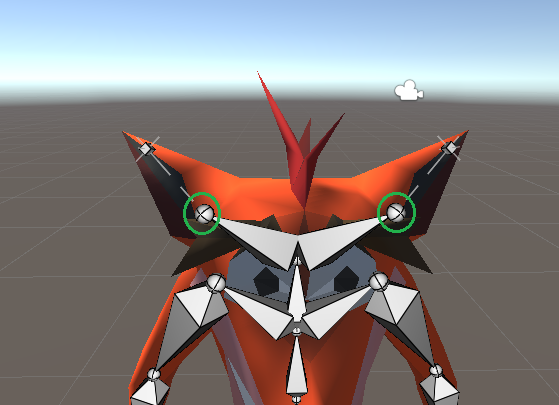
That's why the last transform (the end joint in Blender) is displayed as regular transform because it has no vertex weights assigned and Unity thus does not treat it as a bone. The end joints only purpose (in Blender) is to define the length of the bone visualization.
So in order to manipulate the last bone, click on the joint (the sphere) marked above.
If you want to have a complete bone displayed, you would need to extrude the joint (marked in green) in UMotion and hide the unnecessary transform that was imported from Blender. The config mode video tutorial shows you how to extrude end bones and how to show/hide transforms: https://www.soxware.com/umotion-manual/Lesson5.html
Please let me know in case you have any follow-up questions.
Best regards,
Peter
Customer support service by UserEcho

