
 ArgumentException: Illegal characters in path.
Im just trying to use the tool just as its described. it gives me a very weird error and doesn't output anything
ArgumentException: Illegal characters in path.
System.IO.Path.Combine (System.String path1, System.String path2) (at :0)
01100101101111000011001010100111100101001011100.11101001010110101000101011101000000101010001100 (UnityEngine.AnimationClip 01111001000001100011100110110101011100110110110, SoxwareInteractive.AnimationConversion.AnimationConverter+Configuration 00110101111000110100101101011111011111011010111, System.Single 00001110111001010001111100000000100011111000101, System.Single 11011111000111101110101001100000001111101110010, System.String& 11110001011111110000100111100001101101000111111) (at :0)
SoxwareInteractive.AnimationConversion.AnimationConverter.Convert (UnityEngine.AnimationClip[] clips, SoxwareInteractive.AnimationConversion.AnimationConverter+Configuration configuration, System.String& logMessages) (at :0)
SoxwareInteractive.AnimationConversion.AnimationConverterWindow.OnGUI () (at Assets/AnimationConverter/Scripts/Editor/AnimationConverterWindow.cs:604)
UnityEngine.Debug:LogException(Exception)
SoxwareInteractive.AnimationConversion.AnimationConverterWindow:OnGUI() (at Assets/AnimationConverter/Scripts/Editor/AnimationConverterWindow.cs:610)
UnityEngine.GUIUtility:ProcessEvent(Int32, IntPtr)

Hi Jack,
thank you very much for your support request. Looks like somewhere in your file paths, there are folder names, that use not allowed characters. Try to only use only the following characters in your folder names: a-z, A-Z, 0-9, _, *space*. Also only use these characters in file names.
Please let me know in case you have any follow-up questions.
Best regards,
Peter

Error after first importing asset
Good night! I hope you're well
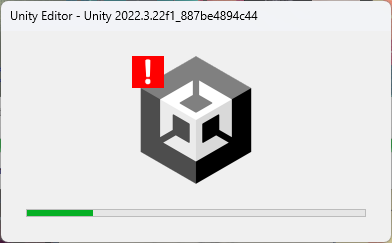
Recently I acquired the UmotionPro Asset but when I opened the example scene I find this
I tried to re-install it, close the editor and open it but still no working. I am using unity 6 beta (6,000.0.0b13). Another thing that I could notice is to when open the Umotion Pro timeline and select any character of the example scene, the timeline is empty.
Thank you so much!
Hi,
thank you very much for your support request.
Looks like the Robot-Kyle model wasn't imported correctly into your project. Please try the following: Create a new empty Unity 6 project and import UMotion there. Does that fix the issue?
Best regards,
Peter

Can this asset be used in the built application?
Can this asset be used in the built application?
I am looking for a tool that can modify timeline animations within an app built for WebGL."
Hi,
thank you very much for your support request. Unfortunately, UMotion can only be used from within the Unity editor.
Please let me know in case you have any follow-up questions.
Best regards,
Peter

 Crash after reloading API script
Similar issue:https://support.soxware.com/communities/1/topics/44-crash-on-script-update
Unity crashes when reloading a script that has been placed in UMotionEditor/Scripts/Editor to use the UMotion API and has `using UMotionEditor.API;` code in it after modifying it.
GameObject is not selected,
crashes in both cases, even if there is no project open.
Hi minibox,
thank you very much for your support request.
Does it also crash if you place the script in a different editor folder (e.g. "Assets/Editor")
Best regards,
Peter

Using FK/Ik
Hi,
I’m experimenting with Umotion Pro and so far I’m struggling with using FK/IK. What I have noticed that you cannot use both IK and FK for the same joint/transform. You have to use either IK or FK for the same joint or transform. Is that true?
Hi Fadel,
thank you very much for your support request. Correct, you can either use FK to manually place your bones or let IK automatically place your bones. With the FK/IK blend slider, you can smoothly blend between FK or IK.
You still have all the necessary manual control over IK though. Let's say your IK is controllering an arm. By moving the wired cube, you can adjust the hand position. When moving the wired sphere (i.e. the "pole target") you can adjust where the ellbow is pointing at. Depending on how you've setup your IK Constraint, you can also control the twist rotation of your bones by rotating them in the FK skeleton (see "Reference" setting https://www.soxware.com/umotion-manual/InverseKinematics.html#Setup).
In case you have any follow-up questions, please further explain your use-case scenario.
Best regards,
Peter

Blend Shapes into FBX animation
Hello UMotion team,
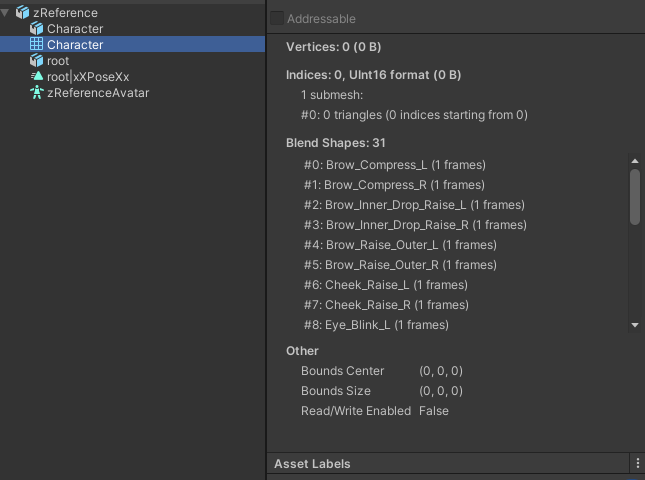
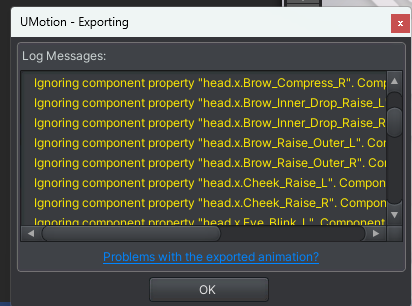
We are trying to animate blendshapes but are running into an issue when exporting the clip from UMotion into an FBX. We get the warning: "Ignoring component property (BlendShapeNameHere) component properties are not supported by the *.fbx".
This works fine if we export directly to an *.anim.
We export to an FBX so that our team can easily crop animations and add events to the clips directly in Unity's inspector. Also, the overall file size of the FBX + animation clip is less than the animation clip on its own.
In Blender, we're able to create an animation that animates the rig and the blendshapes. When we import this into Unity, the animation data contains the path to the blendshapes within the mesh. So long as this path is the same in other FBXs, we're able to animate their blendshapes.
Is it possible to achieve this with UMotion and if not, is it possible to add this feature? Our workaround within Blender would create a tremendous level of new workload hours on our team and bring about its own complications. This feature would be an enormous time saver and fit with the team's existing workflow within UMotion. Any help would be greatly appreciated!
I will attach reference images below.
Thank you.
Here is a reference of the working file from Blender.
An empty mesh with Facial blend shape data, A rig, and One animation clip with test animation and blendshapes in one.
Error message with BlendShapes on the animation
Hi Gabriel,
thank you very much for your support request.
As you correctly notices, exporting animation curves that reference Unity specific components (like blend shapes that reference the SkinnedMeshRenderer component) is currently not possible using the UMotion FBX export feature. Do you have an FBX file that contains blend shape animation curves that you could provide so that I can look at how they are usually stored in FBX and check if it would be possible to do that using UMotion? Please note that I can't promise anything yet, though.
Thank you very much.
Best regards,
Peter

Can you use Inverse kinematic for a lerping Gameobject?
Hello, i would like to have some NPC s go between transforms by lerping, i am looking for an asset that would let me to have a procedual animation(or some inverse kinematic) of the legs moving. Can this asset animate while it s lerping/ when the NPC starts to move?
Hi Recktarded,
thank you very much for your support requests. You typically would use root motion for animating the character and let it follow a path via a script. This would generate better/more natural looking results than procedural animations. It's also more straight forward.
You can optionally use UMotion to create or modify the walking root motion animation for your character. You would then setup an Animator Controller just like you would do for the player character and combine this with scripts. Here is a video tutorial I found related to this topic: https://www.youtube.com/watch?v=uAGjKxH4sDQ
Please let me know in case you have any follow-up questions.
Best regards,
Peter

 Tool to simplify animation
Hey guys, I wanted to thank you for your wonderful product!
Is it possible to add an additional toolbar that will greatly simplify the life of many animation creators:
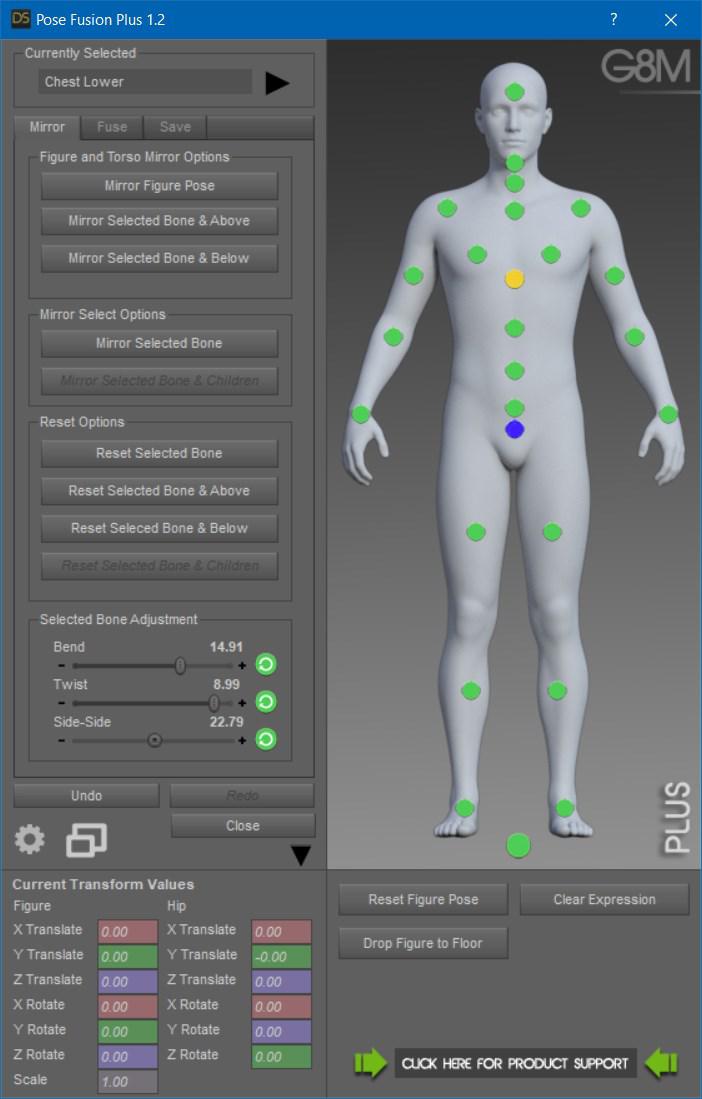
The above picture is an example of a program in which you can do “Gathering”, “Reflection”, “Copy from another pose (Partially)” and much more to selected bones. (https://www.daz3d.com/pose-fusion-plus-for-genesis-to-genesis-8)
Could you add similar functionality to your program?
Hi Mega,
thank you very much for sharing your idea with. I'm collecting all ideas in a big file and use that to prioritize new features. I added your idea to the list. Please note though, that I can't promise anything right now if and when such a feature will land.
Have a great day and thanks for helping improving UMotion.
Best regards,
Peter

Option to merge animation layers
One of the animators for our project makes extensive use of layers in their workflow and some clips end up having 15+ layers. The layers work great but the clips can end up a little disorganized, and the umotion projects can end up getting pretty bloated - often ending up being several hundred MB. While these larger projects are open, the editor will often hang on 'waiting for user code in UMotionEditor.dll to finish executing'. I think it would be very helpful for organization and performance if we had an option to merge layers.
Hi ian,
thank you very much for sharing your idea. I've added it to my list of ideas for the future. I use this list to decide and prioritize new features.
Best regards,
Peter

Why Can't change the Animated Propreties names?
hey, I changed some naming in my Player Prefab and now my Animations is not working well. so I tried to change the naming in Animation and then export it again but I can't find anything related to this. so for example I had Object_Handler in my player now I changed it to Item_Handler, so what should I do? I can't just lose all the keyframes to just renaming the object!
Hi Arian,
thank you very much for your support request. In Unity, animations use the name of objects to reference them. So that the animation isn't working straight after changing an objects name is kinda by design.
But fortunately you don't have loose your key frames in UMotion. Here is how to deal with re-naming step by step:
- Imagine you have a working UMotion project.
- Now you want to rename an object of that character.
- Click on "Clear" in the UMotion pose editor to release the character for editing.
- Now you can rename the object of your character in Unity's Hierarchy window (e.g. Change "Object_Handler" to "Item_handler").
- Assign the character to the UMotion pose editor again.
- UMotion will notify you that it found a new transform (the one you just renamed) and that it is going to be added to the UMotion project.
- (If Humanoid) Make the new transform visible again (go into config mode, select the object in the hierarchy and under "Properties" set "Visiblity" to "Show").
- Go back to pose mode.
- In the clip editor, open the curves of the old transform (it should be shown in yellow as missing). Copy all key frames and paste them into the new transform. Repeat this steps for the position/rotation/scale properties.
- Verify that everything is working as expected. Then you can go into config mode and click on "Cleanup" in order to remove the old transform from the project.
Hope this helps. Please let me know in case you have any follow-up questions.
Best regards,
Peter
Customer support service by UserEcho
