Answered

Force enable gameobject in heirarchy?

Xenos 10 months ago updated by Peter - Soxware Developer 10 months ago 3

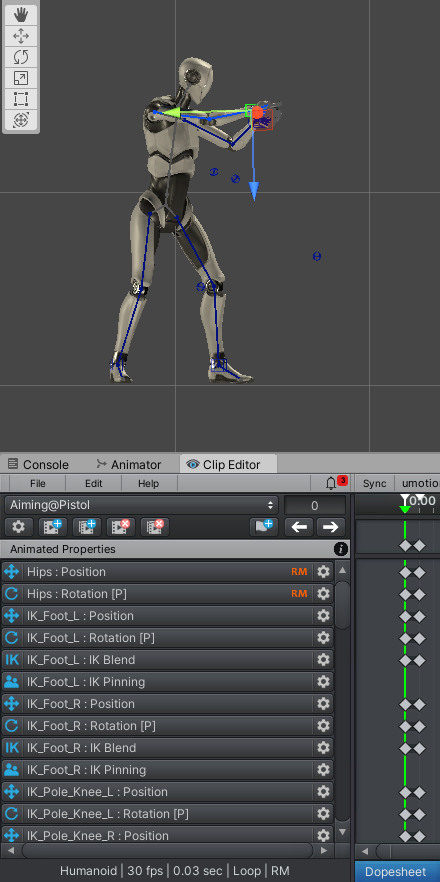
Hey I'm trying to sync Umotion to the Animator or Timeline to be able to make a reload animation for my humanoid and a seperate animation clip for my gun (childed to the hand for animating, I have code that makes it follow the hand bone in runtime) but because the root is force disabled, Unity can't play animations on the gun because its parent is disabled.

Image 1370

Answer

Hi Xenos,
the Unity humanoid animation system does not allow to animate the bone named "root" in your case. That's why it is disabled. If you want to animate "root", you would need to switch from "humanoid" to "generic".

Please let me know in case you have any follow-up questions.

Best regards,
Peter

Answered

I can't Apply key for rotation

waleed101994 10 months ago updated by Peter - Soxware Developer 10 months ago 1

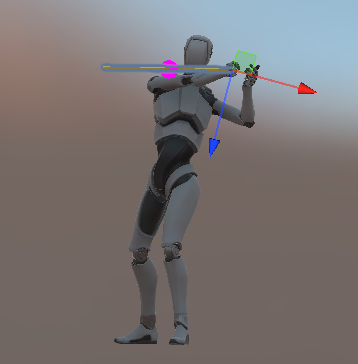
I used layers (additive). I watch the video and it looks like you pressed right click on scene view to pop-up keys menu. I use different assets with right click on scene view and I can't set the keys for rotated bone. I deleted the other asset so I can do it. but still no key menu pop-up. I read documentation and couldn't find any hints. 

Answer

Hi,
thank you very much for your support request.

There is no functionality to create a key-frame by right clicking in the scene view. In order to create a key, you have to either press the "Key Selected" button in the Pose Editor or use the related shortcut. Shortcuts are displayed in the tooltip that appears when hovering the mouse over a button.


Here is the related page in the manual: https://www.soxware.com/umotion-manual/Animation.html

Btw. you can also use "Auto Key" in "Generate" mode to automatically let UMotion create keys as soon as you rotate a bone.

Please let me know in case you have any follow-up questions.

Best regards,
Peter

Answered

some UI twerks

4f00d 11 months ago updated by Peter - Soxware Developer 11 months ago 3

Hello, then trying to Edit keys it opens up the small panel, but you have to click the panel to be able to use it, like it could be already with cursor inside it. Or maybe Unity doesnt allow it, idk

Image 1361

Image 1363

The muscle groups panel is too small, and to use it properly is most likely not possible, any try to change the sliders indicator positions leads to jumping and unwanted behavior.

And no I dont want to select multiple bones in Dopesheet/Curves panel and adjust Keys one by one, it would take hours to replicate and make slight/tiny adjustment as Muscle Groups panel does(if it does properly)

What about -/+ buttons to adjust muscle groups? this way it would be possible to increase or decrease the value, cuz clicking it with mice its magic, its either gonna do what I intended or fail and next step is ctrl+z, then again fail or success, and then you need to skip frame and again the same situations repeats.. 

Image 1364

other ideas for grouping bones or at least using some sort of filtering or logical sorting? collapsing/folding group "Header"?  cuz now at the TOP we have root/pelvis, we completely ignore foot, and add some fingers after it? then we place Head bones, and in the bottom the we place foot bones, bizarre sorting..(the fingers is probably the last used bones, or quickly adjustable with MuscleGroups panel, on every character the fingers will be displayed differently, no point to put too much effort trying to make fingers look perfect, but we have them at the TOP like its the most important thing)

Image 1365

the sorting could be as it its, but displaying every finger for most likely no reason is bad design in general


been using this asset for 2-3years, and zero UI improvements and its definitely far from perfect

Answer

Hi 4f00d,

thank you very much for your ideas for UI improvements. I've took note of all of them and am considering those suggestions for future updates.

Regarding the current sorting in the UMotion Clip Editor: The order is taken from how the bones are ordered in your character's hierarchy at the moment when it was first assigned to the UMotion Pose Editor:

Image 1367

Image 1368

So you could adjust the sibling positions of bones (do not alter the parent-child relationship!) in Unity's hierarchy window to your liking before assigning the character to the UMotion Pose Editor for the first time.

Best regards,
Peter

Answered

Position item not saved

HerQles 11 months ago updated 11 months ago 6

Hi

(Translated using google translate)

I have a problem with changing the position of an added item to my hand. How to add an item to the hand bone (Generic) so that its position can be changed in Umotion and this position will be saved.

In the hand bone I created an empty object (EquipmentHandR) in which the script spawns an item (PrefabV). When creating animations, everything is fine. I set the position of the item and create animations. When running an animation in runtime mode the position/rotation of the item is default without any changes made when creating the animation.
In the timeline (Clip editor) the position/rotation of the item (PrefabV) is saved.
What am I doing wrong?

Image 1350

Answer

Hi,
thank you very much for your support request.

If it previews correctly in UMotion the way you described it, this should indeed just work.

  • Maybe a script is overwriting the position of the item?
  • Are you sure you aren't playing an old/outdated version of the animation?
  • Are you adding/removing said item at runtime? It might be necessary to update the internal transform cache of the animator component in this case (I think simply toggling the animator.enable) might be sufficient.
  • Does the exported *.anim preview correctly when viewed using Unity's Animation window?

Please let me know in case you have any follow-up questions.

Best regards,
Peter

Answered

pose library use

Antonio Flores 12 months ago updated by Peter - Soxware Developer 12 months ago 1

I have created a list of poses that I want to use as a pose library.  When I import a clip, How do I use these poses in a humanoid animation?

Answer

Hi,
thank you very much for your support request.

After importing your poses via the animation clip import, you can simply copy and paste a pose by copy and pasting all key frames at that position (you might need to ensure that there are keys for all bones at that frame because during import, UMotion removes any redundant keys).

Please let me know in case you have any follow-up questions.

Best regards,
Peter

Answered

Umotion Animation and Timeline Animation Shift

Mümin Çentez 12 months ago updated by Peter - Soxware Developer 12 months ago 1

Hello there,

I started using umotion and it is a good asset. However I have trouble using this asset in my timeline. In timeline I have 2 humanoid characters and their animations are recorded by motion capture system.

I have imported and created the project for both animations and generate it in the timeline. However when I edit the motion in umotion and export the animation there will be a shift in the position of the characters.

I tryone of the characters arm to hold and follow the other character's arms. 

I managed to sync with timeline and edit the humanoid in umotion animation. While the project is open everything is perfect when I export to timeline the animation shifts on the sideways.

I nearly tried every option inside the editor however I do not manage to overcome this position shift. Do you have any idea?

Answer

Hi Mümin,
thank you very much for your support request.

Here is a list of settings that influence the position offset in Unity Timeline:

  1. Root motion settings that are shown in the inspector when you have the *.anim file selected. Using "Bake Into Pose" might help.
  2. There is a "Track Offset" property for each animation track in Unity Timeline
  3. There is a "Clip Offset" property for each animation clip in Unity Timeline

Having scaling applied on some of the child-transforms of your character can also cause some weird positional offsets. Make sure to only scale the root of the character.

Please let me know in case you need any further help.


Best regards,
Peter

Answered

jump and rotate 45 in the air

kloogens 12 months ago updated by Peter - Soxware Developer 12 months ago 3

I completed the tutorial where you fix the jump animation.

I removed the forward motion from the animation so the character jumps straight up and down.

All I want to do is rotate the character 45 degrees while in the air around the Y-axis.

While that sounds easy, I've spent all day trying to get it right and I can't no matter what combination I try.

 The rotation influences the Z and X axis as well (not in the inspector though it works as expected rotating on global y).   I can be in Euler rotation, quaternion progressive, local, global, absolute, or relative, it doesn't matter the output is always the same, the character rocks back and forth on both the x and z axis after it lands until it settles back down into the same pose as the first frame.

I have no idea what is going on.

Please help.


Answer

Hi kloogens,

thank you very much for your support request.

In order to rotate a character around the y axis make sure that your "Pivot Mode" in the Pose Editor is set to "Global". Then select the hips bone and rotate it using the green circle of the rotation gizmo. If you want your character to turn from e.g. frame 5 to frame 10 make sure that you have a key with the initial rotation at frame 5 and a key with the final 45° rotation at frame 10. Remove any rotation keys of the hips bone that are in between.


Please let me know in case you have any follow-up questions.


Best regards,
Peter

Not a bug

Not able to select all hand bones with Shift when in IK mode.

Anonymous 1 year ago updated by Peter - Soxware Developer 1 year ago 1

I found a reference in the forums to use Shift + selecting the wrist bone to select all fingers. It wasn't working for me and then I discovered that it only appears to work in FK.  I'm able to switch from IK to FK, select all the bones, and then go back into IK to copy them over to the other side.

Answer

Hi,
thank you very much for your support request.


Shift + Select selects all children of the clicked bone in the hierarchy. The finger bones are not children of the IK target (you can see this in the rig hierarchy view in config mode).


Best regards,
Peter

Answered

Anyway through UMotion to convert a Humanoid animation to a Generic?

BenieTheDragon 1 year ago updated by Peter - Soxware Developer 1 year ago 1

I have several Humanoid animations, but I only need to turn 1 of them into a Generic animation. This is for the Among Us Follower.
Is this possible to do through UMotion? Or do I have to purchase the $25 Animation Converter thingy (just to convert one single animation and likely never use it again, which IMO would make the cost pointless)?

Answer

Hi BenieTheDragon,
thank you very much for your support request.

Yes you can do it with UMotion Pro as well. Here are the steps:

1) Duplicate the generic character which you want to animate with these animations.

2) Configure the duplicated generic character as humanoid. Make sure that everything is setup correctly (all bones are shown in green in the humanoid avatar config and that the character is in a T-Stance). More info: https://www.youtube.com/watch?v=pbaOGZzth6g
3) Create a new humanoid UMotion project, assign the humanoid version of your character to the pose editor and import the humanoid animations you want to turn into generic. Validate that the animations play correctly.

4) Go to the settings (gear icon in clip editor) and change export type to FBX. Select your character's FBX file (of the generic one) as destination file.

5) Export the animations.


The animations are now within the FBX file of your generic character.


Please let me know in case you have any follow-up questions.


Best regards,
Peter

Answered

Can't figure out how to apply/save ik animation keys

Anonymous 1 year ago updated by Peter - Soxware Developer 1 year ago 2

Watched the tutorials. No animating experience.

I have mixamo standing idle animation. Want to add to it so that char pretends to wash hands at sink. Repositioned hands with ik. Well i guess i need to create additive layer like tutorial told me. Ofc it deleted the progress as it promised :). Made changes again. But i'm not sure how to properly apply/save the changes to additive layer at specified time.

The FK/IK Blend is greyed out and can't be modified. Key dialogue seems to detect the changes to hands and neck. So i select all and add. But when i play animation from the beginning absolutely nothing is applied. I'm missing something very obvious. Went ctr+z couple of times, but no matter what i do, i see some new keys created, both at the beginning of the animation on my new layer and in specified time, but when playing it, nothing moves, just basic idle animation is playing.

Cheers.


Image 1347

Image 1348

Image 1349

Answer

Hi,
thank you very much for your support request.

IK is supported on layers, but it's not supported to key the "FK/IK Blend" property in an additive layer. An additive layer is adding an offset to the underlaying animation (mathematically it performs an add operation: "FK/IK Blend (base layer)" + "FK/IK Blend (layer1)"). For "FK/IK Blend" this doesn't really make sense as it could yield to values that are out of range 1+1 = 2 which is not a valid value for FK/IK Blend.

So key the FK/IK Blend value on the base layer. You can also modify the IK of the hands on the base layer as your base layer does not have any IK keys anyway as the imported animation was using FK.
Alternatively you could use an override animation layer for your arms as you want there motion to be completley overwritten anyways. In an override layer, it's also possible to change the "FK/IK Blend" property.


The additive layer would be useful for e.g. adding some rotational offset to the spine so that the character is leaning over the sink. This would still keep the base idle movement of the spine just offsets it by e.g 10° (i.e. base layer spine angle + 10° of the additive layer).

I hope this shed's some light into what an additive layer actually is.

Best regards,
Peter