 Split animations
I want to make an animation of reloading weapons, but I do not want all the bones of the weapon to be inside the player root, because the guns are placed dynamically in the hands. Is it possible to split the animation? or maybe there is another way?

Hi,
thank you very much for your support request.
Everything that is placed as a child of an Animator controller can be addressed by that controller. You can use animation clips that point to transforms that are not always available (but are added during runtime).
So while creating the animation (during edit time), place the weapon as a child of the hand. During runtime, use transform.SetParent() to make the gun a child of your hand.
Please let me know in case you have any follow-up questions.
Best regards,
Peter

 Can i use unity ik after i made the animation?
Hello thi is especially important question for me because if i untic the IK in the unity animator it is fine but if i use other software like final ik just to handle the feets will it mess up anything? And also why this is happening?(Legs kind of just floating)

IK Pinning with feet
In your tutorials, you demonstrate IK pinning with arms and the hands, you also show some brief clips of adding a IK handle to the feet.
Can you please post a tutorial on how you do this with the feet please. I've spent many many hours trying to figure this out and I'm still none the wiser and a tutorial would go a long way in clarifying a difficult topic.
I'm using animations from Maximo and many of these have annoying issues with foot placement not being correct.
Hi Craig,
thank you very much for your support request.
The easiest way to setup IK pinning is by using the IK Setup Wizard. It automatically configures feet and hand IK targets to include the IK pinning functionality. You can convert existing animations to IK by clicking on "Edit --> FK to IK Convertion".
Here are some in depth tutorials (in the manual there is a nice overview of all available video tutorials in the "Video Tutorials" chapter):
How to use the IK Setup Wizard (and the manual setup approach).
IK Pinning uses the Child-Of constraint under the hood. Watch this before the IK Pinning tutorial.
IK Pinning.
And here a video tutorial where I use all of this in a practical example (fixing a broken MoCap animation):
Don't hesitate to ask in case you have any follow-up questions.
Best regards,
Peter

Animation position cursor not working after new update
Hi,
after new update, the animation position cursor (the green one) is not working the first time it's clicked, after full animation played. Animation is not being played despite moving the green cursor. When unclicked and clicked again it works until I play animation to the end.
Thanks for fixing the previous bugs - It's much better now :)
EDIT: I've added a video: umotion_cursor_bug.mp4

Error on Unity Start
Error: Could not load signature of ΊΊΉΉΉΊΉΊΉΊΉΊΉΊΊΊΉΉΊΊΉΊΊΉΉΉΉΊΊΉΊΉΉΉΉΊΉΉΊΉΉΊΉΉΉΊΉ:ΉΉΊΉΉΉΊΉΉΉΊΉΉΉΉΊΉΉΉΉΊΉΉΉΉΉΉΉΊΉΉΊΊΉΉΉΊΉΊΉΊΊΊΉΊΊΊ due to: Could not load file or assembly 'UMotionSourceApplication, Version=1.0.7264.19973, Culture=neutral, PublicKeyToken=null' or one of its dependencies. assembly:UMotionSourceApplication, Version=1.0.7264.19973, Culture=neutral, PublicKeyToken=null type: member:(null) signature:
Hi,
thank you very much for your support request.
Please check my answer to a similar support request: https://support.soxware.com/communities/1/topics/318-errors-in-unity-201842f1
Please let me know in case you have any follow-up questions or if this doesn't solve your issue.
Best regards,
Peter

Preview Animation on Umotion is different after playing it in Unity
Hi there,
I am trying to make a die animation, but the problem comes when I move the root Position and Animation properties of the clip. The animation differs when it is played by unity or with UMotion
I have created a simple repro animation to show you.
When I play the animation in the UMotion the "character" ( or something similar :D) just "die" but when played with the Unity animation system the "character" flies
Thanks for sending me the repo project. I have been able to identify the issue: When the left tangent mode of the first key or the right tangent mode of the last key is set to "weighte", the exported animation curve won't be played by unity. I've implemented a fix in UMotion V1.20p08 (should arrive on the asset store in the next few days).
There is an easy workaround you can apply:
1) Select all keys in your animation (in UMotion)
2) Right click --> Both Tangents --> Weighted
3) Do the same again: Right click --> Both Tangents --> Weighted
4) Export your animation
Thank you very much for reporting this issue.
Best regards,
Peter
Umotion multiplies x9 my animation size, what can i do?
Hello, the animations size multiplies a lot of times on size with 0 changes..
What i did?
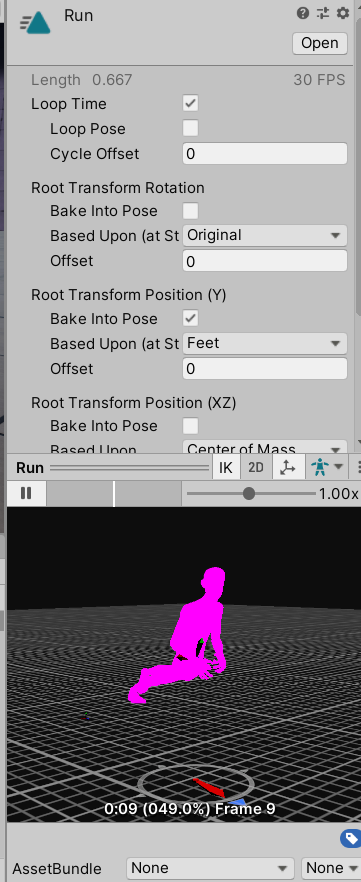
I downloaded a simple animation with a size of 400 kb from mixamo, then imported the animation clip to umotion pro.
After that exported the animation clip from umotion ( with 0 changes, exactly the same clip). But the size of the clip is 3.6 mb!!
9 times the original size! It happens with all the clips ...
How i can solve this?
Thanks
Hi,
thank you very much for your support request.
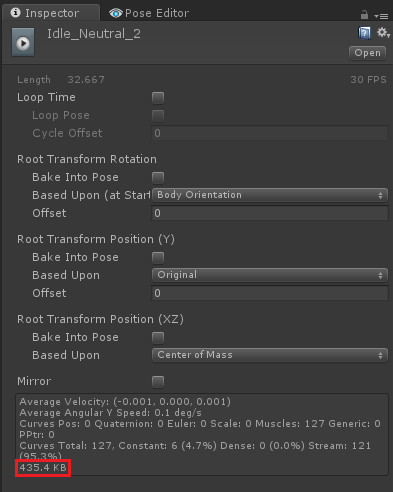
Please make sure to measure the animation size correctly. The size an *.anim file has on your PC's disk is NOT the size the animation has in your game. It contains editor only animation curves that are generated by Unity for it's animation window (but are stripped in the build of your game). The build size of an animation is shown in the Inspector of the *.anim file:
Importing/exporting a humanoid animation file requires that UMotion re-samples the animation which can increase the animation file (it depends on the animation, but this should be definitely far below a factor of 9 as you've mentioned).
If the resulting file size is too high, export to *.FBX. This allows you to let Unity compress your animation (tune the compression settings in the Inspector --> Animation tab of the *.FBX file). UMotion's export to *.ANIM doesn't apply animation compression (it only removes duplicate keys).
Attention: When exporting a humanoid animation to *.FBX, always set "Write Mode" to "Update Existing File" to export your animation into your character's *.FBX file! This ensures that the humanoid avatar is correctly setup by Unity.
Please let me know in case you have any follow-up questions.
Best regards,
Peter
Commercial Team Exporting
Hello Everyone, I wanted to know if I can create my own stuff in my own unity project from umotion. Then export it to my teams game to publish in the future. Is this allowed ?
Hi,
thank you very much for reaching out.
Please let me summarize just to ensure I have understood the question correctly: You want to know if you can use a single-seat UMotion Pro license (on your PC) to create animations that you are then going to share with your team members. Correct?
That is allowed of course. You can even gift or sell the created animations as stand-alone products (on the asset store for example).
Please let me know in case you have any follow-up questions.
Best regards,
Peter
Pasting keyframes on Additive Layer has weird result
Hi there, I'm having a weird result when I try to paste keyframes onto an additive layer. I'll try and explain what I'm doing as best and as clearly as I can. For the purposes of this example I have two animations: Idle and Talking. Both are animations that have been downloaded from the Mixamo website using the same rig for both - so the bones should all match etc.
I wish to change the animation of the left arm on the Idle animation and replace it with that of the Talking animation, but on an additive layer, so I can reduce the blend weight of the animation.
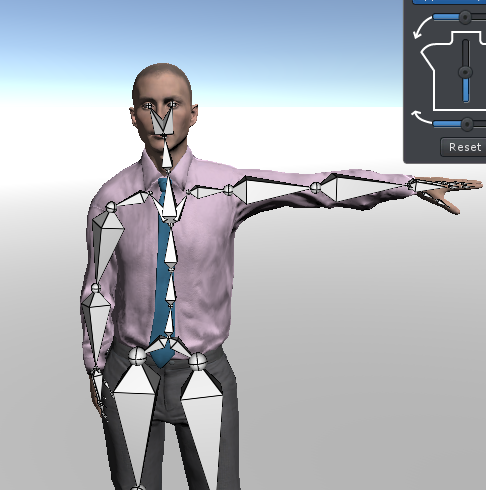
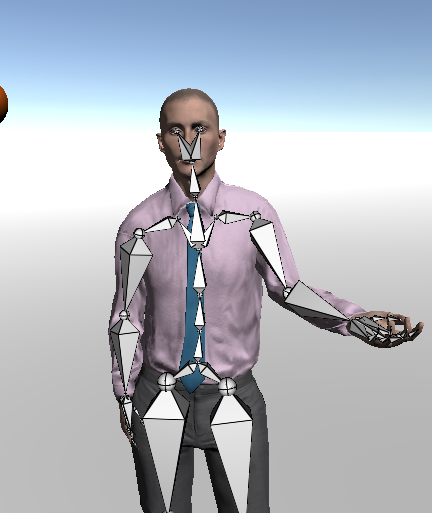
On the base layer of the Idle animation I've deleted the original keyframes involving the left arm - and the result is the image below:
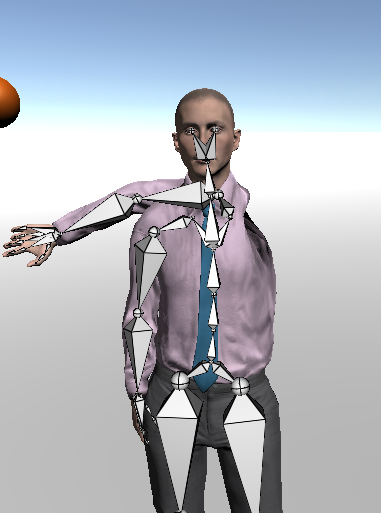
Now, if I take the keyframes for the left arm in the Talking animation and cut and paste them into the base layer of the Idle animation we get the result below.
This looks great, all is perfect, however, rather than this operation, I need to post these keyframes onto an additive layer so that the blend weight can be reduced. Yet, when I go ahead and do this, the result is this:
Any idea why this is happening or how I can fix it easily? I feel I'm probably missing something really obvious, but just can't see the wood for the trees.
Many thanks in advance.
Hi,
thank you very much for your support request.
An additive layer stores keys as a relative offset to the current pose of the underlying base layer (e.g. "add 10° rotation on top of the current base layer pose"). A base layer stores the absolute local position/rotation of your bone. Copying keys from the base layer (of the other animation) to the additive layer thus would treat the keys that store an absolute local position/rotation as if they would store a relative offset (which in your case won't produce the desired result).
You want to use an override layer instead of an additive layer. The override layer simply overrides the absolute key values of the base layer. Copy & pasting between the base layer and an override layer works fine.
Please let me know in case you have any follow-up questions.
Best regards,
Peter
IK Pinning: Changing Walk to Limp
Is there a way to use IK pinning so that a foot stays planted to the floor and is "dragged" along with the rest of the leg's walk animation? I am trying to convert a regular walk animation into a limp, but cannot figure this out.
Hi,
thank you very much for your support request.
If your IK target is setup in such a way that one axis points perfectly upwards, you could just flatten the curve of that axis (in Curve view, select all keys of that curve, then right click on one key, click on Edit Value and type in the new value that should be assigned to all keys). Note: For easier selecting of the keys of the curve, hide the other curves by clicking on the corresponding eye icon in the "Animated Properties List".
Otherwise you might have to do it manually by creating a few key frames (IK pinning still lets you move the IK target, it is just relative to "world space").
Please let me know in case you have any follow-up questions.
Best regards,
Peter
Customer support service by UserEcho
