 Rotate arms
Hi Peter,
I was wondering why the arms are not in the motion slider menu like all the other parts are?
Thank you for a great product.

Hi,
thank you very much for your support request.
In most cases, arms are controlled by IK anyway. That way you can easily adjust the position of the arms by dragging the hand's IK target around.
Sliders for arms would be harder to do precise positioning and wouldn't be faster than pulling an IK handle around so I saw no real-world use for such sliders.
Please let me know in case you have any follow-up questions.
Best regards,
Peter

UMotion for Arms/Hands - special use case
Hello,
I’m a Unity developer at Centre for Bionics and Pain Research (Sweden).
We have a system where we (trough Machine Learning) detect actual arm/hand-movements of a user, and then use Unity to mimic these movements with a 3D arm.
Currently, we have developed this system with advanced scripting. Now, we seek to migrate to a system where we have each possible movement (Open Hand, Close Hand, Flex Hand, Extend Hand, Flex Elbow, Extend Elbow etc.) defined as Animation Clips.
Our problem is that the user shall be able to interpolate between these positions freely, with all possible positions of an actual arm/hand. For example:
- The user closes the hand 30%
- The user flex the hand 50%
- The user extends the elbow 20%
- The user close the hand fully (100%)
- The user flex the elbow 40 %
Would it be possible to use UMotion for such a use case?
I believe we require a system where one can start and stop playing an animation clip at any given keyframe, as well as interpolating between clips.
Best regards,
Niklas Möller
Research Engineer
Center for Bionics and Pain Research
Sahlgrenska Universitetssjukhuset
R-huset, plan 7, Länsmansgatan 28, 431 80 Mölndal
Hi,
thank you very much for your support request.
Would it be possible to use UMotion for such a use case?
UMotion can be used to create the animation clips like the close hand animation, flex hand animation, etc. The result would be *.anim files (or *.fbx files) containing the animation.
For your animation playback system, just use regular Unity scripting to do the mixing of your animation clips: https://docs.unity3d.com/ScriptReference/AnimationClip.SampleAnimation.html
Please let me know in case you have any follow-up questions.
Best regards,
Peter

Why exported umotion animation size is typically 2x larger from the original?
Should one download random animation from Mixamo, then import the animation to umotion, finally export it without changing anything, one can find that the animation size is almost 2x larger. Could you please tell me the reason and how to further decrease the animation size? I tried to deleting some 50% of the keyframes, but the size is still the same.
Hi Calvin,
thanks for your support request.
This is a commonly asked question. Please check out this answer I gave a while ago: https://support.soxware.com/en/communities/1/topics/350-umotion-multiplies-x9-my-animation-size-what-can-i-do#comment-397
Please let me know in case you have any follow-up questions.
Best regards,
Peter
Umotion does not work, cannot even choose one key frame
Please look at the video. Already re-import. It works for sometime, but the error went back again


Is there a list of all default shortcuts (shortcut sheet)?
Hello there! I use keyboard shortcuts often, but it'd be nice to have a shortcut sheet or a list of all default shortcuts. I tried to find it to no avail. Do we have that somewhere?
Hi,
thank you very much for your support request.
There is currently no PDF that lists all shortcuts. When you have a button/UI element, you want to know if it has a shortcut assigned, you can hover the mouse over it. The tooltip shows you if and which shortcut is assigned to it. This should be faster than searching a PDF.
Please let me know in case you have any follow-up questions.
Best regards,
Peter
 How to use child of constraint
I'm sure this question can be found in the forum, and I've seen similar questions in the comments of tutorial videos on YouTube.

I think (and I personally agree) that many people will try this feature because it is one of the most attractive features that Umotion has to offer.
So it would be nice to have detailed instructions, but I'll leave you with a translation of what I wrote in Japanese.
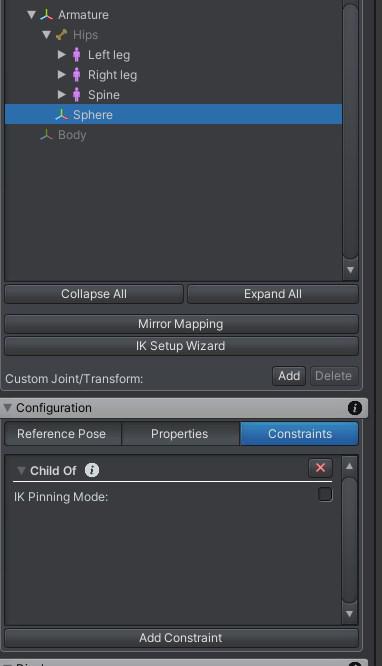
I saw the file "PickUpAnimation" in UMotionProjects in UmotionSample.
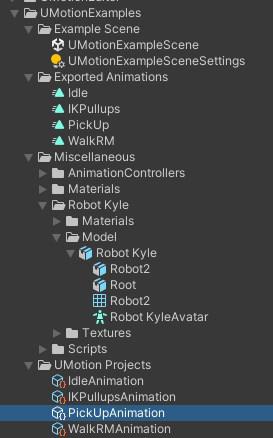
I also want to reproduce this, so I created a new Project with a new humanoid
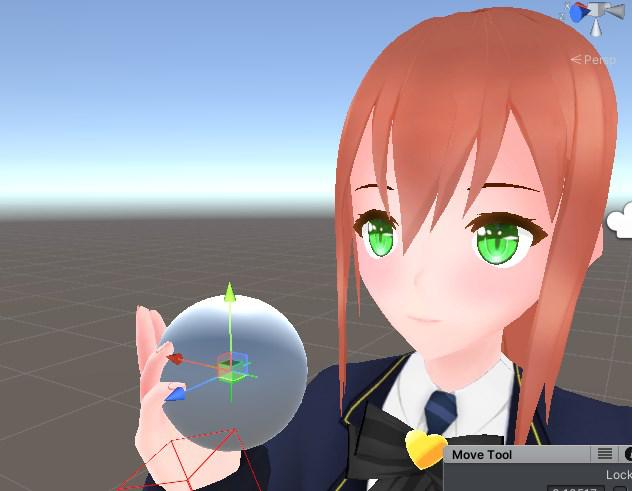
I prepared a character, added a sphere and added it to PoseEditor.
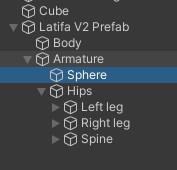
There is a sphere in ConfigMode, I tried to display this in Visibility in properties, but I got an error.
English is not my native language, so I translated it through Google Lens and it says, "You have a sphere in the parent hierarchy, please put it in the child hierarchy."
That seems to be what it says.
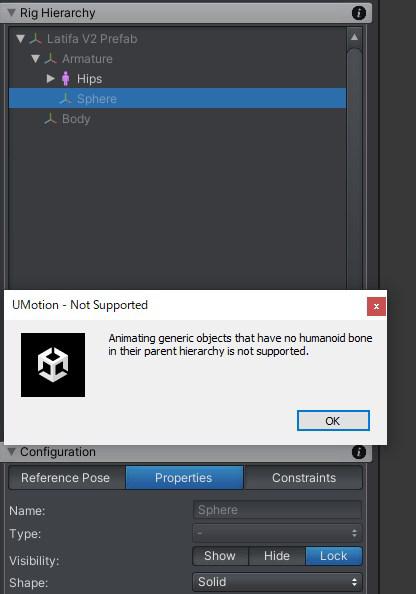
At this time, I noticed that in the You Tube tutorial video, the object labeled "Hip" is a generic joint/bone, and mine was a humanoid bone.
Mine was a humanoid bone.
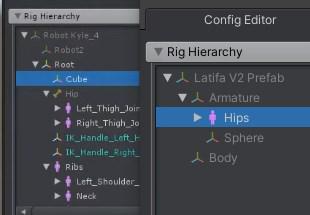
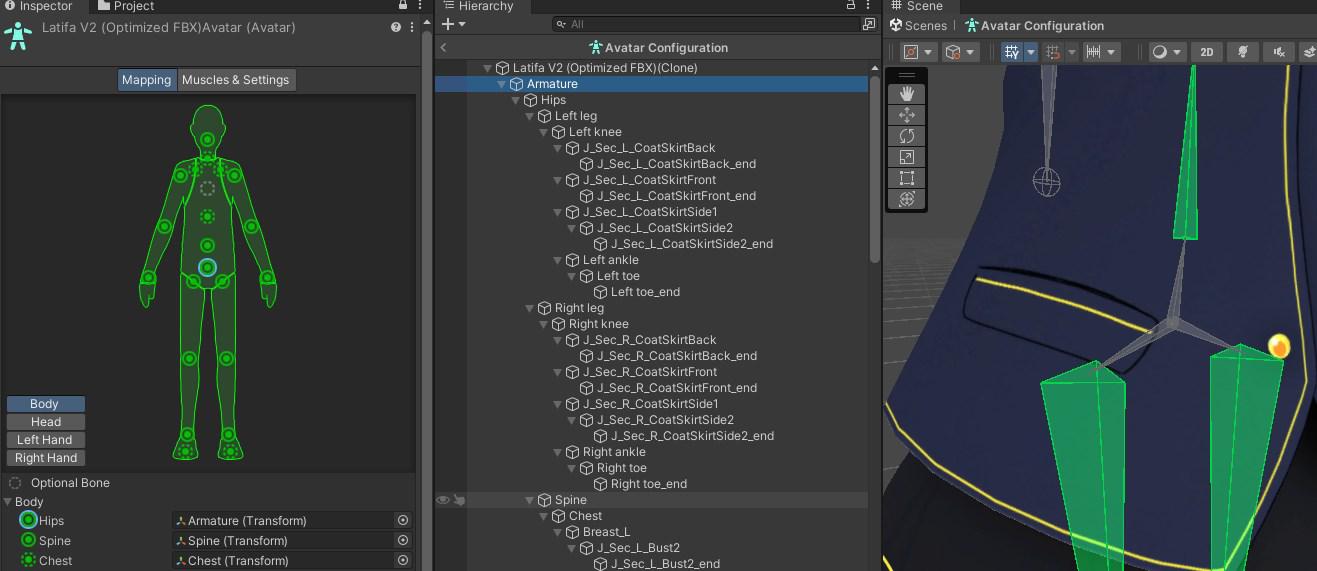
I checked Robot Kyle's Avatar and noticed that the object labeled Hip was there, but not mapped anywhere.
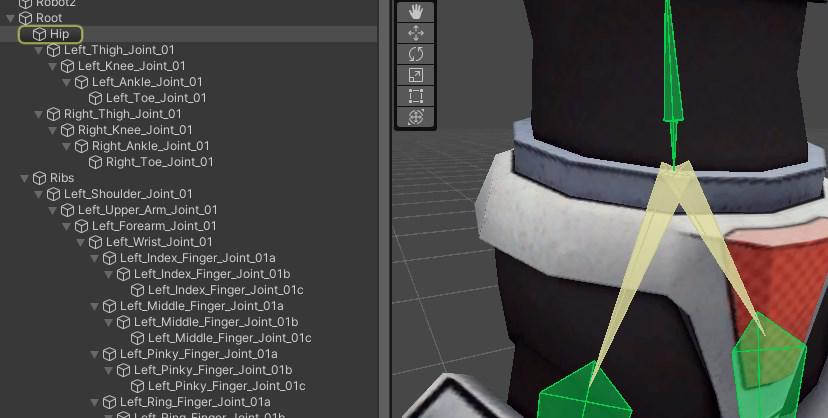
I thought this might be the cause, so I checked the Avatar I was using, and the object named Hip in this Character is definitely a humanoid bone.
I will try to recreate Robot Kyle, and for the character I cost, I should be able to just Mapping the Armature at the top level of Hips to Hip.
Create a new Project, prepare a character, add a Sphere and add it to PoseEditor.
What do you think, it worked fine.
I spent about 5 days before I noticed the difference in this Hip.
I hope this post will be useful for beginners who are learning child of constraint and encounter the same difficulties.

 Arms and legs flip out after pinning, pole vectors not matching fk animation
I usually go through the cycle of exporting > importing and tweaking fk and then applying IK all over again, putting pins on every foot/hand (one by one cause else the keyframes are messed up) and I still get arms or legs flipping out (sometimes without a keyframe, you can only see it when playing the animation, even deleting it doesnt get the flip out and the same flip is in the export file)
A lot of the times the pole vectors also ruin the animations, FK/IK conversion is absolutely not similar, it costs completely unnecessary time/energy to fix everything again and again over and over...
Been having this problem for months now, and it's been happening a lot more lately
Please let me know how to prevent/fix this Peter

Tutorial for Dragon in your video.
Hi, I'm just getting started with Umotion Pro and learning how to use it.
I have a dragon and would like to learn how to modify the animations and blend shapes that comes with the dragon. I noticed that in one of Umotion's promo video where you show a dragon being modified by Umotion. I looked for a tutorial with the dragon but couldn't find it. Can you send a link please, cheers
Hi,
thank you very much for your support request.
Unfortunately there is no specific video tutorial for editing dragon animations available. The clips you saw where made solely to present some of UMotion's features in the trailer.
The good news is, it doesn't really matter if what you're animating is a dragon or a different 3D model, the features of UMotion still apply in the same way.
In the UMotion manual, you find a comprehensive list of all available video tutorials. I would start with the quick start tutorial and progress from there based on your needs: https://www.soxware.com/umotion-manual/QuickStart.html
The general video tutorials go over the features of UMotion while the "UMotion In-Practice" videos shows you how to use some of the features in practical examples.
Please let me know in case you have any follow-up questions.
Best regards,
Peter

making non-root-motion hip/root bone animations for humanoid rigs?
Wanting to take advantage of animation retargeting and making humanoid animations for multiple humanoid rigs, however, I'm at a loss for creating an animation that can move the hip/root bone *without* causing root motion.
I'm unsure how to properly describe it, but I'm trying to animate crouching, squats, dancing for example on a loop, but most tutorials out there regard *applying* root motion rather than working without it. Disabling root motion on the controller results in the animation being looped in place (hip bone frozen in the air, limbs moving around it), when I would like to have my rig engage in the full range of movement- and take advantage of IK-pinning in the animation process.
Am I missing a step to manipulate the root transforms, or fully disable root motion? Or is there a way to have an animation manipulating a root bone (the hip, in my case) *restart* and loop from it's original, initial position?
Hi Anon,
thank you very much for your support request.
Select the exported *.anim file, then in the Inspector tick the "Bake Into Pose" setting of the root motion axis that you don't want to be driven by root motion.
Please let me know in case you have any follow-up questions.
Best regards,
Peter

Crash when exporting FBX on MacOS
I notice several threads with the same issue but they are a couple of years old, so I decide to report a new one
Mac OS Monterey, Unity 2019.4 LTS, uMotion v1.29
Hi,
thank you very much for your support request.
The problem of the old threads should be fixed (I switched to a different FBX SDK build at this time which fixed the issues).
- Are you running an Intel based Mac or an ARM based Mac?
- Does this crash happen every time or randomly?
- How can I reproduce this crash?
Thank you very much.
Best regards,
Peter
Customer support service by UserEcho
