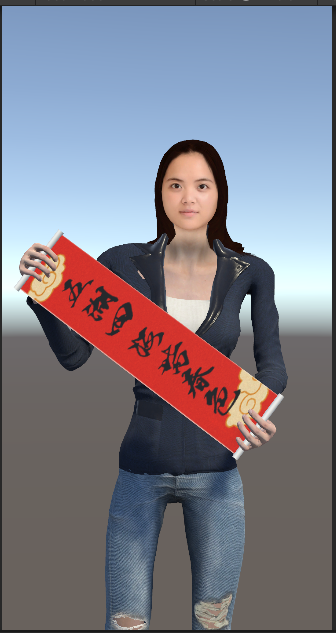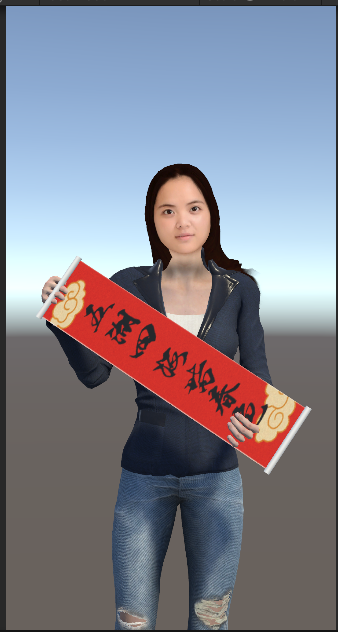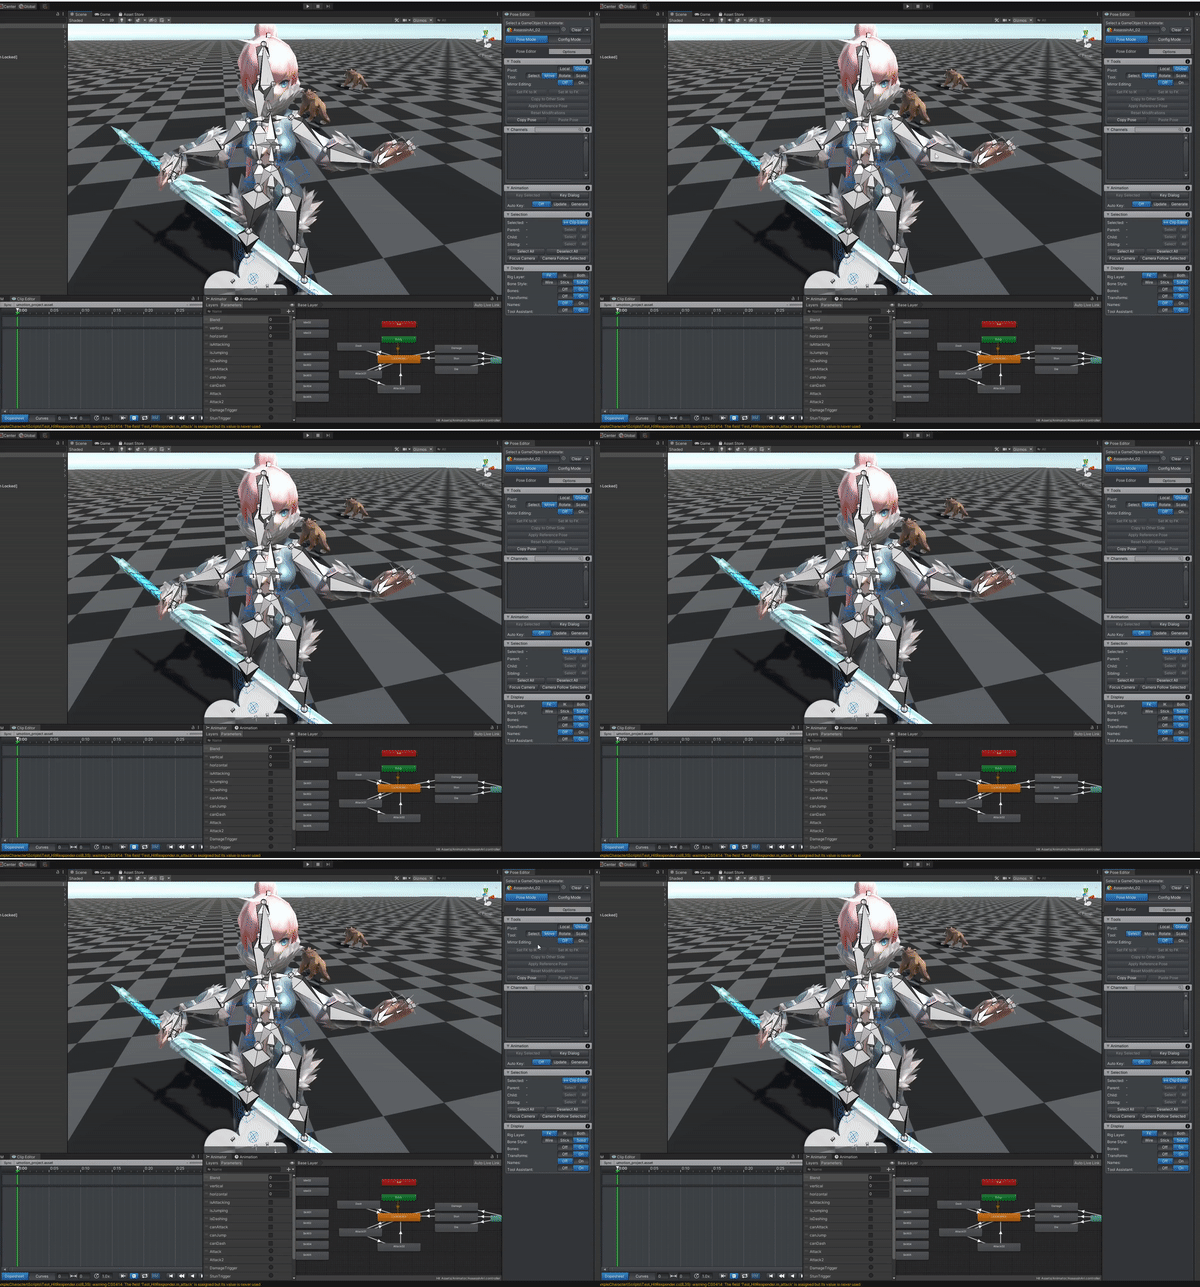
 difference after exporting animation
I'm having a different result after exporting my animation.

after exporting,the chunlian's position is diffrent.


Hi,
thank you very much for your support request.
This is a typical issue when using humanoid and has something to do with how humanoid works under the hood.
There are two solutions:
1) Turn on humanoid's hand IK (can only be done via script) to tell humanoid that you need the hands to be precisely where you've authored them.
2) Use generic instead of humanoid. Contrary to humanoid, generic just takes an authored animation clip as an input and plays it 1:1 as it is.
Humanoid is an animation re-targeting system designed to allow sharing an animation across multiple characters by imitating the look of an animation. Humanoid is not suited for precise things as it looses precision due to "re-targeting errors". More info about humanoid's inner workings: https://blog.unity.com/technology/mecanim-humanoids
Please let me know in case you have any follow-up questions.
Best regards,
Peter

 I have a question about Animation Converter.
Is it possible to change animation from humanoid to legacy?
Thanks.

Hi,
thank you very much for your support request.
Yes a conversion from humanoid to legacy is possible. This is how it would work:
1) Duplicate your legacy character's source file (usually *.fbx) and configure the duplicated version as humanoid.
2) Adjust the settings in the animation convert to convert from humanoid to legacy and assign the humanoid and legacy version of your character to the appropriate fields in the animation converter.
Let me know in case you have any follow-up questions.
Best regards,
Peter

 Timeline sync with override tracks
Hi Peter,
Thank you very much for the tool. Editing within unity is a very great thing in term of workflow.
I'm currently trying to edit animations via my timeline in a quite complexe override track setup that mimics my mecanim layers.
I can edit the animation correctly and sync it but it's not previewing the other tracks or maybe not applying the avatar mask that is provided. How could I handle this ?
Thanks !


Hi,
thank you very much for your support request.
When synchronizing with Unity Timeline, UMotion takes the authority over your character and previews the animation you have currently loaded in UMotion. The additional layers in Unity Timeline are not going to be previewed during this time.
Please let me know in case you have any follow-up questions.
Best regards,
Peter

 Generic animation different through UMotion to timeline
Hello Peter,
I am having trouble with the animated object (Dragonfly) moving to different locations when the object is in the pose editor and when it isn't. I was using the animations that came with the dragonfly and couldn't get it to work so I just tried a New Clip to see what would happen and it still doesn't work. I am not sure what is happening as I have used this function a lot without any issues. Could it have something do with how the prefab is set up?
See a link to the video below - I have just put a cube behind the dragonfly so it is easy to see.
https://360.articulate.com/review/content/c48617a3-0976-4af3-87a5-1292a4c1015c/review
Thank you

Hi Elsiehar,
thank you very much for sending me the repo project. The cause of your issue seems to be that Untiy Timeline applys the scene rotation offset and the translation from the animation curve in the wrong order. If you preview the animation using Unity's own animation window, it is previewed correctly so this seems to be an inconsistency solely within Untiy Timeline.
The good new is, there is a rather easy workaround:
Make sure you're animation clip has keys for the rotation property, then Timeline evaluates the animation correctly.

Please let me know in case you have any follow-up questions.
Best regards,
Peter

 can't select bones from a scene in pose mode
Hello,
I've just begun using UMotion Pro today. I created a new umotion project for my generic-rig character and dragged and dropped them into the "gameobject to animate" selection box. The import seems to have worked great and I can see all the bones on my character just fine. The only problem is, I can't select any bones from the clicking in the scene. I have, however, been able to go into Config Mode, select a bone from the hierarchy and then rotate it in the scene. Obviously not an ideal way to use the tool... I'd like to figure out why I'm unable to simply select bones in the pose mode. I don't know if I'm doing something wrong or if this is a bug. I followed the intro tutorial very closely, but I was unable to keep following when the instructor clicked in the scene to select a bone, as it did not work for me.
The below gif illustrates me clicking in the scene view in Pose Mode and nothing happening.
Thanks all,
Jon


Hi,
thank you very much for your support request.
Looks like something is blocking the selection raycast of UMotion or a third party Unity extension might eat up all scene view mouse click events. Could you please try the following:
1) Create a fresh Unity project.
2) Import UMotion
3) Import your character
4) Try editing your character in the fresh project. Does it work?
If not, please send me the Unity project (via email support form) and I'm going to take a look at it.
If it does work in a fresh Unity project, then there might be some third party editor extension or the like in your project that consumes all mouse click events in the scene view. To find that suspicious extension, duplicate your entire project and then start deleting all your extensions one by one. The last extension you've removed before selecting works correctly again is the cause of the issue.
Please let me know in case you have any follow-up questions.
Best regards,
Peter
 Question regarding additive layer & advice requested for first time user
Hi. So first thing, I could use some general advice. I have an animation pack (Rifle anim pro) I am trying to use on 5 different characters (all different rigs) and thought maybe the umotion pro asset would solve my problems. As you can see below, each character needs some tweaking to make these animations work well. This is a good use case for Umotion pro right? I do have 30+ animations that would need fixing though.
Here is a quick picture of the issues I explained above:
https://i.imgur.com/JjgdE3D.png
For some it's the feet, others it's the arms, and they're all looking down instead of up. For some reason when I used them in UE4 they worked fine, but in unity with these rigs I encounter issues.
So if you do think Umotion pro is what I need for this, which I did, my next question is: I was following one of your tutorial videos using an additive layer. First off, was this the right call? Anyway, after using the additive layer I couldn't apply any of my changes. The keyframes disappear when I add the new layer and I am unsure where to add new ones or where to apply my changes. If I hit the 'apply' button on the window that pops up for each individual property it does nothing, perhaps because I have no keyframes on this new layer?
https://i.imgur.com/fYHWTml.png
Thanks.

Hi,
thank you very much for your support request.
For some it's the feet, others it's the arms, and they're all looking down instead of up. For some reason when I used them in UE4 they worked fine, but in unity with these rigs I encounter issues.
Take a look at how you configured the humanoid avatar. Maybe the character's are not in a perfect T-stance or bones are not assigned the correct humanoid role. You can check the humanoid avatar config by clicking on the character's FBX file, and then in the inspector click on the "rig" tab, then click on "Configure..." to open the avatar editor.
First off, was this the right call? Anyway, after using the additive layer I couldn't apply any of my changes. The keyframes disappear when I add the new layer and I am unsure where to add new ones or where to apply my changes. If I hit the 'apply' button on the window that pops up for each individual property it does nothing, perhaps because I have no keyframes on this new layer?
Yes with UMotion you can adjust your animations. Regarding your additive layer, make your changes and then save them to your addtive layer by creating a key frame on the additive layer. Creating keys in layers works the same as on the base layer, either by clicking on "Key Selected" in the pose editor or by using auto key.
These two video tutorials both use additive animation layers:
https://www.soxware.com/umotion-manual/InPractice2.html
https://www.soxware.com/umotion-manual/InPractice3.html
Please let me know in case you have any follow-up questions.
Best regards,
Peter

 Cant Save or Export Animation

Hi,
thank you very much for your support request.
If you rotate/move a bone, the change to the pose is marked by a red bone. To save the modification as a key frame to the to the animation clip, you have to either manually key your change (by clicking on the "key selected" button in the pose editor) or by using auto key (which automatically generates key frames for you every time you move/rotate a bone).
More information can be found in the quick start video tutorial: https://www.soxware.com/umotion-manual/QuickStart.html
Please let me know in case you have any follow-up questions.
Best regards,
Peter

 Shortcut to next keyed frame
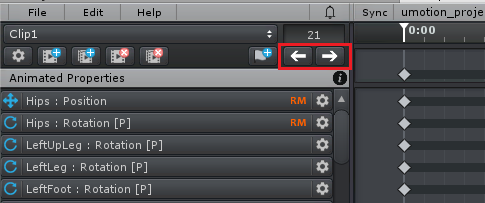
Current "Next/Prev keyframe" shortcuts are actually "Next/Prev frame" and they are very helpful. At the same time, sometimes it would be great to have actual "next/prev keyframe" too (i.e. jump to whatever next frame is with some keys)

Hi Vadim,
thank you very much for your support request.
UMotion already has "next/prev keyframe" - buttons and you can assign shortcuts to them via "Edit --> Preferences" in the Clip Editor:

Please let me know in case you have any follow-up questions.
Best regards,
Peter

 Precise mode for Muscle Groups
After spending some time with UMotion (and it's a great tool !!!) there are a couple of things (I think) can make it even greater. I know, I found a couple of notes regarding precision in this forum in the past and that's not really viable in UI. But, maybe there is a way to introduce some kind of a precision version via Ctrl button or something like that?

Hi,
thank you very much for your support request.
With precision version, do you mean that the sensitivity of the slider is reduced (e.g. mouse needs to travel twice as far to shift the slider for a certain amount)?
Best regards,
Peter
 Blendshape Constraints Global
https://support.soxware.com/communities/1/topics/528-negative-values-for-blendshapes
I posted here but was unsure if it would be seen as the topic is 'Answered'.
Simply put, I need to be able to set blendshapes to non 0-100 values, such as -300 and 300 etc. But I'm working with a mesh that has 800+ blendshapes, and the constraints window in UMotion seems to have a constraint min/max setting for every individual shapekey. I can't edit them all, that would be crazy. Is there a way to adjust the global constraint?
Thanks

Hi,
thank you very much for your support request.
Please find my answer in the originally linked thread: https://support.soxware.com/communities/1/topics/528-negative-values-for-blendshapes
Best regards,
Peter
Customer support service by UserEcho
