
 Is it possible to Bake animations on export?
I'm trying to also get my animations into blender for reasons, but it's importing every bone as a separate animation or something crazy. Is it possible to bake the animations on export?

Hi,
thank you very much for your support request.
When you export your animation from UMotion, it already get's baked into *.anim or *.fbx. When you have issues with importing an *.fbx into blender, please checkout this forum thread where I've provided a solution for a similar question: https://support.soxware.com/en/communities/1/topics/808-fbx-files-from-unity-to-blender
Please let me know in case you have any follow-up questions.
Best regards,
Peter

Animate 2 Characters in 1 Clip?
I want to combine 2 characters into 1 animation clip, both using separate imported animation clips. I’m trying to make one solid animation for when the Player collides with the Enemy and gets attacked. It’s been really difficult to line up the timing for the connecting blows when each clip is separate. I was hoping there was a way to have two characters, and two separate imported clips made into one master clip.
Hi,
thank you very much for your support request.
That's exactly what Unity Timeline is for (it allows you to combine multiple characters/animations, even sound, etc. into one "uber" animation sequence).
I recommend creating a new Unity Timeline sequence that animates both your characters. Then use UMotion's Timeline integration to adjust the animations as required. Here is a quick video showing UMotion's Timeline integration in action (for more details, please checkout the manual's "Unity Timeline Integration" chapter):
Please let me know in case you have any follow-up questions.
Best regards,
Peter

Define specific file path for exported clip animated properties
Hello,
I've done some animations for a model and noticed that after exporting them the properties path starts with the armature bones hierarchy under the parent object. Example:
Cartoon arms
|- Armature
|- Model
A property that was animated has the path Armature/LeftShoulder/LeftArm after export.
This caused some problems for me when I tried using the animation in Unity because the Cartoon arms object was under another parent object which used an animation controller to call the animation (the Cartoon arms object did not call the animation). I had to edit the anim file and replace the path manually for all properties (Cartoon arms/Armature/LeftShoulder/LeftArm) then it worked fine.
My question is: Can you export anim files so the animated properties path starts with the top hierarchy object first (the one added to pose editor) and not the armature?
Thank you and best regards.
Hi,
thank you very much for your support request.
The transform paths in the animation clip always need to be relative to the animator (or animation for legacy) component that plays the animation. As the animator component is in your Armature game object, UMotion is also going to make the transform paths relative to the "Armature" game object. If you want your animation to be relative to the root game object, then make sure that you assign the Animator component to that transform.
Please let me know in case you have any follow-up questions.
Best regards,
Peter

Animating Props Which are not Children
Hello, I'm loving this asset! Amazing work.
I'm looking for options to animate a character interacting and prop, where the prop is situated in world space and isn't a child of the character. One example is a lever. Is this possible?
I also wonder if it's possible to extract the animation of a child object of the character, created with Umotion. That way it could be applied to other objects in the scene.
Many thanks!
Hi Carl,
thank you very much for your nice words. That means a lot to me.
I'm looking for options to animate a character interacting and prop, where the prop is situated in world space and isn't a child of the character. One example is a lever. Is this possible?
Animation clips can only reference bones/transforms/object that are a child of the Animator component. The correct approach for your situation depends on what you are trying to create. If you want to create a cut-scene, you can use Unity Timeline to animate both the lever and the character. UMotion's "Sync" button can be used to preview both animations in sync (while editing one animation). For more information, please checkout the chapter "Unity Timeline Integration" in the UMotion manual.
If this is an in-game situation, where the player walks to the lever and then presses a button to actuate the lever, then the problem gets trickier. I would use a runtime IK solution to first blend the hand to the lever (then keep it parented to the lever). Next play an "actuate" animation on the lever, this is automatically moves the hand with it as it is parented to it. Then after the animation was finished, blend the hand back to it's regular animation state. Using a regular animation clip instead of runtime scripting/runtime IK would require that your character is at the exact same position/orientation relative to the lever in-game as it was while authoring the animation.
Please let me know in case you have any follow-up questions.
Best regards,
Peter
fbx model import and export
Hello,
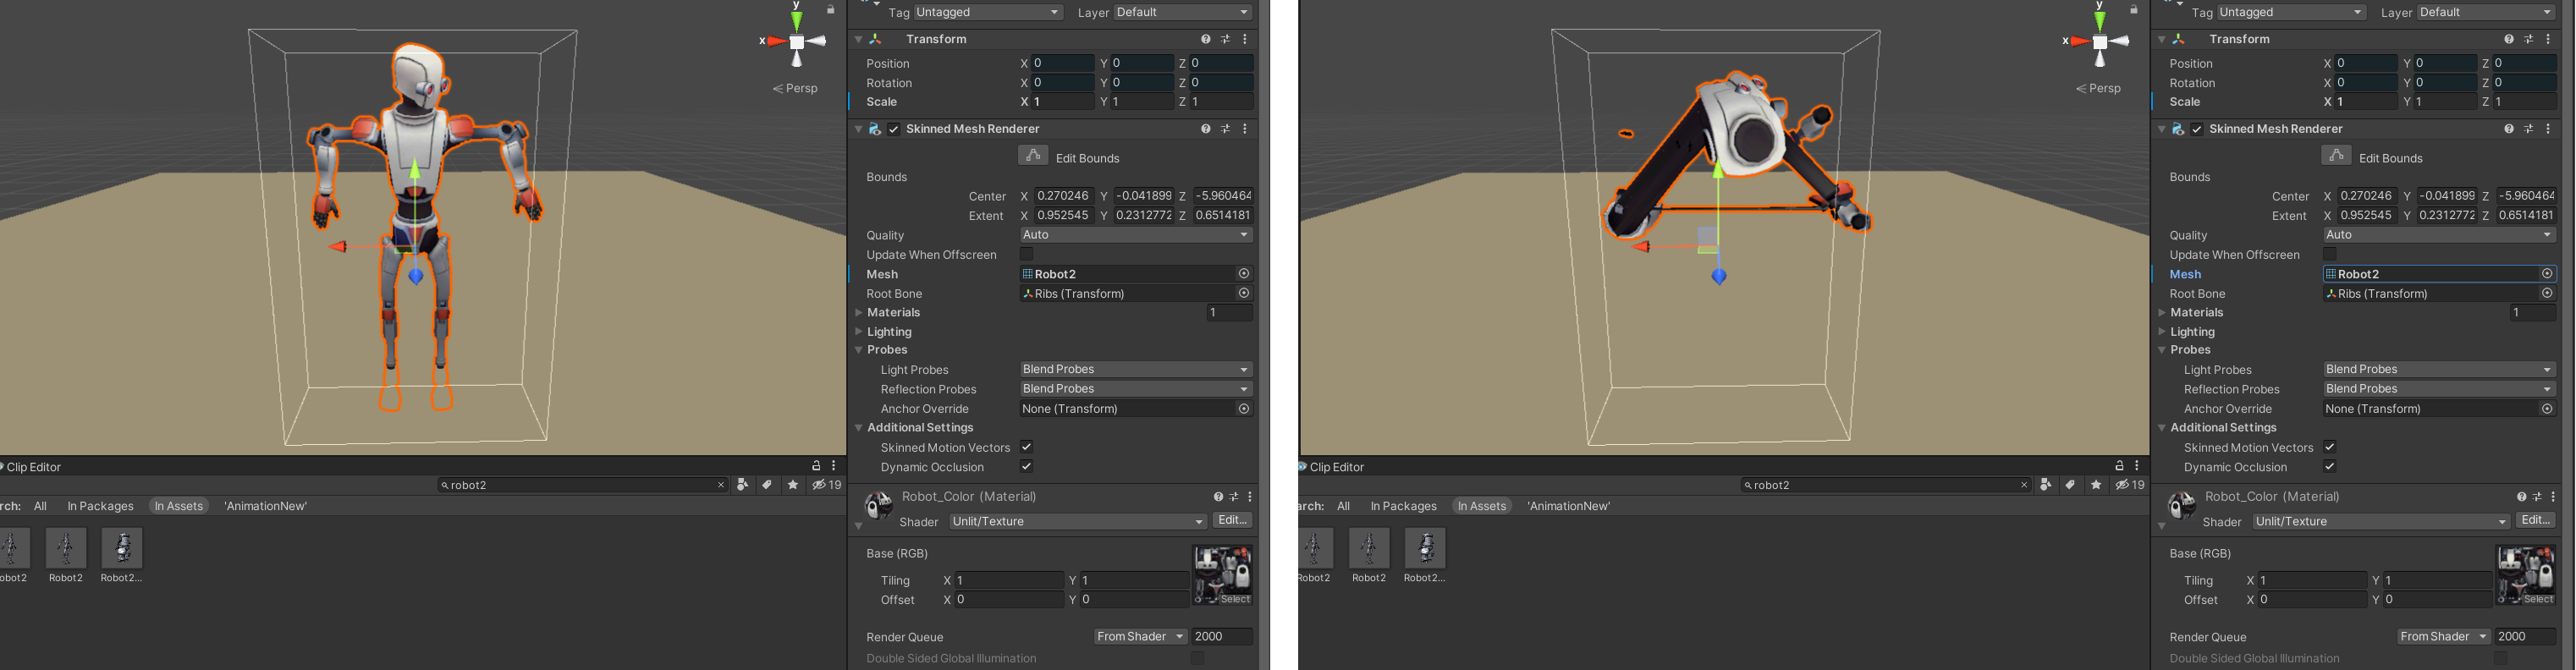
I'm trying to import your Robot2.fbx to blender, export it again to fbx, and load exported model to your Robot_Kyle_1 prefab, but whole model seems to be broken after this procedure. I wanted to only change the mesh shape of the robot, but how could I do this without breaking whole model?
Hi,
thank you very much for your support request.
Blender might be modifying the bones on import or export thus the new character is not compatible anymore with the original prefab anymore. I would recommend that you try and play with Blender's FBX import/export settings, use a 3D modeling application with better FBX support like 3DS Max or Maya (LT) or just life with it and create a new prefab for the new character.
Please let me know in case there is anything I can help you with.
Best regards,
Peter

I want to make running video, and I have done the left parts, how to copy and flip / invert key frame animation to right parts?
I want to make running video, and I have done the left parts, how to copy and flip / invert key frame animation to right parts?
Hi,
thank you very much for your support request.
Here is my workflow:
- Under "Animation" (pose editor) set "Auto Key" to "Generate".
- Go to the first key frame of your left leg bones.
- Select the left leg bones.
- Use the "Copy to Other Side" button (pose editor --> tools) to copy the left leg bones animation to the right.
- Move to the next key frame of your left leg bones and repeat step 4.
- Then you need to offset the keys of your right leg bones by the half duration of your run cycle.
Please let me know in case you have any follow-up questions.
Best regards,
Peter
Suitable project type for arm/hand only rig
Hello,
I've recently purchased UMotion Pro (I'm a newbie but want good tools to use from the get go) and I want to create animations for cartoonish arms and hands (left and right) with no other body parts. They are placed closely to a static object with no rig (jukebox) so it gives the feeling it owns those hands. I've added proper bones to both limbs but each arm bone hierarchy is not connected between them with a spine bone because I do not need to move anything else apart from each arm/hand. This will ultimately be used in a game called VRChat as an avatar.
Is the humanoid type project best for such scenario? I might add further bones down the line to make the object more lifelike (such as moving certain parts of it in a cartoonish matter) and increase complexity but I want a good foundation so any animation I will create doesn't get messed up.
Would there also be special considerations to have in mind?
Thank you and best regards.
Hi,
thank you very much for your support request.
Yes you are correct, generic is the way to go. The only real reason to ever use humanoid is when you want to use animation re-targeting (i.e. create an animation for humanoid character A but use it on other humanoid characters B, C, D...). More information about what makes humanoid special can be found in this blog post: https://blogs.unity3d.com/2014/05/26/mecanim-humanoids/
I might add further bones down the line to make the object more lifelike (such as moving certain parts of it in a cartoonish matter) and increase complexity but I want a good foundation so any animation I will create doesn't get messed up.
I highly recommend to add all bones that you need (or might need) before you start doing your animations and do not modify the skeleton afterwards. It's hard to re-use existing animations on a modified skeleton.
Let me know in case you have any follow-up questions.
Best regards,
Peter

Animating generic in a humanoid
Hi, this says that I can animate the generic bones outside the human skeleton.

Does it refer to this setup?
(VFX has the humanoid skeleton, and WeaponSlot is the foreign object.
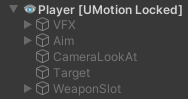
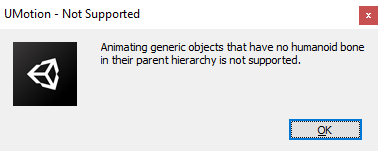
Because it shows this whenever I try to unlock the WeaponSlot object.
Hi Asyl,
thank you very much for your support request.
Yes you can animate generic bones for humanoid models as long as they are a child of the "hips" bone of your character (that's what the error message is trying to say). The sentence in the manual is not correct, I have updated that paragraph shipping with the next patch release. Thank you very much for pointing that out.
Please note that generic bones are invisible by default in humanoid projects. You can make them visible by switching into config mode. Select the generic bone and under "Properties" set "Visibility" to "Show".
Please let me know in case you have any follow-up questions.
Best regards,
Peter
Conditions for generic model to be compatible with generic clip
Hi, when I try to import a generic clip in a generic umotion project it says about the hierarchy problems?
Should the model rig's name and an external clip's rig name be the same?
Does it care about multiple parenting or as long as the name is the same it doesn't care if it's way beyond the parent system? (just exaggerating)
And may I know other conditions that it checks so as to prevent this from appearing next time? Thanks

Hi Asyl,
thank you very much for your support request.
Generic animation clips only work for the generic character they have originally been created for. You can not use a generic animation created for character A on character B. Simply renaming the hierarchy won't help (it would satisfy the error message you get, but the imported animation would be trash). Only Unity's humanoid animation system is capable of animation re-targeting (i.e. trying to match an animation created for character A on character B). More information about animation re-targeting and why it is necessary can be found in this blog post: https://blogs.unity3d.com/2014/05/26/mecanim-humanoids/
If you get this error message even though the animation you've imported was created for the exact same character, then make sure that you have not altered the hierarchy of your character. The animation clip references all bones/transforms using a so called transform path relative from the animator component (e.g. "Hips_01/Spine_01/Spine_02/Shoulder_R" <-- would reference a bone named "Shoulder_R"). So beginning with the animator component, there must not be any extra transforms or transforms that have been renamed or moved in the hierarchy.
Please let me know in case you have any follow-up questions.
Best regards,
Peter

VR IK
Lev,I would like to work on hand rotations/Grips on a two handed object that has been tracked in VR like for example a baseball bat. I can get the tracker data in by recording its movement and playing it back in unity whilst recording an anim of a humanoid being posed by Final IK's VRIK based on the trackers motion. I do not want to repeat this at runtime, but to perfect the animation in Umotion of wrists etc. Trouble is I cant seem to IK or parent the second hand to an object held in the other hand. Can you give me any hints ? I tried to find a way to copy the coordinates (Keys) of the bat held in one hand and pase them to FK/IK movement in the other hand's data, but when I paste the keys they only paste the X axis (Red Curve ) and lose the z axis and y axis data.on the keys I Cant understand why could this be a bug? Otherwise is there a way to copy the local positions on one hand and paste into a new transform on the root object using the root's co ordinates?
Hi Jim,
thank you very much for your support request.
Just assign a child-of constraint to the IK handle that you want to parent to the baseball bat.
In case you used the IK Setup Wizard to setup your IK constraints, a child-of constraint is already assigned to the IK handles (used for IK pinning). Just disable the IK pinning mode (go into config mode --> select the IK handle --> open the constraints tab --> scroll to the child-of constraint --> disable the check mark for the IK pinning mode).
With a child-of constraint, you can change the parenting during your animation. You can also parent the IK handle to the baseball bat directly in config mode via the "Parent" field in the "Properties" tab (this changes the hierarchy and is thus applied for the whole UMotion project).
For more information regarding the child-of constraint, please checkout the following video tutorials:
Please let me know in case you have any follow-up questions.
Best regards,
Peter
Customer support service by UserEcho
