
 UMotion In Practice Link Death
I am new to umotion, so im still watching the umotion tutorials, I just peeked at the , FPS UMotion In Practice, And for the hands there is a link Whole Project. This one is also death. I need to watch this tutorial in the futher.

Hi,
thank you very much for letting me know. I've updated the link in the video description, it should be working again.
Don't hesitate to contact me in case you find any other dead links.
Best regards,
Peter
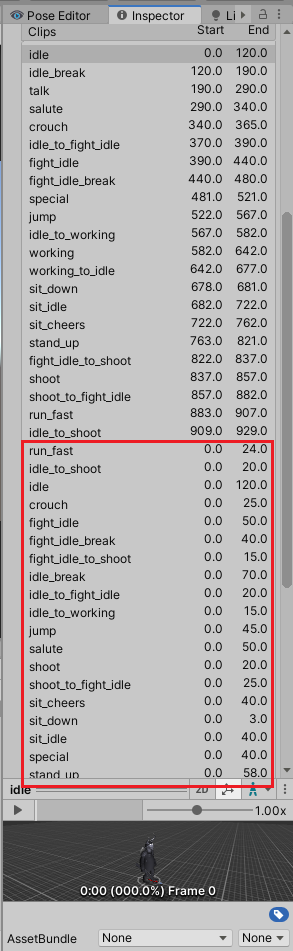
Export to FBX - Duplicates Animations
1. Imported all animation clips from FBX file.
2. Export-> All Clips -> to the same FBX file using "Update Existing File".
3. Result: each animation clip has been duplicated.
4. If I import it to Blender, each animation clip is it's own "Action", instead of all animation clips being on a single timeline, merged together, next to each other.
I would expect, that:
- If exported animation clips would replace existing animation clips.
- If add a new animation clip in UMotion, then exporting it would append this animation clip at the end rather than separating it. For example, If I have 1000 frames, then If I create animation with 30 frames and export it, then I would expect FBX file to have 1030 frames and that animation would be Start: 1000, End: 1030.
I am not sure how this is supposed to work, so please confirm if this is the expected behaviour?
Things to note:
- each exported animation clip starts from frame 0.
- each exported animation clip has its own separate "source".
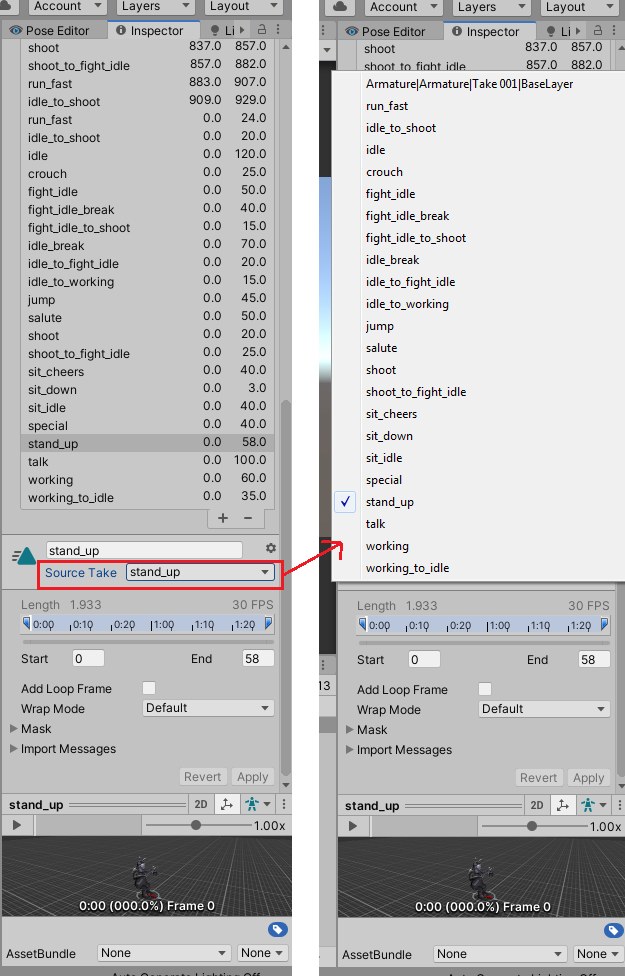
Hi,
thank you very much for your support request.
Seems like your fbx contains only one animation clip which is then split into separate clips by Unity's importer (the separate clips are defined with the start/end clip times). If you then import the separate clips into UMotion and re-export them to the FBX, UMotion is going to write them as separate clips into the fbx. If you want a combined clip to be written into the fbx you would need to create a combined clip in UMotion. You could either define a combined clip in Unity's import settings and import that one or combine the already imported clips (imported in UMotion) to one and export that one.
Why do you prefer a combined animation?
Best regards,
Peter

Add little offsets on keyframes automatically?
Hi !
Just a quick question. When I finish an animation, I add a little offset for each bone, like in the red part of the pic below, in order to get a more natural overall movement.
Is there a tool to automatize this process?
(if not, don't bother, I'm just asking)
Thanks again for your help !
Best regards,
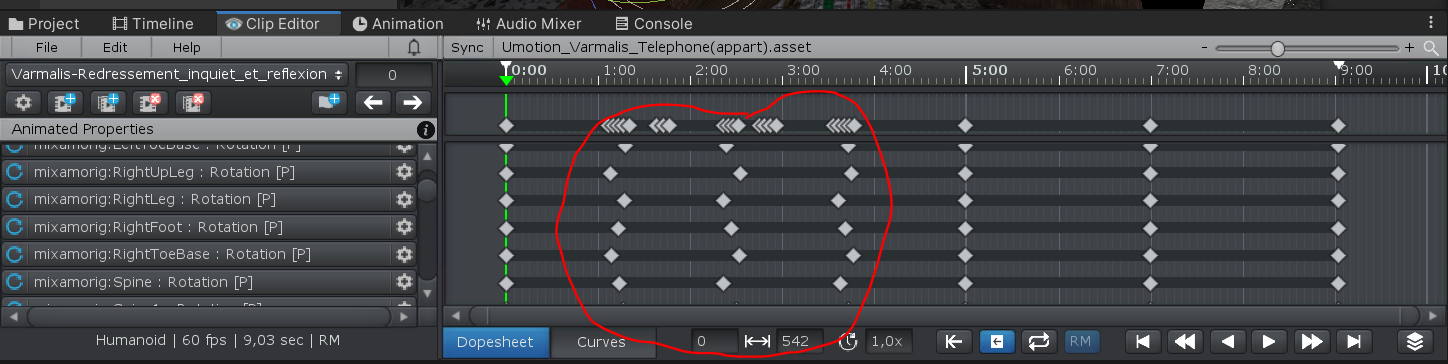
Hi,
thank you very much for reaching out.
Unfortunately there is no such automatic tool.
Please let me know in case you have any follow-up questions.
Best regards,
Peter

Not working
in console show me this...
Assets\Editor Default Resources\UMotionEditor\Scripts\Application\CameraCompatibilityUtility.cs(23,17): error CS0103: The name 'RenderPipeline' does not exist in the current context
Hi,
thank you very much for your support request.
The script file you mentioned in the error message does not exist in newer UMotion versions anymore. Old script files remain in the installation folder when the old UMotion version is not deleted before updating to a new one (Unity's package mechanism isn't deleting old files unfortunately) or you accidentally installed an old version of UMotion. Please delete the "Editor Default Resources" folder. Then go to the Unity Asset Store, make sure that the version V1.23 is downloaded, then import it again. This should solve your issue.
Please let me know in case you need any further assistant.
Best regards,
Peter
BlendShapes : cancel the adding of curves for blend shapes?
Hi, thanks a lot for this super useful tool ! ^^
I'm used to play with BlendShapes values outside of Umotion, with another tool called Game Creator.
But when I added my character to Umotion, and when it asked me to add BlendShapes parameters, I said yes, and now my Game Creator actions are not working anymore on BlendShapes (it looks like giving the access to one tool removed the access from the other tool, we can't have both).
Is it possible to remove the BlendShapes access from Umotion? If no, how can I go back to the initial situation? I'm afraid to lost my work on animations.
Thanks again for your help !
Best regards,
Hi,
thank you very much for your support request.
While a character is assigned to the UMotion Pose Editor, it is locked to be exclusively used by UMotion. Once you click on "Clear" (in the Pose Editor), the character is released again. So if your issue is during edit time, just make sure that your character is not locked by UMotion.
When an animation clip includes animation curves for a blend shape weight, the blend shape weight can only be overwritten by a script based system if it is executed in "LateUpdate()" (which is executed after the Animator component). If the script is executed in the Update() method, then the blend shape weights written by the script are overwritten by the Animator component that is executed afterwards.
Blendshape curves are only added to the exported animation clip if it has at least one key. So you can either delete all Blendshape keys or you can remove the Blendshape properties completely from your UMotion project. This can be done by switching into Config mode, select the transform where the blend shapes have been added to. Then open the "Constraints" tab and delete all the custom property constraints of the blend shapes.
Please let me know in case you have any follow-up questions.
Best regards,
Peter

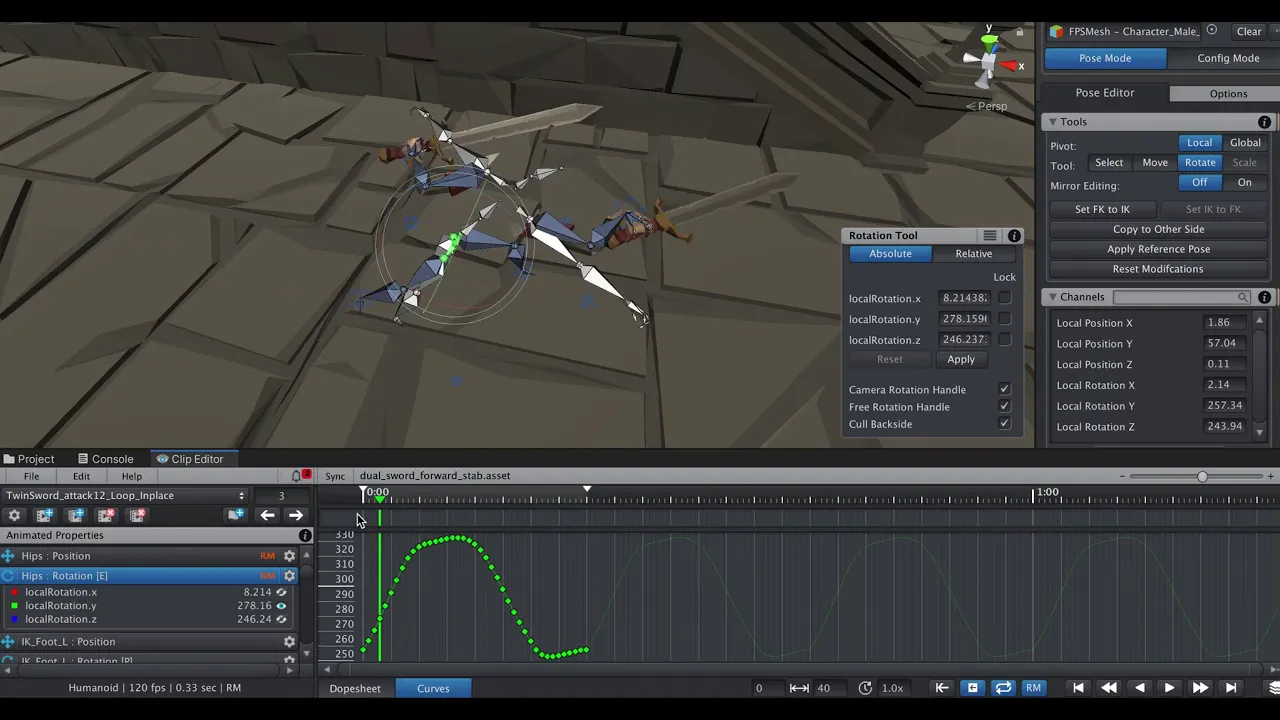
Animate any fbx? Machine animations, non character or live.is it possible with umotion?
I would like to create animations for machinery.
I have a lot of 3d models of stuff usually in FBX, and i wish to create animations to these.
However, all tutorials and guides seems to be focused on character animations, so i am wondering
can i use Umotion to (for example) rotate the rotor on a Windturbine FBX model?
Hi,
thank you very much for your support request.
You can animate anything, including wind turbines. The model just needs to be separated into the individual parts you want to animate. Bones are only required/useful when you want to deform the mesh. You can separate models easily in a 3D modeling animation. And badea15ro is right, bones have to be created in a 3D modeling application (you can't bind new bones to the mesh in UMotion).
Here is a short video demonstrating how a gun model is animated (that is only separated into it's individual parts):
Please let me know in case you have any follow-up questions.
Best regards,
Peter

 90 Y Rotation on Root Motion after last keyframe, not sure how to change as 1st and last are the same
I searched in the forum here but couldnt find the answer. I have an imported animation that turns 90 degrees Y on completing, but the first and last keyframe are the same local Y rotation, and so they match up, and those are all the keyframes.
There isnt another keyframe, so it should just loop. The Local Rotations are all the same, but when i set the Global Rotation it does show it changes 90 degrees, but since the 1st and last keyframe at the same local rotation Y, why is that? How do I make them the same if they are already the same.
Im sure there is a simple answer, but I dont understand what to change. I made a video to show this to enhance the clarity:
Fixed in UMotion V1.24. Available in a day or two via the asset store.
Thanks again for reporting.
Best regards,
Peter

Grounder Full Body Biped from Final IK support?
I have a few animations that look very strange only when my character is walking up slopes, and I'm not sure what's causing it. I'm using the Final IK Grounder component to make my character walk up slopes. Is there any support for this component in UMotion?
Hi,
thank you very much for your support request.
UMotion is not executing any code at runtime of your game. UMotion produces regular, pre-authored animation clips (either *.anim or *.fbx files) that can be used like any other animation file. That means all scripts you would normally use with those files (like the Final IK Grounder) can be used as usual.
Using the Final IK Grounder while authoring your animation (during edit time in UMotion) probably won't make much sense as the ground slopes won't change during edit time. However, you can let UMotion execute scripts during edit time via the UMotion callback mechanism (usually used to extend UMotion with custom IK solutions). You can find more information about this feature in the manual at the chapter "Pose Editor --> Options" headline "Extending UMotion".
Please let me know in case you have any follow-up questions.
Best regards,
Peter

How blendshape animation
Hello, i try umotion for my project, i create an animation clip in editor clip, i export the clip. whant i apply on my character, no blendshape animation. So what i do wrong ?
it is very simple, i dont undersant. i create the animation, i export, no animation blendshape, no keyframe.
What th problem with umotion ? we cannot export blenshape anition. i nevers see a tutorial for this. is it normal ?
how animate a chatacter without animation. no interest.
Hi,
thank you very much for your support request.
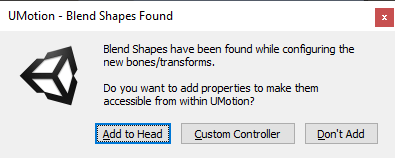
- When you assign your character to UMotion's Pose Editor for the first time (and the character has blend shapes), UMotion automatically asks you with a message box if it should configure them for your project. Did you get this message?
- Do your blend shapes preview correctly in UMotion?
- Please note that blend shape animations (i.e. the weight of the blend shapes) can only be exported to *.anim but not to *.fbx. Please refer to the manual at chapter "Clip Editor --> Import / Export" for a nice overview of what features each file format supports. Are you exporting to *.anim?
If this doesn't help, please provide some further information so that I can take a closer look at your situation (e.g. a video demonstrating your problem, or a simple Unity scene that contains everything I need to reproduce your situation). You can send files to me in private via the email support form (or request a link to my Dropbox for large files via said email form). I just did a quick test and blend shape animations export perfectly fine in my case, so their shouldn't be a general problem with this feature.
Best regards,
Peter

Errors on exporting animations
I've been trying to overwrite an already existing .fbx file but I can't get it to work. When I add an animation layer to one of my animations. I then export with the settings Fbx Binary 2019, Update Existing File, Lossless and I get a lot of errors saying Assertion failed on expression: 'm_UsedFileIDs.count(fileID) == 0'
UnityEditor.AssetDatabase:Refresh()
ΉΊΊΉΉΉΉΉΉΊΊΉΉΊΊΉΊΉΊΉΊΉΉΉΉΉΊΉΉΉΉΊΊΉΉΉΉΉΊΉΊΊΉΉΊΉΊ:ΉΊΉΊΉΉΉΉΉΊΉΊΊΉΊΉΊΉΉΉΊΉΉΉΊΉΊΉΊΉΉΊΊΉΉΉΉΉΊΊΉΉΊΉΊΉΊ() (at line:37)......
Hi,
thank you very much for your support request.
As this error message is thrown by Unity's AssetDatabase.Refresh(), UMotion should have already finished exporting the animation. This might just be a Unity bug/problem. Please try to close Unity and reopen it again. If that doesn't help, move the *.fbx file to somewhere else and also delete the *.meta file that is next to the *.fbx file (only visible in the Windows Explorer or Mac Finder when displaying hidden files is enabled). Then switch to Unity, the fbx should be gone now. Then move only the *.fbx file (not the *.meta file) back to Unity. This should cause Unity to completely re-import the fbx file.
Please let me know if that helps and if you need any further assistance.
Best regards,
Peter
Customer support service by UserEcho
