- UMotion - Animation Editor
-
 Questions

How to zero properties in bulk, and other QoL requests
Hello!
I am in the process of creating facial expressions for my DAZ character. Each expression is an animation placed in an Additive layer of the character's animator (not an additive layer of UMotion, just to be clear), which means that all animations need a first frame with all the used blendshapes set to 0, before the other frames in the animation animate those blendshapes.
Problem is, I have nearly 300 blendshapes and I'm adding more. They are essentially shape morphs, expression morphs, correction morphs, detail morphs and pressure morphs and yes, I need them all. An expression animation typically uses 10-20 blendshapes (lips, eyes, jaw, nose etc) so all of them need to be set to 0 in the first frame if I want the additive layer to do its job correctly since the first frame seems to serve as the "offset" for all the subsequent frames in the animation.
But only those blendshapes, and no other! Otherwise, the character's other blendshapes are overwritten by this animation even though it is supposed to be additive. Don't ask me why.
For example, my female character's glutes contract when she walks. If I zeroed all the properties (blendshapes and bones) in the first frame of my expression animations, there would be a conflict, the glutes would reset and it would look bad. So I need to zero only the blendshapes I use in my expressions, and not the glutes. This means I have to carefully select the appropriate blendshapes in the clip editor every time I want to make an animation, which is a very error-prone process.
In UMotion Pro, I would like to simply copy-paste the keys from one of the existing keyframes to the first frame, and to click on something to zero those pasted keys. I have looked pretty much everywhere and did not find such an option, but it would be very handy! Right now I have to manually reset those keys in the pose editor by dragging all the sliders to 0 one by one. It's tedious and time-consuming.
My second request would be to be able to export animations that have only one keyframe. Right now, when exporting an animation, UMotion refuses if it doesn't have at least two keyframes, but would it be possible to export it anyway by automatically copying (at export time) the last existing keyframe to the last frame of the animation? After all, we already specify a duration for the animation in the clip editor, I believe it is 1s by default. It would be great to not have to do a copy-paste of the keyframes ourselves so we don't risk inconsistency and unwanted movements when changing one key and forgetting to copy it to the end of the animation.
Likewise, it would be great if we could specify somewhere that we want the animation to loop, without having to manually copy the first keyframe to the last frame (like we have to do in Blender too, it's not just UMotion). Once again for the sake of keeping things consistent and avoiding copying data.
Another request, since I'm working with blendshapes. I noticed that it is difficult to enter a number for one blendshape in the pose editor's channels part then Tab to the next. Usually, that focuses on the "config mode" button and hides the "pose mode" panel, which is confusing. It does not do this by shift-tabbing (going backwards) so for the sake of consistency, it would be great if we could Tab from one property to the next.
Oh, and another request! Could we have the ability to set a blendshape to a negative number or to a number beyond 100, please? Unity allows this but apparently not UMotion. Sometimes it is very handy to use a blendshape with a value that is outside its envelope. For example, DAZ has a "cheek puff" blendshape but not a "cheek sink", which could be simulated with a negative "cheek puff" value.
Thanks and keep up the good work, UMotion is a tool I can't work without, and a tool I know I can rely on.
Answer
Just to be clear about additive animations for those who are reading this thread and having trouble with additive animations like me, I always thought that "additive layer" meant "its properties are added to those set by the layers of lower priority" (higher in the list) in the Animator. UMotion seems to interpret additive the same way with its own layers inside a single animation.
But I was wrong, it seems that "additive" in the Mecanim world means, "the properties are offset by the reference pose of the animation" (which is either the very first frame or another frame specified in code). So an animation is additive onto itself, not onto lower priority layers, which is kind of counter-intuitive to me.
Source: https://forum.unity.com/threads/additive-animations-not-working.419382/#post-2733058
(but the whole thread is worth reading)
To get back to the topic and to add more context to my requests, here is what the "FacialFull" layer of my animator looks like:
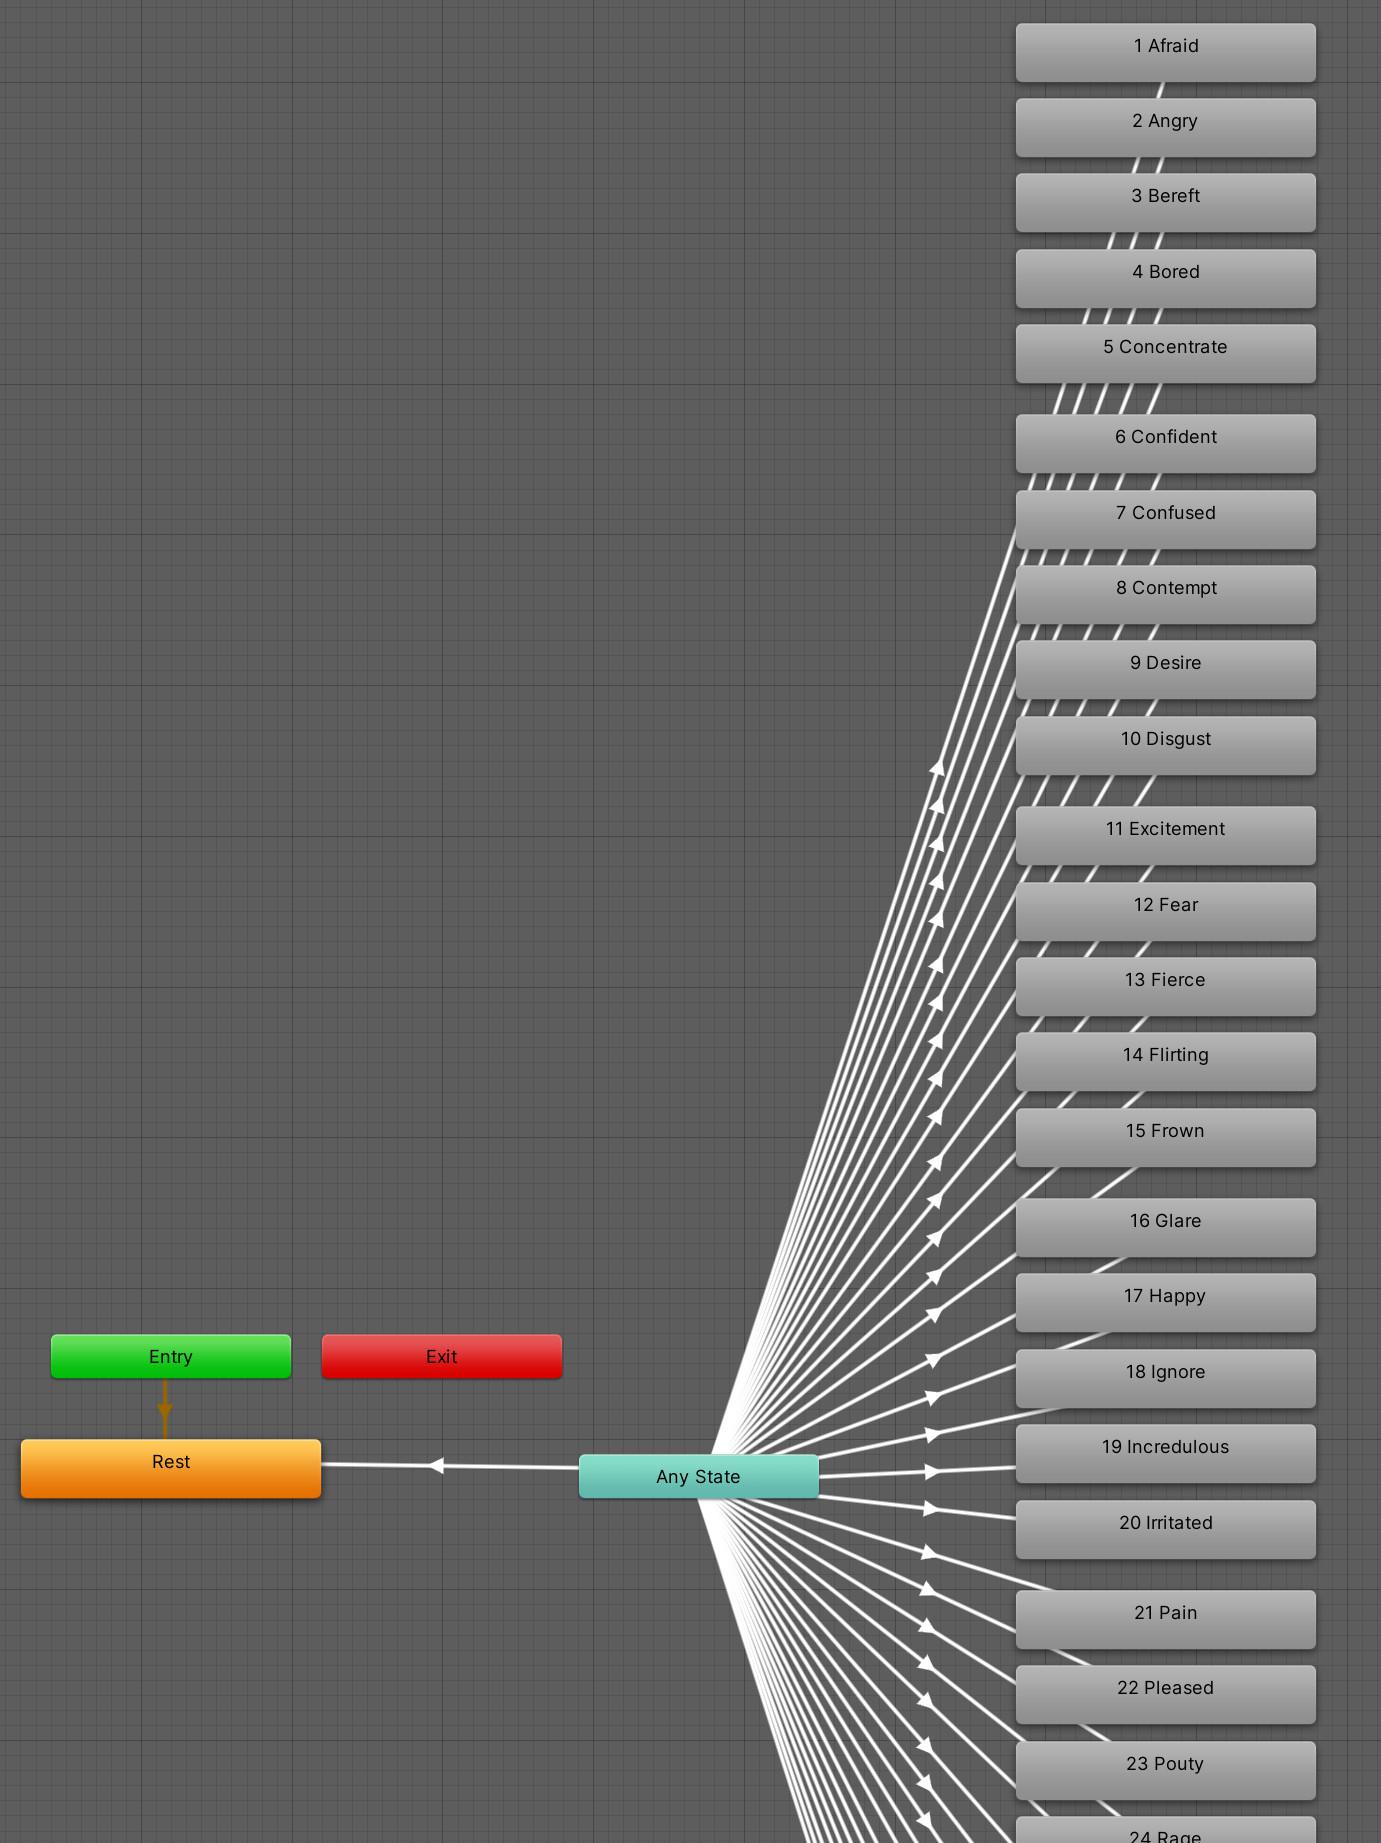
That's 39 states, one expression per state, the number before the name is just a reminder for me to indicate what value the integer parameter must take to go to that state from "Any State". The "Rest" state is neutral, all the blendshapes used by the expressions being set to zero. This is made so when I stop an expression, the face returns to neutral instead of staying stuck in the last expression. Nothing fancy here.
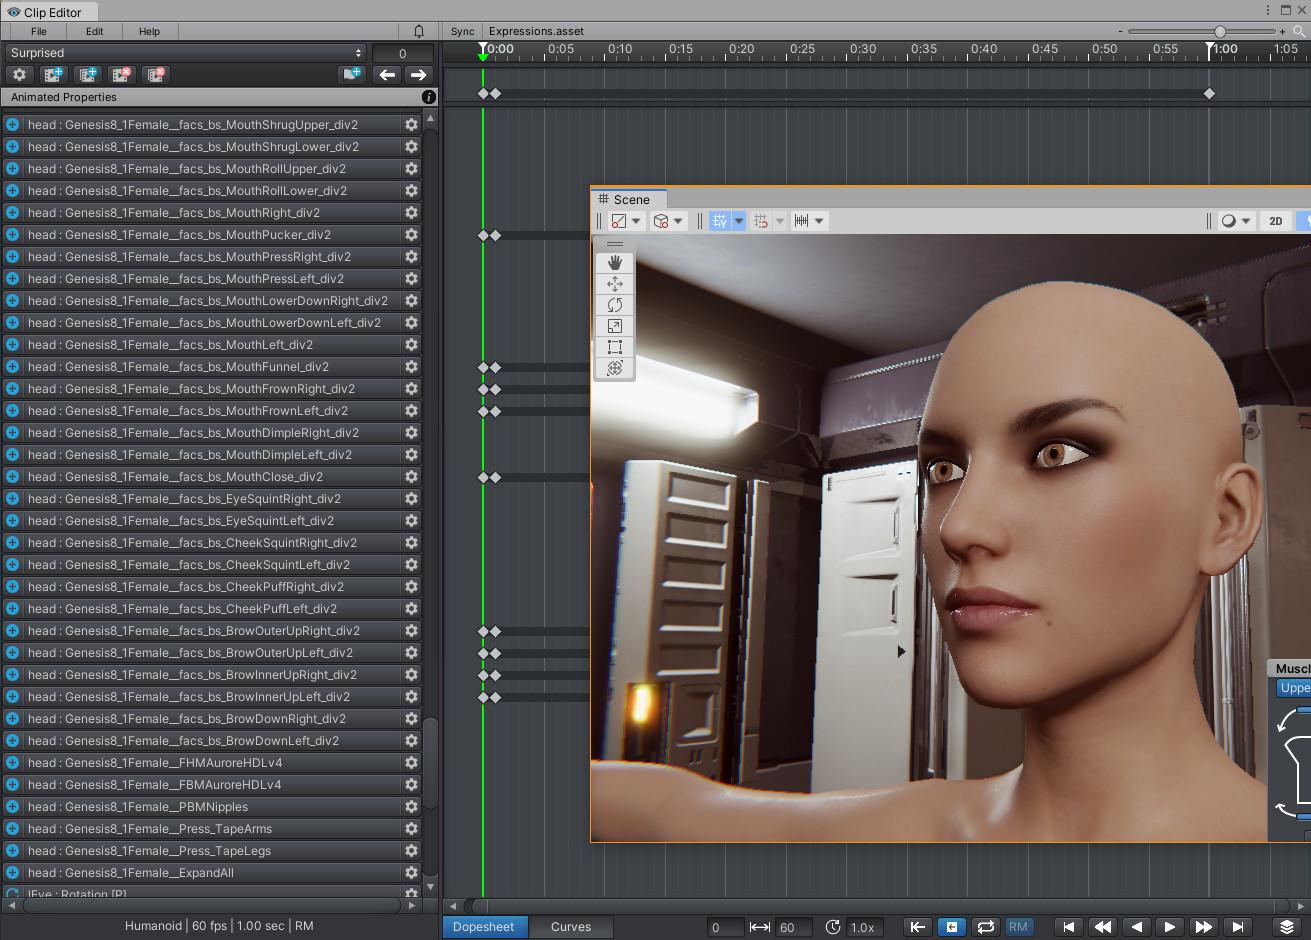
Here is what the "Surprised" expression looks like (frame 1 contains zeroed keys, frame 2 onward contains keys with the actual values).
Frame 1:
Frame 2:
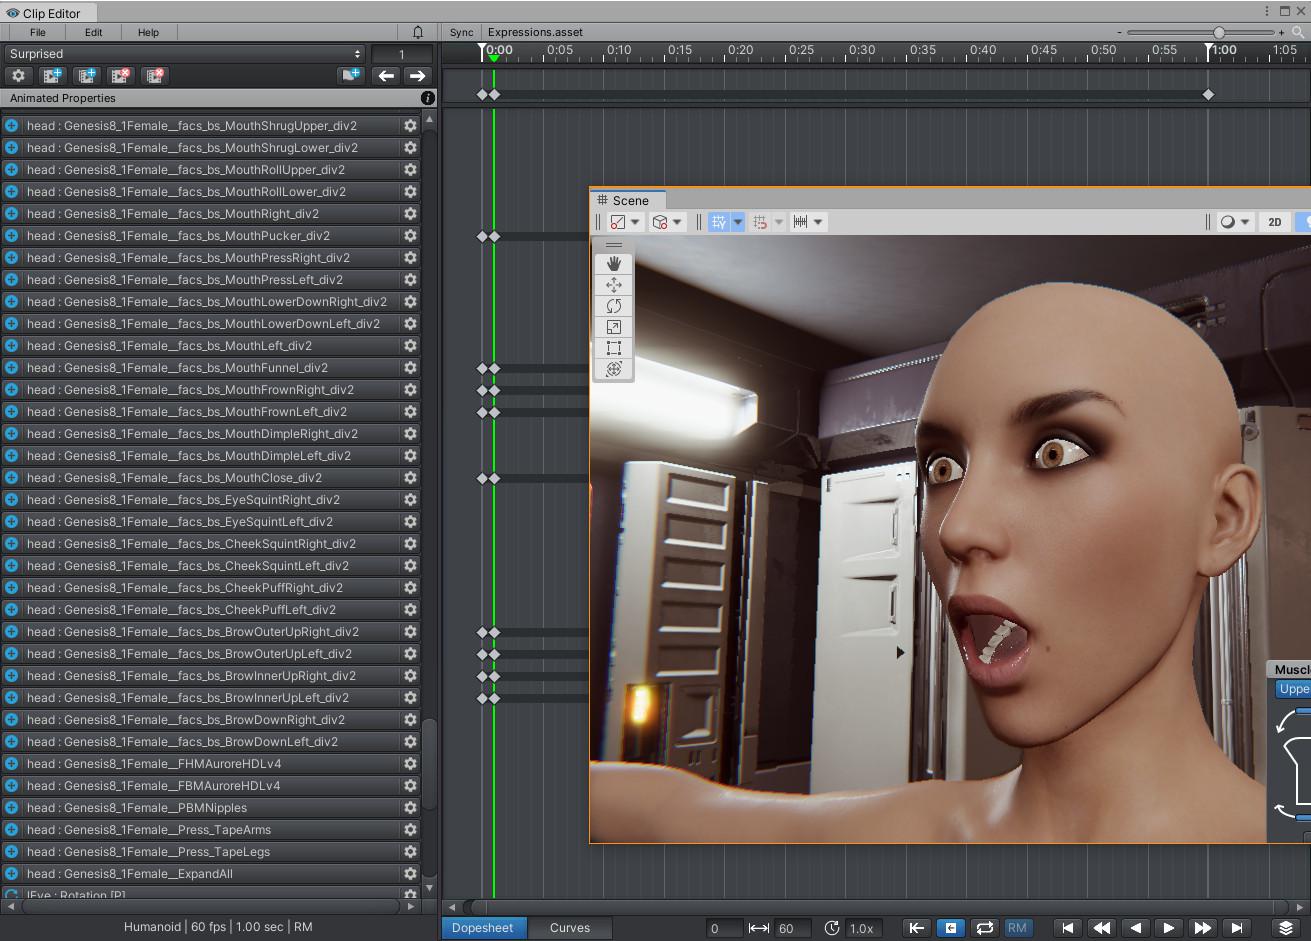
(incidentally that's generally my face when I read more and more about Mecanim, but that's beside the point)
But when I use a test animator with only one expression without its first frame containing zeroed keys, it doesn't work at all. The character won't play any expression because its reference pose will be the first keyframe (not frame as Mecanim-Dev said in the thread) which has the actual values for the blendshapes, and they are canceled because they are subtracted from themselves, Mecanim taking them as the reference.
So I'm reduced to having to either key all the useful blendshapes (here, the "facs" blendshapes which are for the face) BEFORE starting my work on the animation, or work on my animation then duplicate the first frame and set all its keys to zero manually. This is why I really need that "zero all keys" feature for that kind of work, and I must not be the only one.

Hi,
thank you very much for your support request.
In UMotion Pro, I would like to simply copy-paste the keys from one of the existing keyframes to the first frame, and to click on something to zero those pasted keys. I have looked pretty much everywhere and did not find such an option, but it would be very handy!
You can do this in the curves view in the clip editor. With all your keys selected, switch into "Curves" view. Then right click on one of the keys and click on "Edit Keys". Then enter 0 to the value field, hit enter and all keys are going to be set to 0.
My second request would be to be able to export animations that have only one keyframe. Right now, when exporting an animation, UMotion refuses if it doesn't have at least two keyframes, but would it be possible to export it anyway by automatically copying (at export time) the last existing keyframe to the last frame of the animation? After all, we already specify a duration for the animation in the clip editor, I believe it is 1s by default. It would be great to not have to do a copy-paste of the keyframes ourselves so we don't risk inconsistency and unwanted movements when changing one key and forgetting to copy it to the end of the animation.
You could use the UMotion API to add a button to UMotion that does that for you. The UMotion API might also be handy for other situations of your very specific problem. Docs: https://www.soxware.com/umotion-manual/UMotionAPI.html
Another request, since I'm working with blendshapes. I noticed that it is difficult to enter a number for one blendshape in the pose editor's channels part then Tab to the next. Usually, that focuses on the "config mode" button and hides the "pose mode" panel, which is confusing. It does not do this by shift-tabbing (going backwards) so for the sake of consistency, it would be great if we could Tab from one property to the next.
Tab is the shortcut for switching between pose mode and config mode. If you have a text field selected, it correctly selects the next text field. So chances are, you might have deselected the text field prio to pressing tab (e.g. by pressing enter). You can adjust the shortcuts in the "Edit --> Preferences" menu of the clip editor in case you want to disable the tab shortcut.
Oh, and another request! Could we have the ability to set a blendshape to a negative number or to a number beyond 100, please? Unity allows this but apparently not UMotion. Sometimes it is very handy to use a blendshape with a value that is outside its envelope. For example, DAZ has a "cheek puff" blendshape but not a "cheek sink", which could be simulated with a negative "cheek puff" value.
That is possible if you change the min/max limits of the blend shape's custom property constraint in config mode.
PS: It looks like Mecanim isn't the most optimal solution to your problem. Instead of using Mecanim/Animator, you could also write your own little animation state machine code that updates the blend shape values in a way that it's more suitable for your needs. You could still use *.anim files as an input for your code but then use your own math to combine the poses and write the end results to the blend shapes.
Please let me know in case you have any follow-up questions.
Best regards,
Peter
Thank you for your fast answer and for the solutions!
So it turns out that every single thing I asked is either already implemented, or for one of them, rather easy to implement myself. That's one of the reasons why I love UMotion!
I confirm the curves trick, this is going to make things so much simpler for me, thank you!
Same for the Tab key, indeed I tend to press Enter after entering a valueand that must be what brought the focus to the window, out of the text field. By removing Tab from the Preferences (Shortcuts / Configuration / Toggle Config Mode), the keyboard navigation now works as expected.
About the blendshapes' min and max limits, I didn't know (or didn't remember) that we could change them in config mode. Being able to apply those values to all the selected properties is really a plus.
As for Mecanim not being ideal, I own Animancer too but decided against using it for the character, which uses a PuppetMaster ragdoll so it has to be physical (which Animancer does not like). I coded my own blendshapes controller to be able to set morphs on characters (both from their DNA and from their clothes) and to propagate them from the body to the clothes in real time, for example when joint correcting morphs (calves flexing when the ankle rotates, glutes contracting when the thigh rotates, stuff like that) are triggered by ShapeDriver. So I could use it to pose the face with expressions via blendshapes, but that means no animation, just posing. In fact, that's what I did when developing the expressions. I'm not keen on making my own animator, though, there are like a thousand other more interesting things to do when making a game. So Mecanim it is for the time being. It's clunky but at least it works-ish.
Thanks again!

Customer support service by UserEcho

Hi,
thank you very much for your support request.
You can do this in the curves view in the clip editor. With all your keys selected, switch into "Curves" view. Then right click on one of the keys and click on "Edit Keys". Then enter 0 to the value field, hit enter and all keys are going to be set to 0.
You could use the UMotion API to add a button to UMotion that does that for you. The UMotion API might also be handy for other situations of your very specific problem. Docs: https://www.soxware.com/umotion-manual/UMotionAPI.html
Tab is the shortcut for switching between pose mode and config mode. If you have a text field selected, it correctly selects the next text field. So chances are, you might have deselected the text field prio to pressing tab (e.g. by pressing enter). You can adjust the shortcuts in the "Edit --> Preferences" menu of the clip editor in case you want to disable the tab shortcut.
That is possible if you change the min/max limits of the blend shape's custom property constraint in config mode.
PS: It looks like Mecanim isn't the most optimal solution to your problem. Instead of using Mecanim/Animator, you could also write your own little animation state machine code that updates the blend shape values in a way that it's more suitable for your needs. You could still use *.anim files as an input for your code but then use your own math to combine the poses and write the end results to the blend shapes.
Please let me know in case you have any follow-up questions.
Best regards,
Peter