- UMotion - Animation Editor
-
 Questions
How To create an advanced foot roll IK rig
Hi, I'm at a loss here. Sorry if not 100% strictly related to this asset, but how do you go about setting up a rig that allows for IK pinning of a foot and toes? I'm talking about something like what's shown here (at 2:49):
I've read the docs and watched the tutorials, and there's no guide for how to do this with UMotion.
I have UMotion Pro, in case it matters.
Answer

Hi,
thank you very much for your support request.
The foot roll setup shown in this video was based on a Blender tutorial that I saw in the past (can't find it anymore).
Here is a quick instruction how it was created. Please note that this instruction requires basic knowledge about the features of the "Config Mode". I highly recommend following it using the Robot Kyle model from the examples and later in a second step try it on your own model.
- Create a new UMotion project
- Run the IK Setup Wizard with default settings
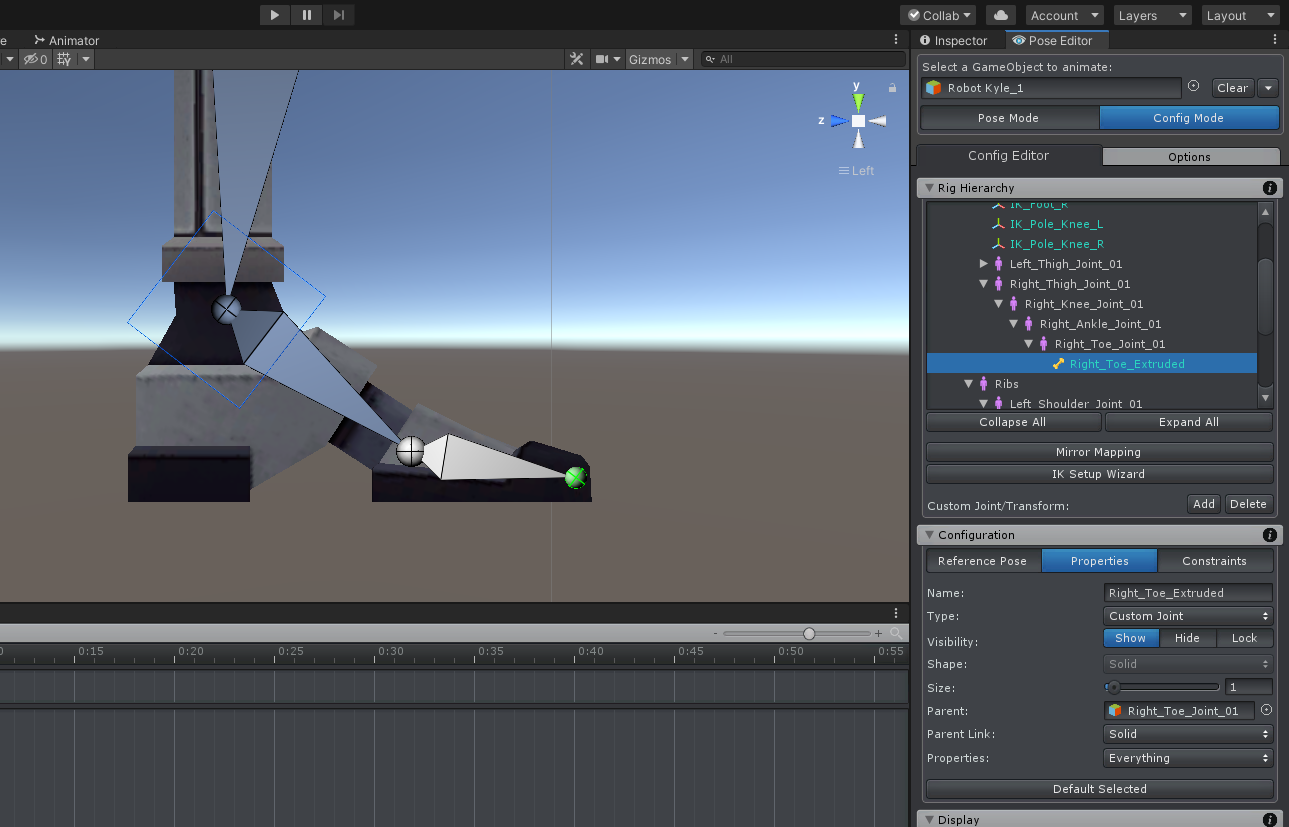
- Stay in Config Mode and extrude the toes bone (I recommend doing this in an orthogonal side view):
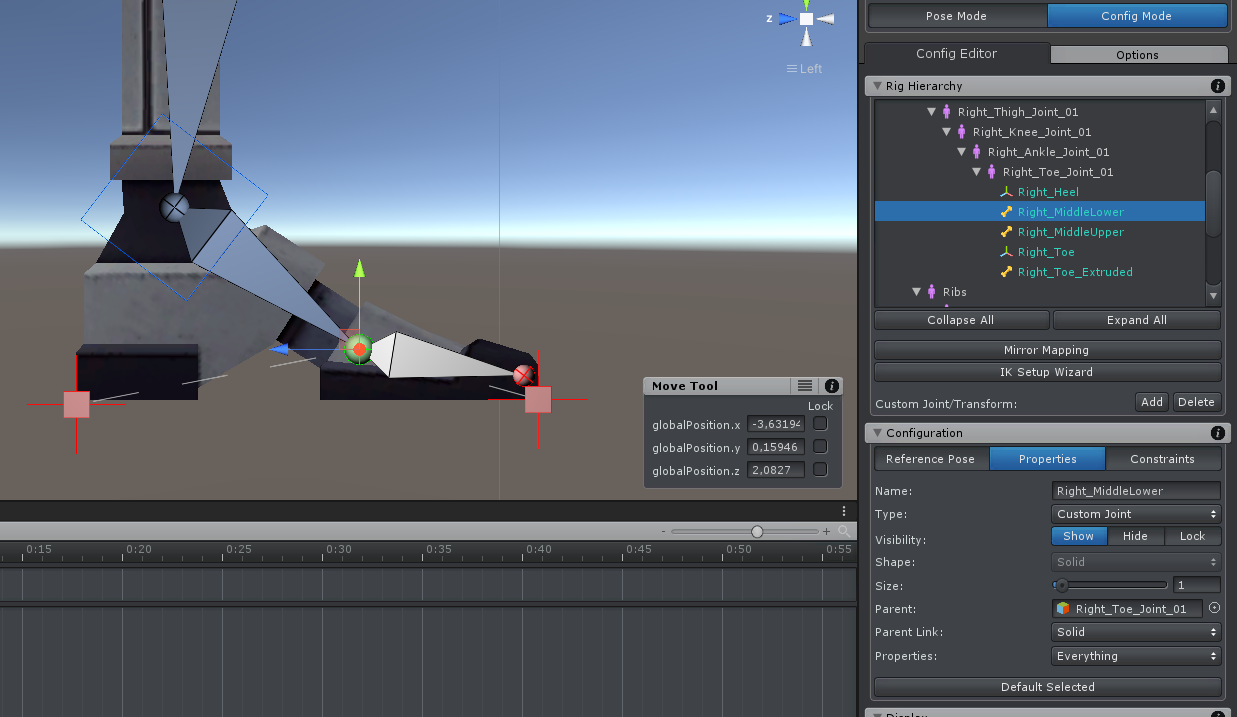
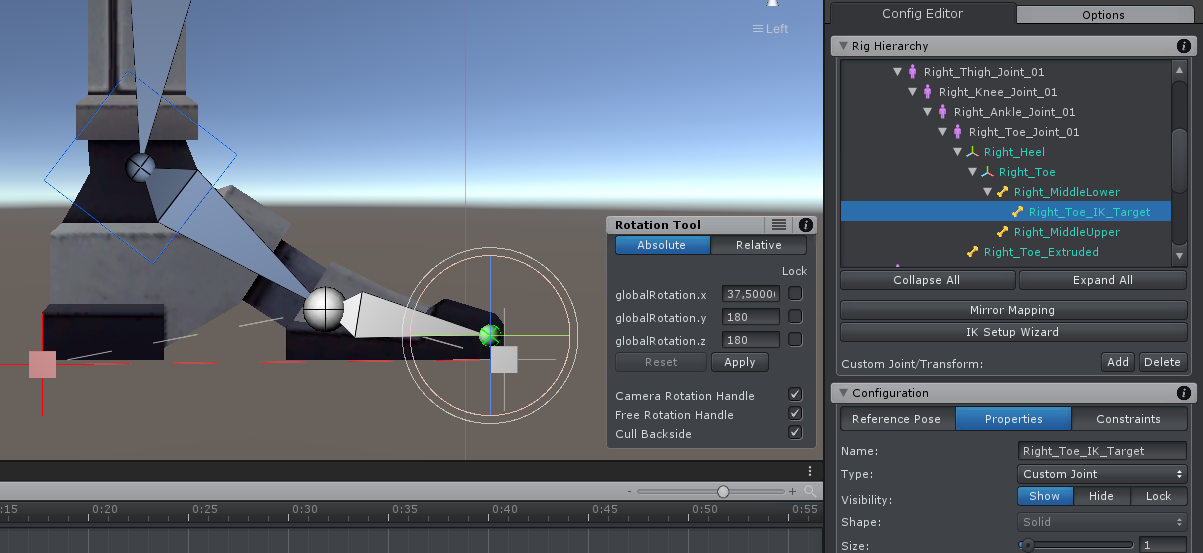
- Create 4 custom transforms at the center of the toe joint. Move one to where the heel ends and one to where the toes and. Keep the other two at the center. Give them a proper naming and visual appearance:
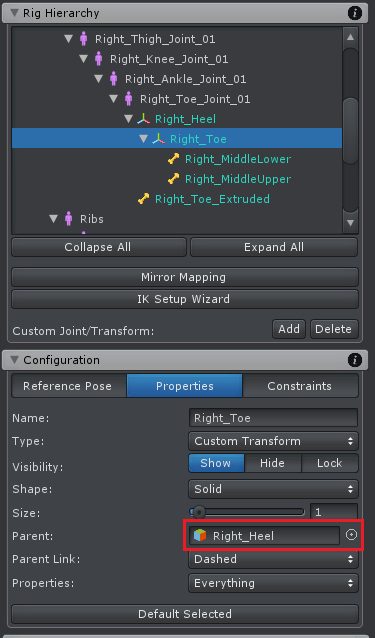
- Adjust the parent/child relationship as shown in the screenshot below:
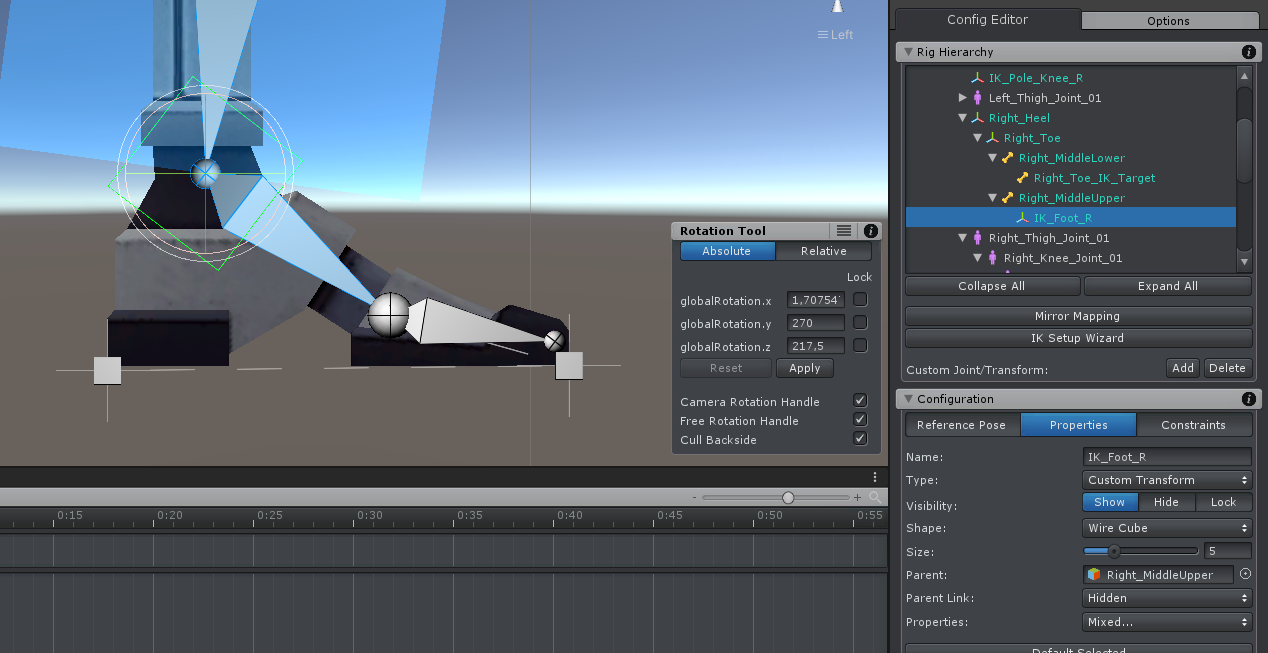
- Create a new bone at the center of "Right_Toe_Extruded" and make it a child of the "Right_MiddleLower" bone.
- Make the "Right_Heel" a child of the "Hips".
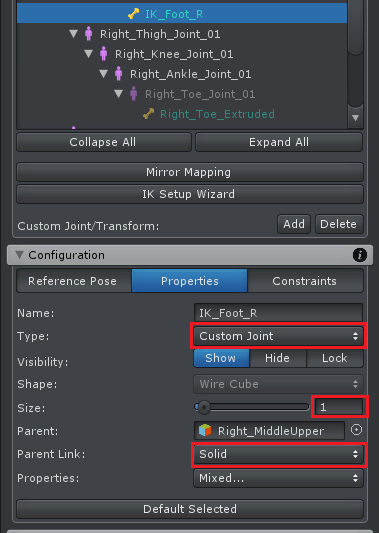
- Make the "IK_Foot_R" a child of the "Right_MiddleUpper" bone.
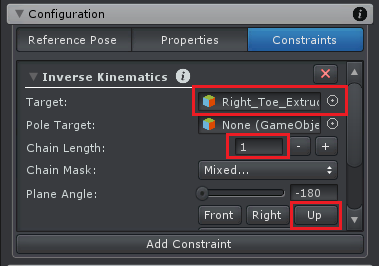
- Setup an IK constraint on the "Right_Toe_IK_Target". The target is the "Right_Toe_Extruded" bone, the bone lenght is 1 and click on the "Up" button for correct bend plane orientation.
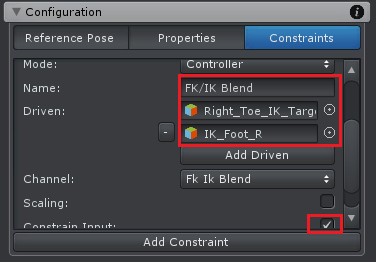
- Setup a Custom Property constraint on the "Right_Heel" for controlling both FK/IK Blend channels at once:
- In the "Properties" tab, set the "Visibility" to "Hide" for the "Right_Ankle_Joint_01", the "Right_Toe_Joint_01" and the "Right_Toe_Extruded".
- Change the appearance of the "Foot_IK_Right":
- (Optional) Add a Child-Of constraint to the "Right_Heel" and enable the "IK Pinning Mode". This allows you to pin the heel in your animation (otherwise it would move with the hips).
- Save the Reference Pose.
- Repeat for the second foot.
You can now switch to Pose Mode to test your setup. Make sure to set the "FK/IK Blend" slider of the heels to 1. Setting the "Rig Layer" to "IK" hides all the unnecessary FK bones.
If you have any questions, please let me know.
Best regards,
Peter


Customer support service by UserEcho

Hi,
thank you very much for your support request.
The foot roll setup shown in this video was based on a Blender tutorial that I saw in the past (can't find it anymore).
Here is a quick instruction how it was created. Please note that this instruction requires basic knowledge about the features of the "Config Mode". I highly recommend following it using the Robot Kyle model from the examples and later in a second step try it on your own model.
You can now switch to Pose Mode to test your setup. Make sure to set the "FK/IK Blend" slider of the heels to 1. Setting the "Rig Layer" to "IK" hides all the unnecessary FK bones.
If you have any questions, please let me know.
Best regards,
Peter